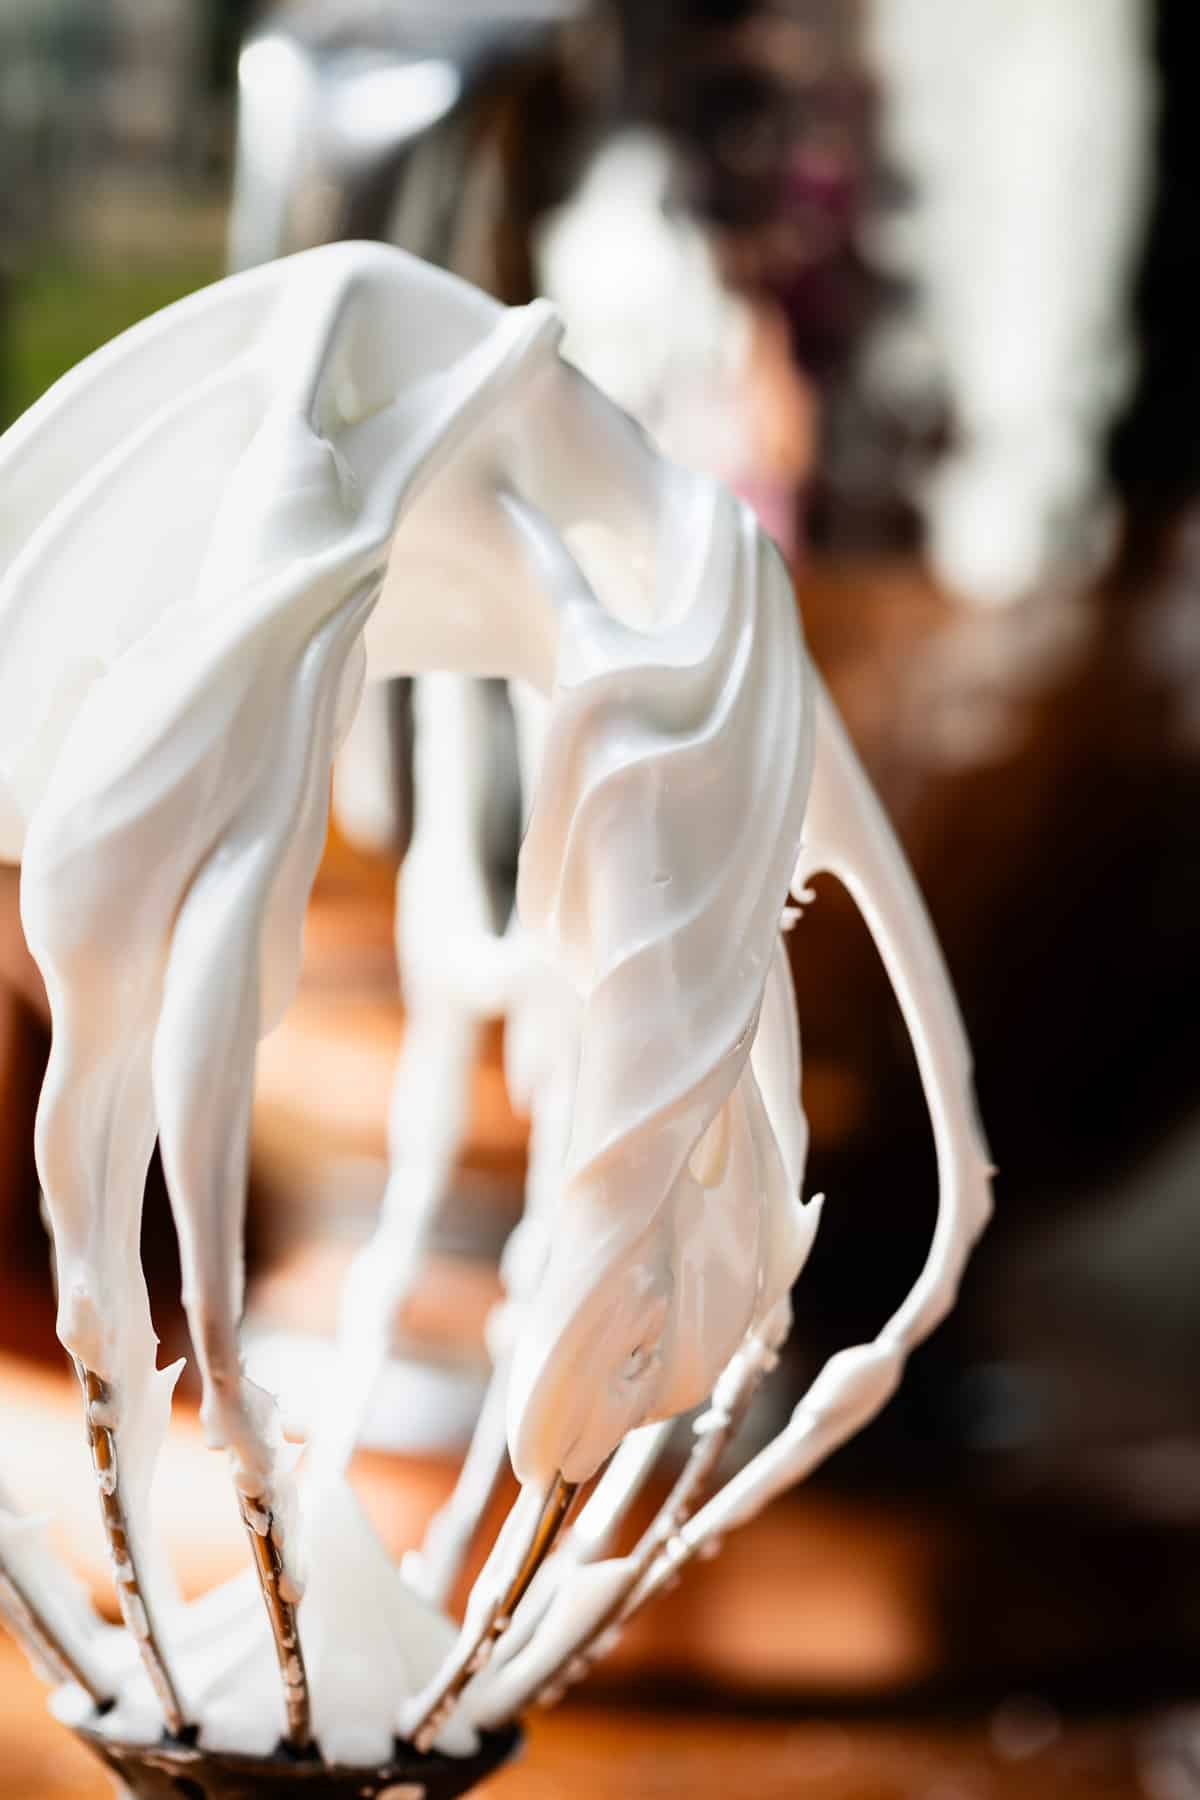
I’m including this photo of the tree because it’s really not my best work. The lines on the tree are too thick, and not uniform. But I added the white dots, tossed the whole thing with sugar, and called it a day. And I still think it looks pretty okay. Like I said, not instagram level, but definitely cute enough to gift to the neighbors! My foot was asleep 😂 It’s always so funny when your kids try to “Mom” you. Getting a taste of my own medicine! Okay, by a show of hands, how many of you have spent way more time than you ever could have imagined on Instagram watching cookie decorating videos?? Your eyes glaze over as you speed further down the rabbit hole, nothing happening beyond intermittent mumblings of “Whoa!” and “That’s so cool!” through your slackened jaw? (Funny enough though, sometimes when I meet people in real life, they are surprised by my lack of skill when it comes to cookie and cake decorating. They assume that because I “do food” I can bust out a bakery-level birthday cake. NOPE! Ha! Not even close!) In fact, I was holding out on sharing my favorite Gingerbread Man Cookies with you for YEARS because of this lack of confidence in decorating. I just didn’t think I would be able to make them look good enough! I was so nervous shooting that post. But I think they turned out okay, and I had a lot more fun than I thought I would. I posted my recipe for The Softest Sugar Cookies of Your Life back in 2017. I can’t believe it’s been 7 years!! Have you made this recipe? It’s a top post of mine, and has brought so many people back to the light, after deciding they hated sugar cookies. I would hate sugar cookies too if I only ever had rock-hard crunchy dry ones. My recipe is SUPER soft, thick, and flavorful! They might not have known it, but royal icing is what they are looking for.
What is royal icing?
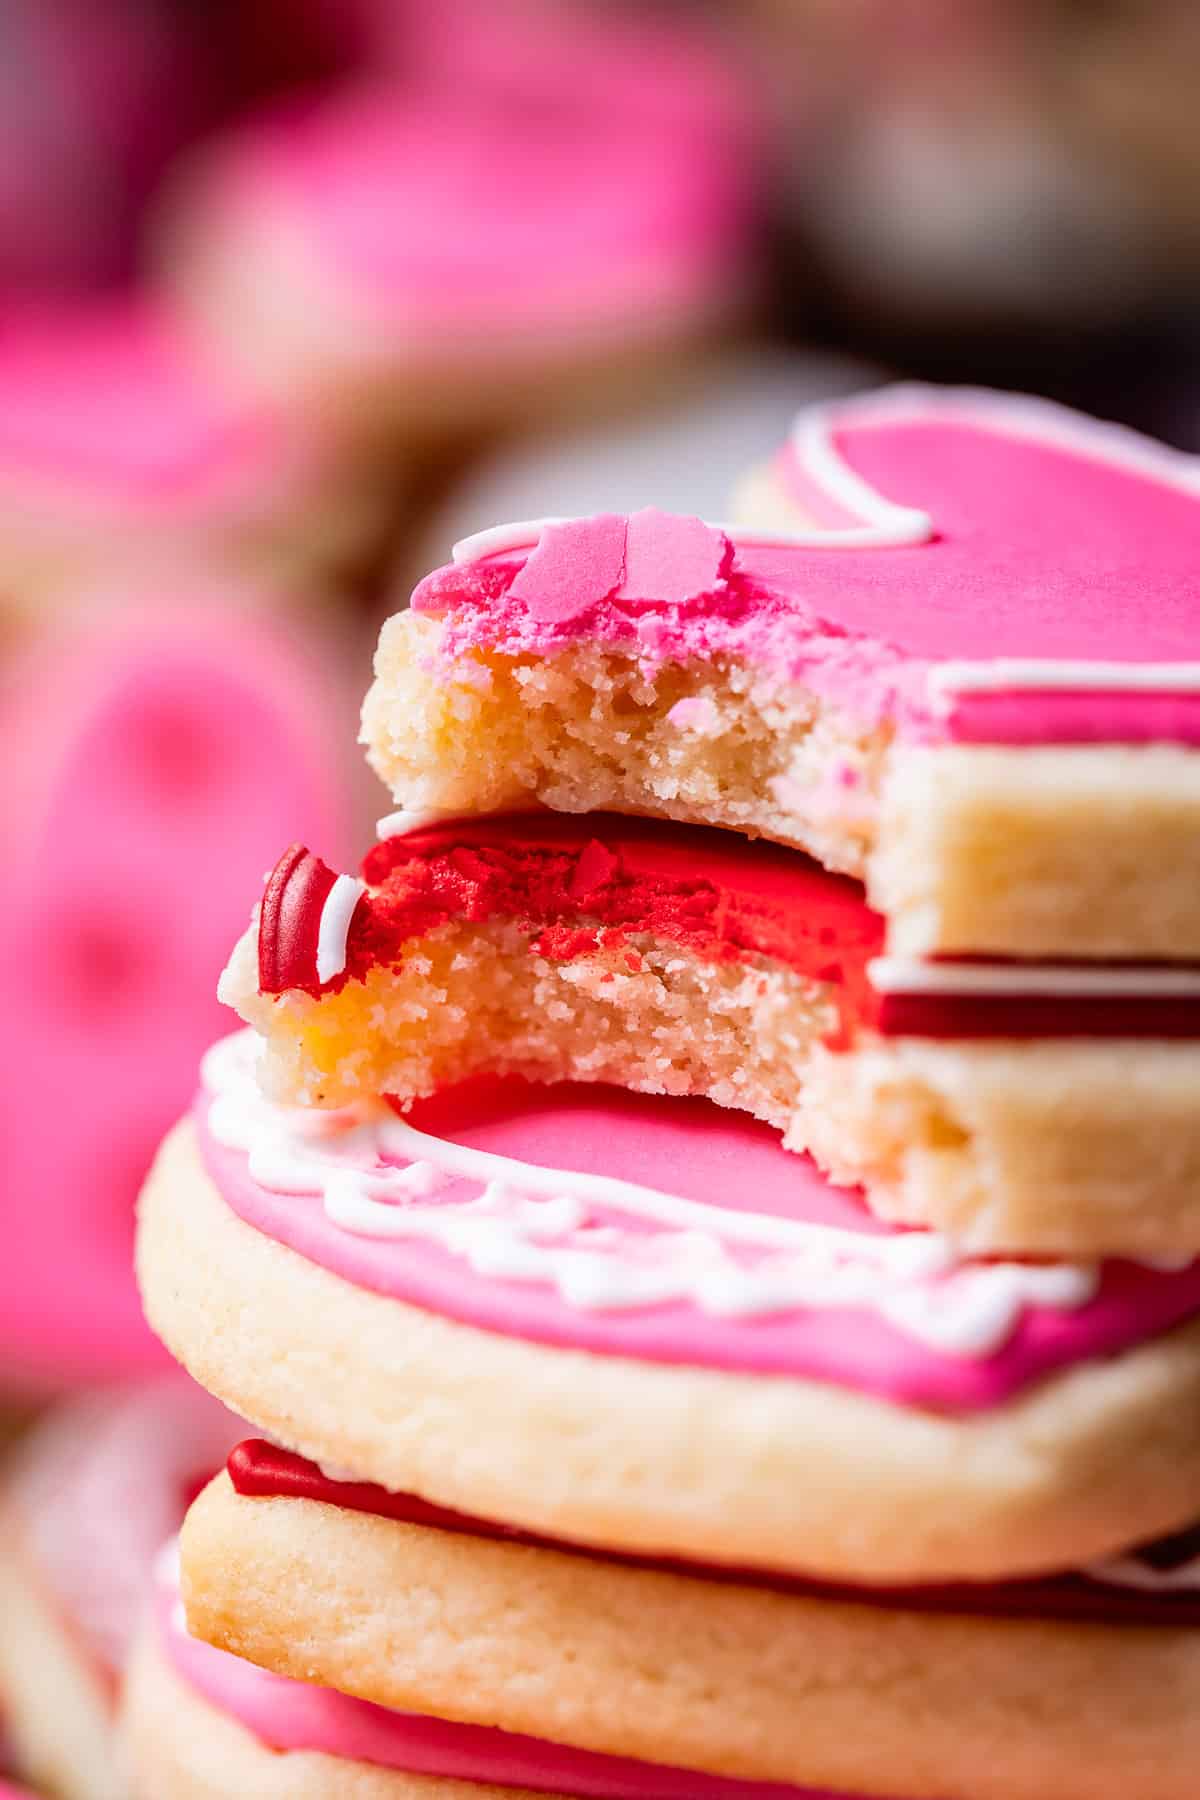
Royal icing is traditionally made from just egg whites and powdered sugar. (Today we are replacing the eggs with meringue powder; more on that below). It’s an amazing combo because it creates an icing that is liquid while you work with it, but hardens into what is basically candy. Because it hardens completely dry, it allows for easy, stackable transportation. It can also be tinted to just about any color, which is just so much fun! The decorating options are limitless! My recipe also comes through on the flavor. I don’t know why there are so many overly-simple royal icing recipes out there. It is essentially sugar, so the addition of extracts (vanilla, coconut, and almond) and hello, salt, make this recipe worlds above most others I’ve tried. I honestly have no idea why hardly any recipes add salt to royal icing, it’s essential to balance the sugar.
It’s shelf stable. There is no risk of salmonella. (I am the hugest hypocrite for even mentioning this because I am a cookie dough addict 🤪) Meringue powder allows for an exact measurement, whereas every egg white is a different size.
Cream of Tartar acts as a stabilizer. This helps your icing from collapsing even in humid weather. It’s kind of like insurance, and I add it every time whether it’s humid or not! It also increases the volume of egg white when you whip them, perfect since we are working with powdered egg whites and they need all the help they can get! Cream of tartar also helps prevent weeping in the final cookie. Corn Syrup. Corn syrup softens our final dried icing. Just a tablespoon added to the recipe means that your icing, when fully dry, will still be soft to bite into. You will not crack your teeth or feel like you are biting into cement with this icing! Glycerine. I don’t call for this ingredient in today’s recipe, but am curious about experimenting with it next time. Glycerine softens the final icing, just like corn syrup, but it also adds shine. If you want really glossy cookies, consider adding 1 scant tablespoon to today’s recipe in place of the corn syrup.
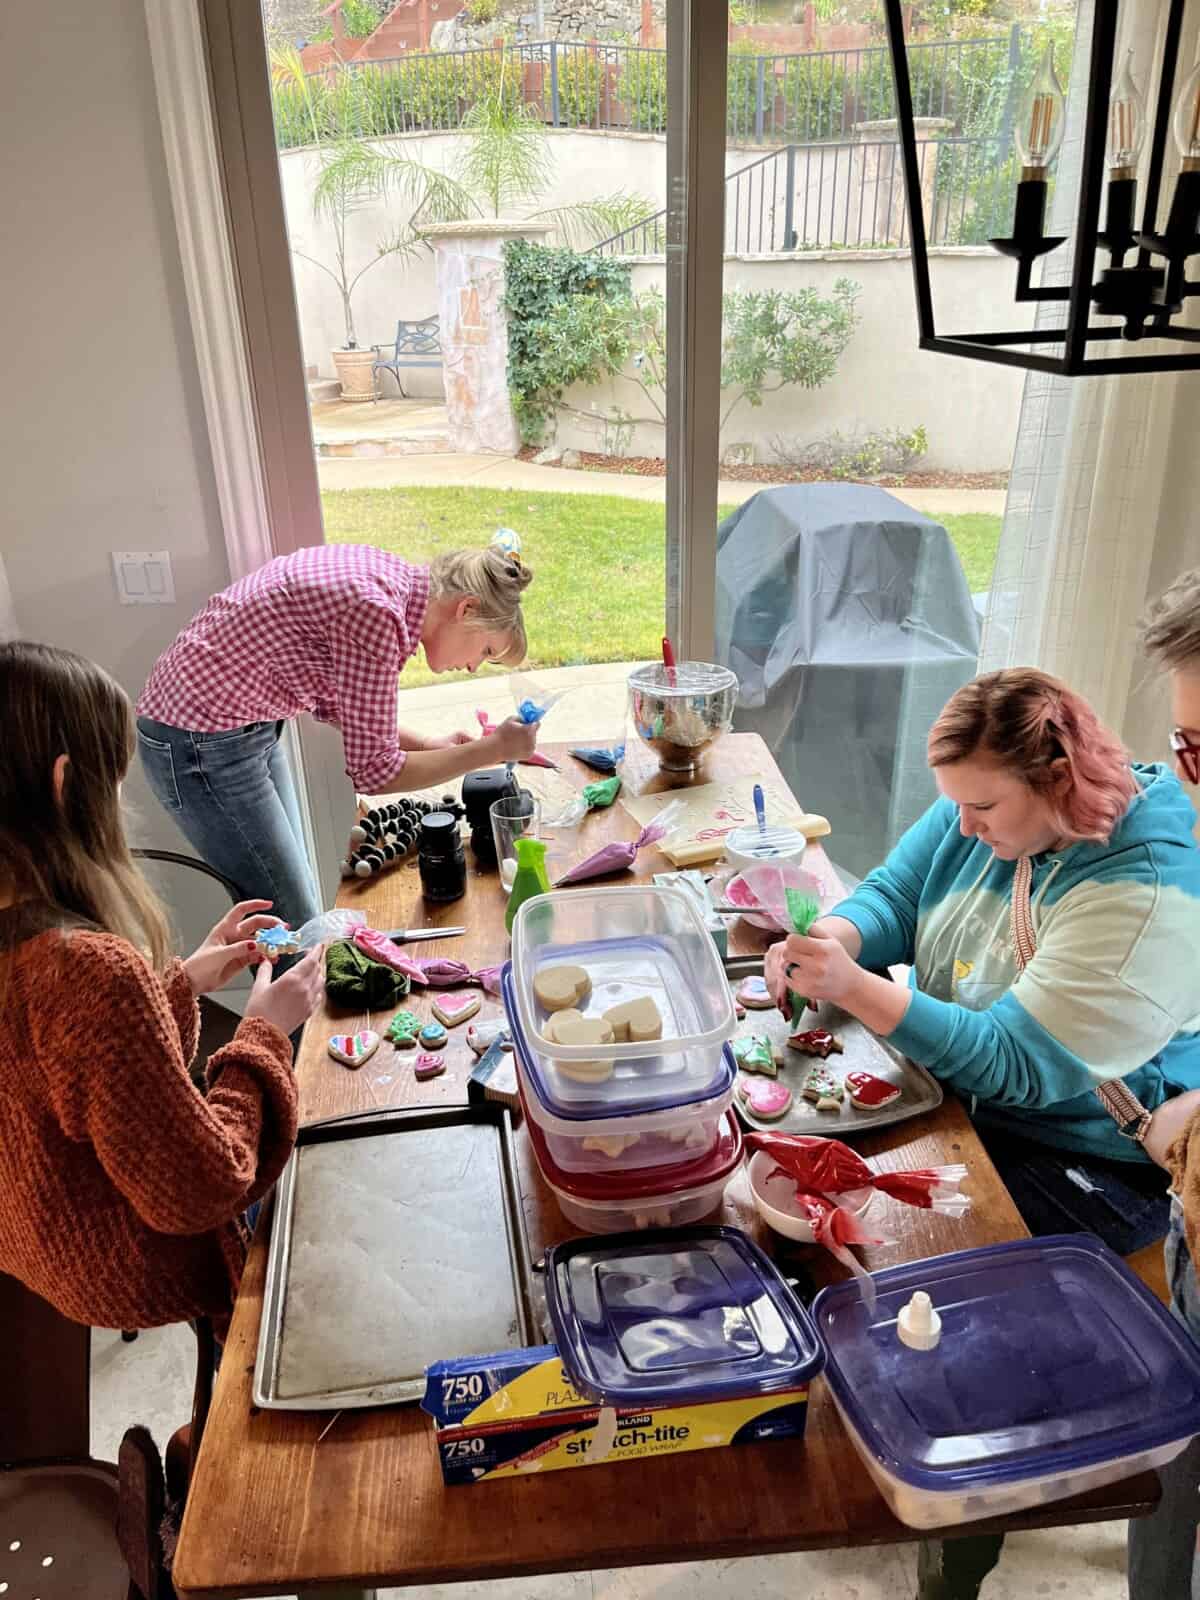
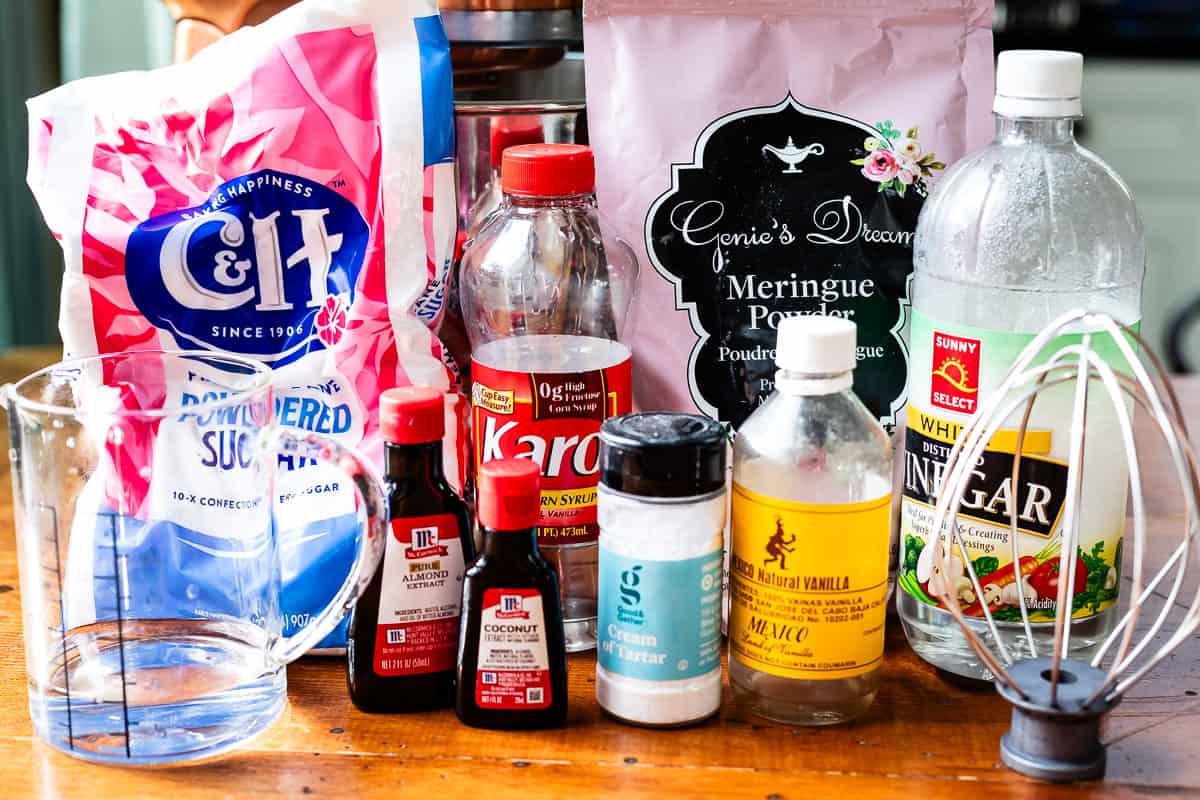
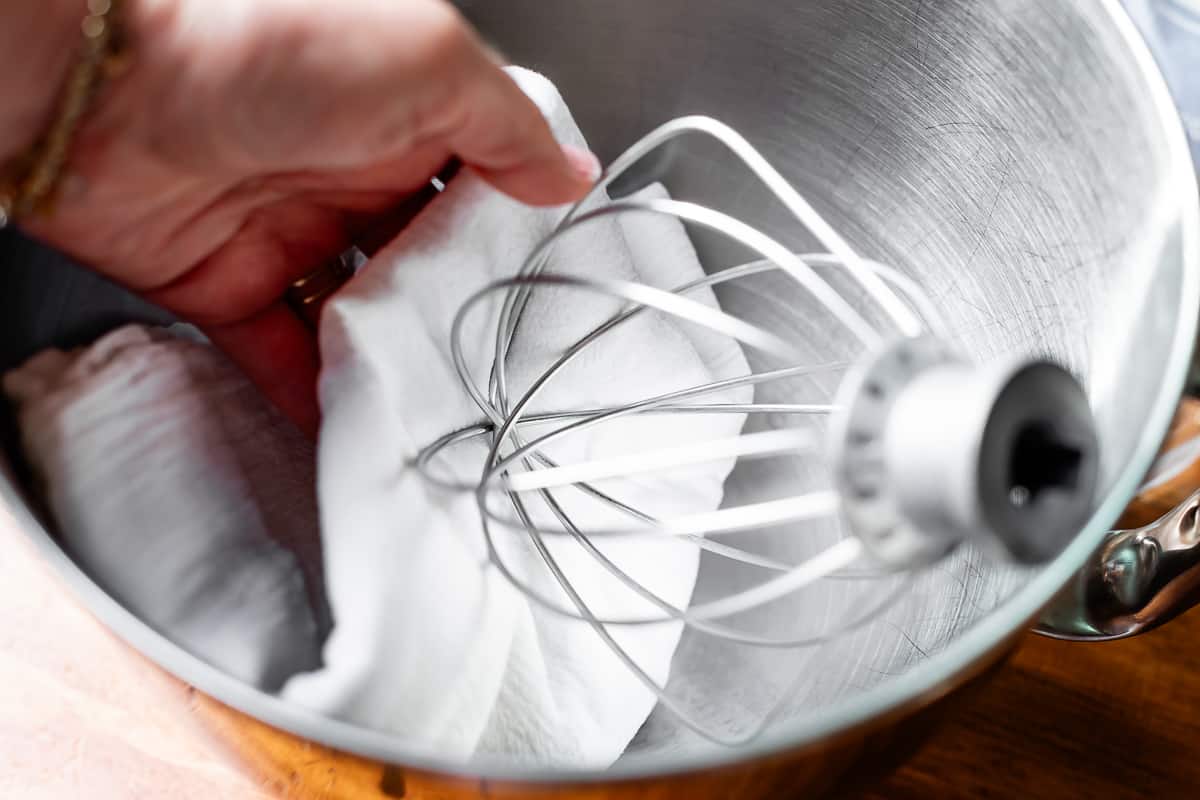
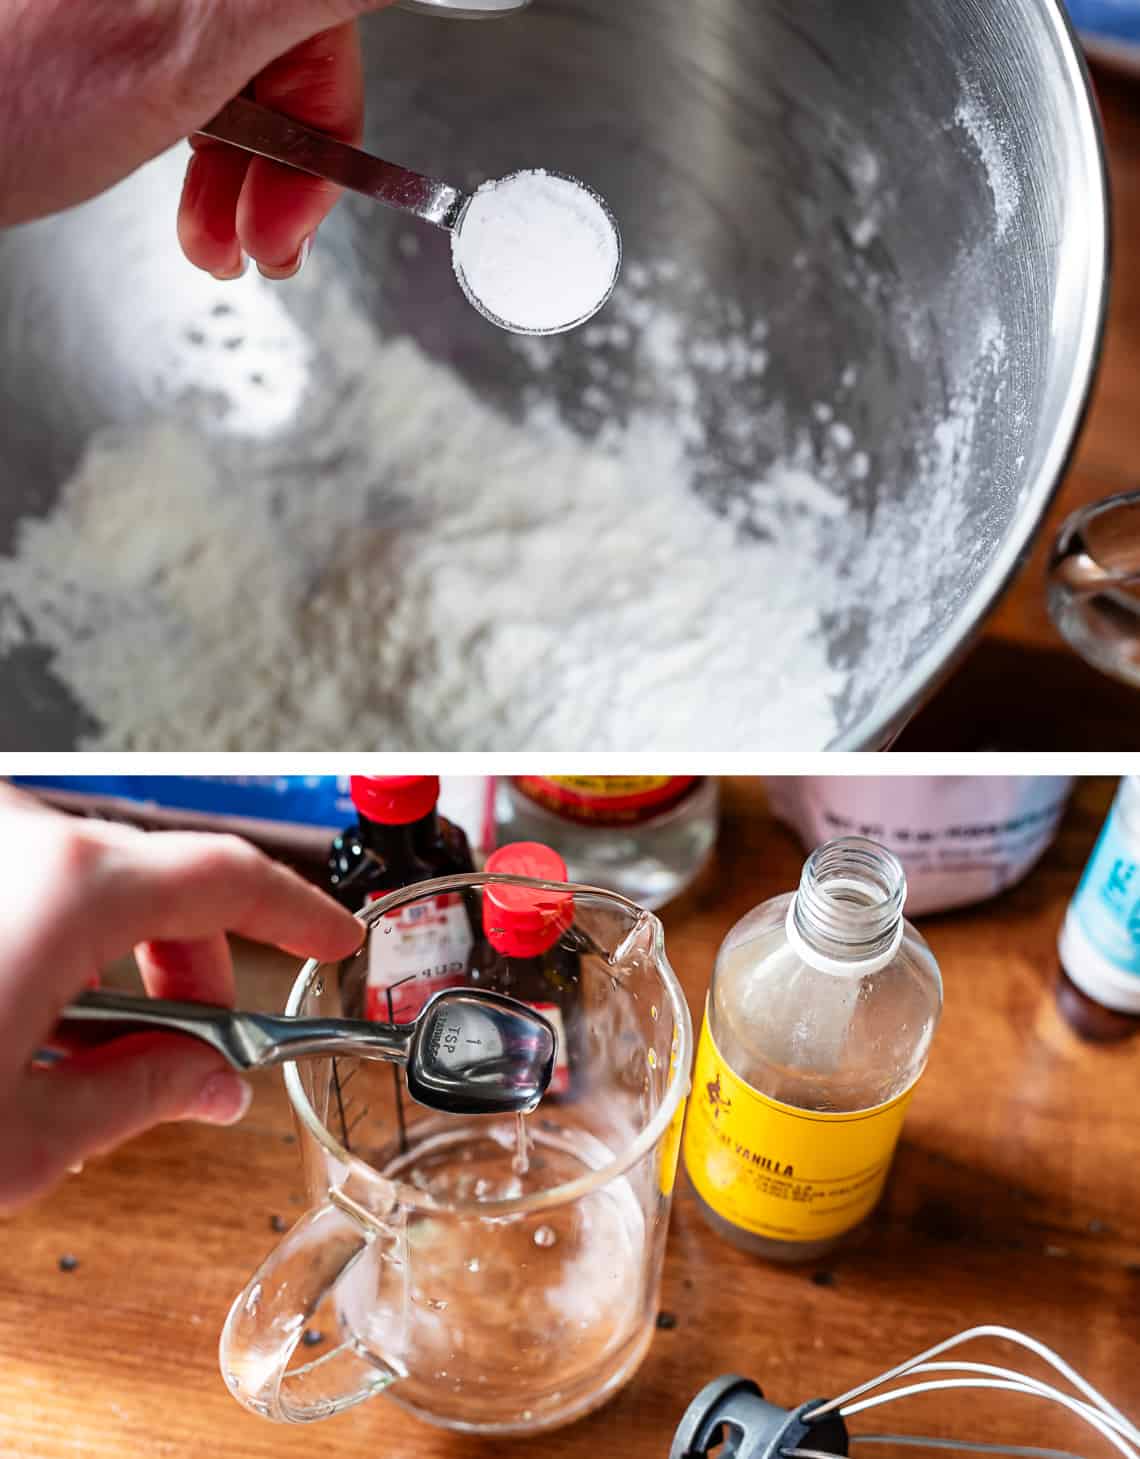
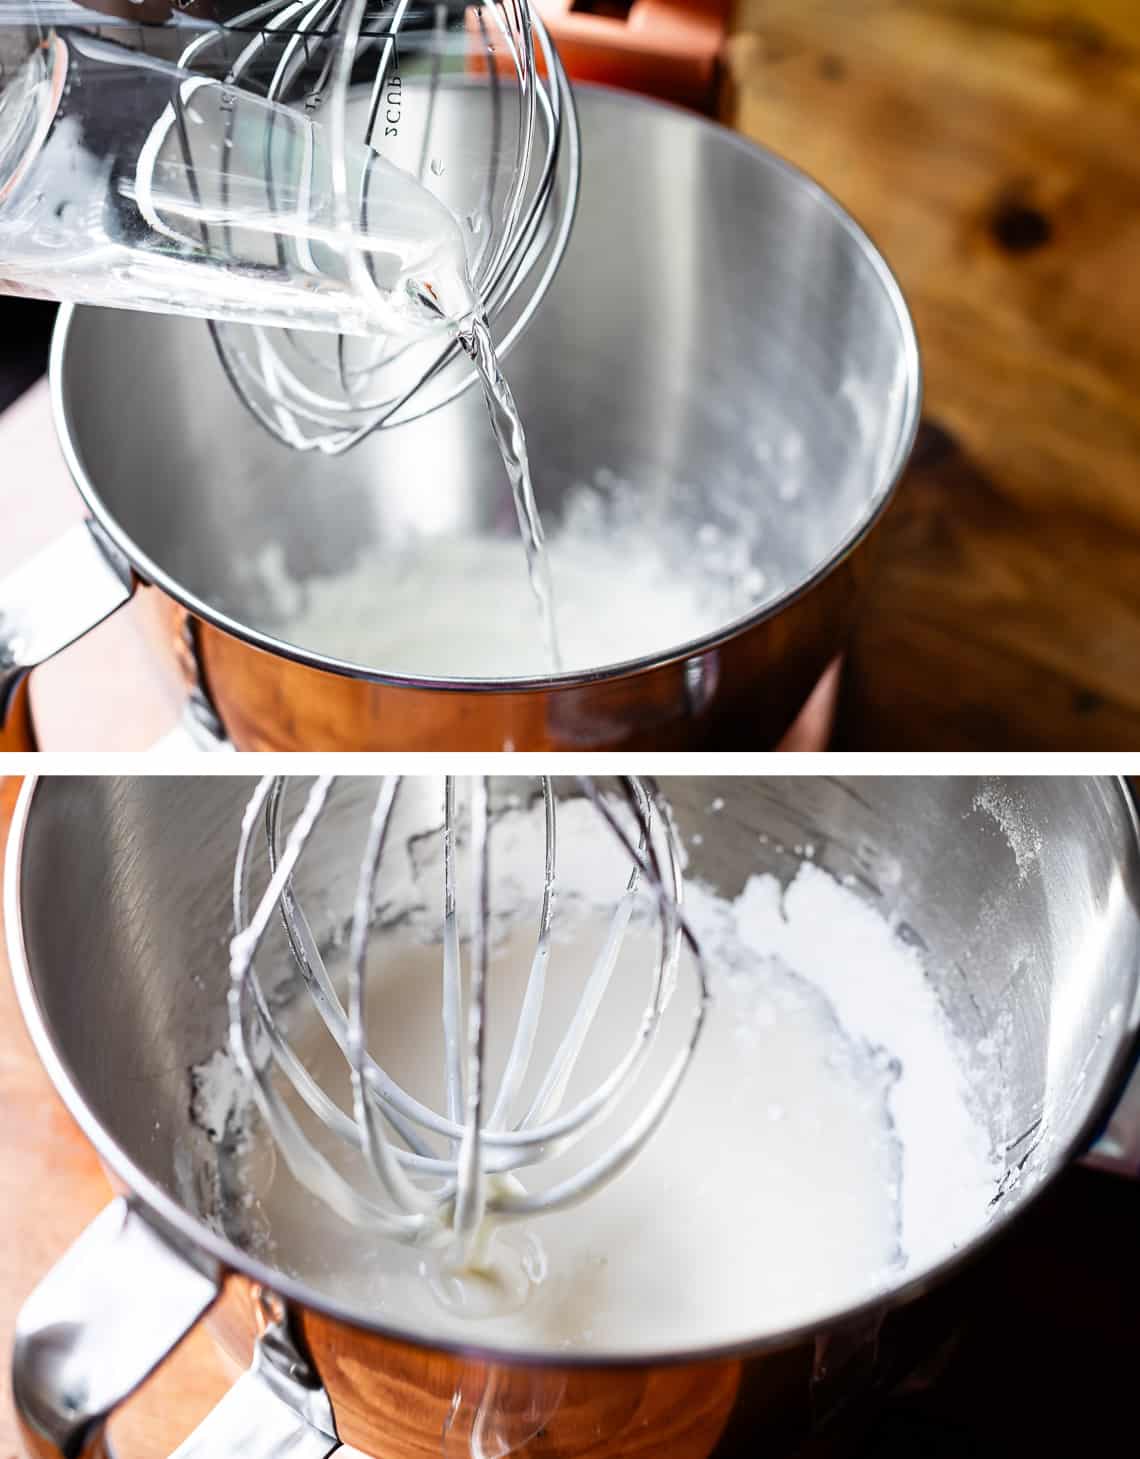
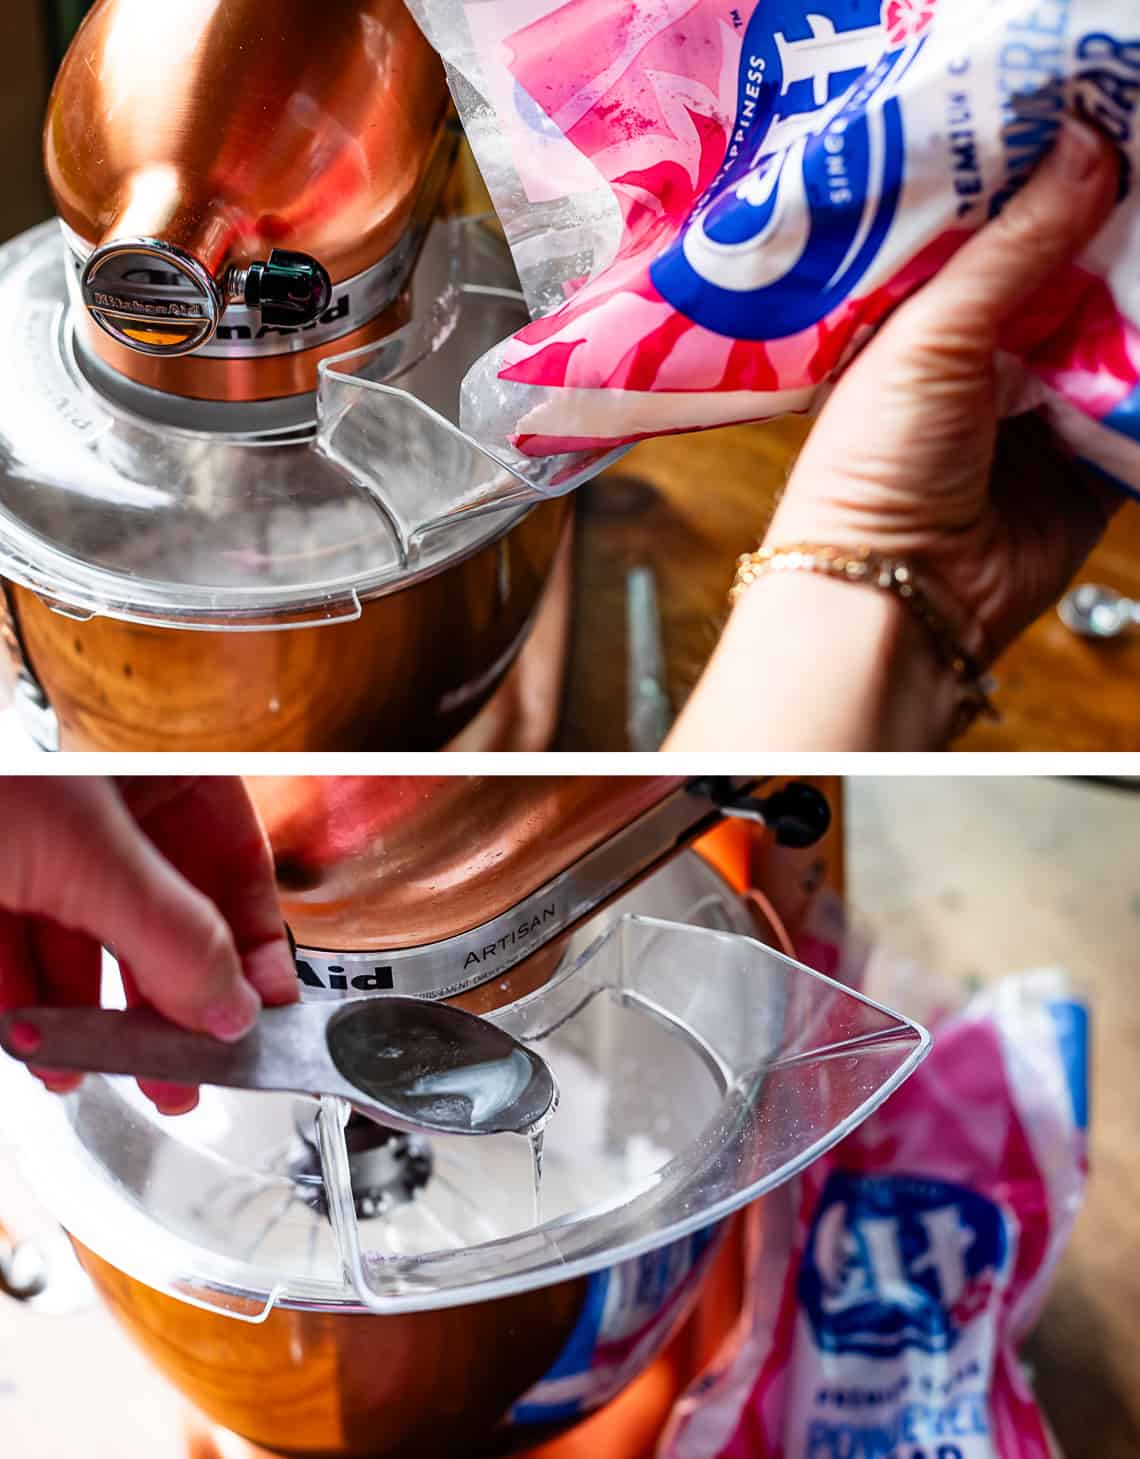
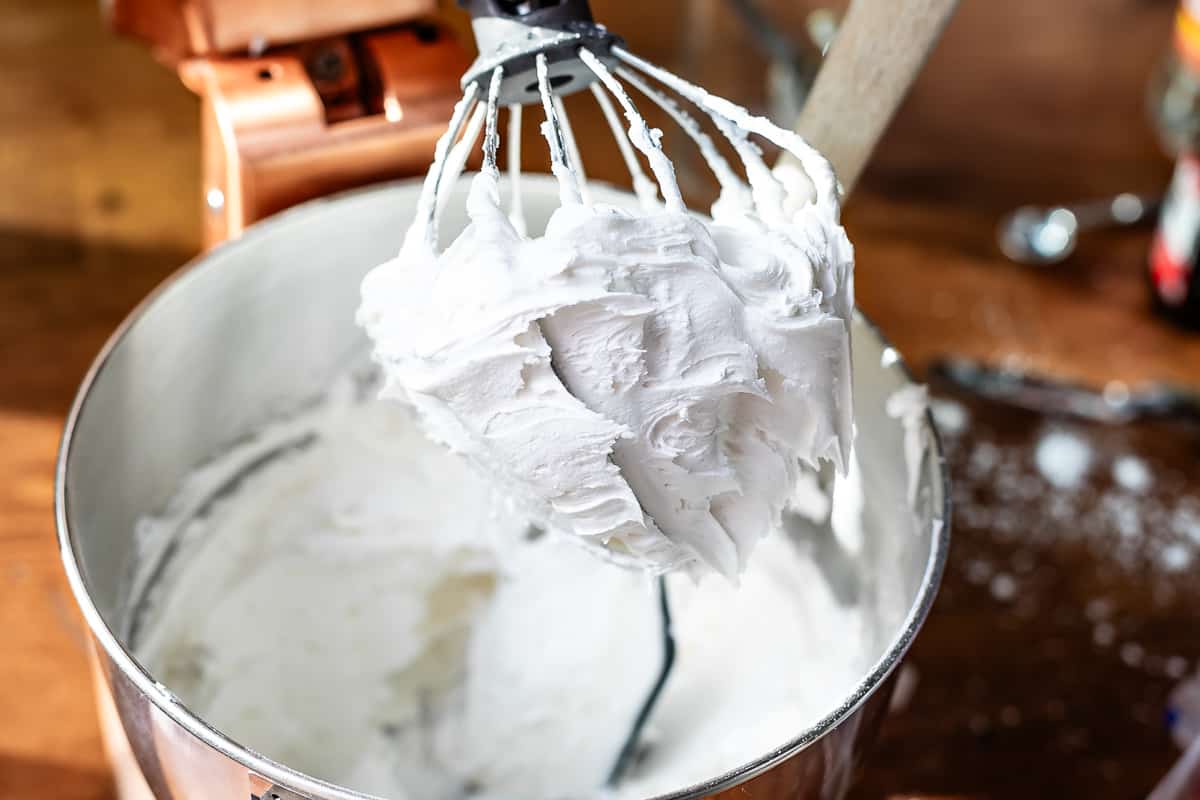
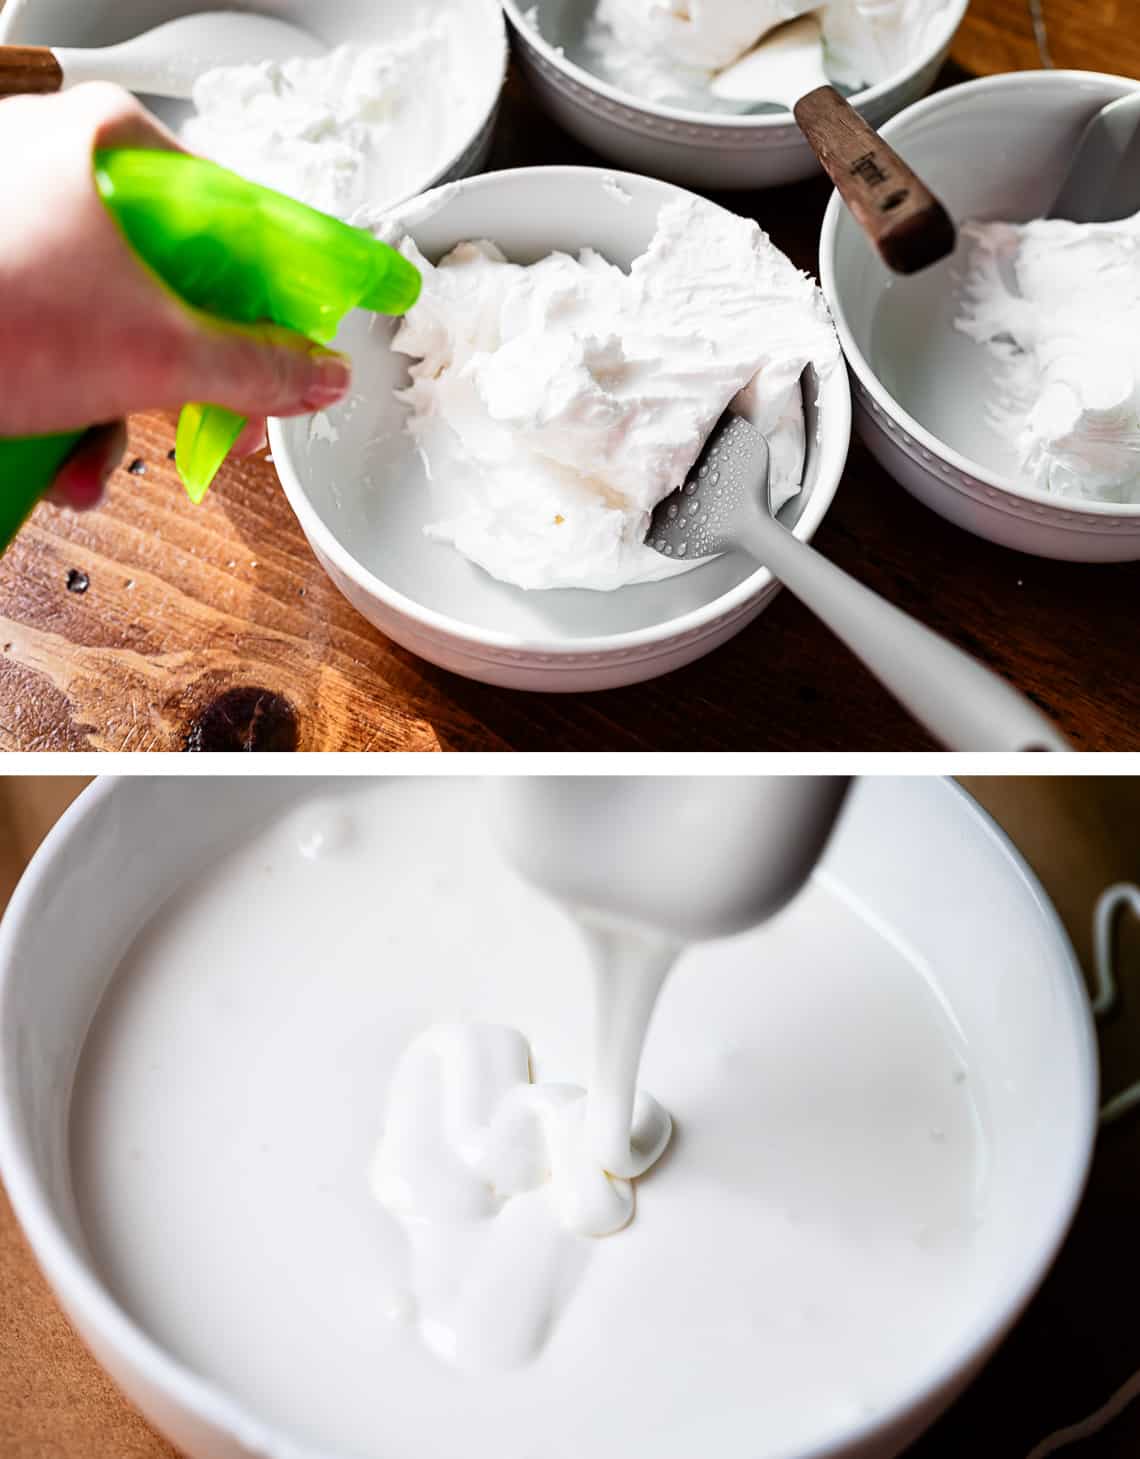
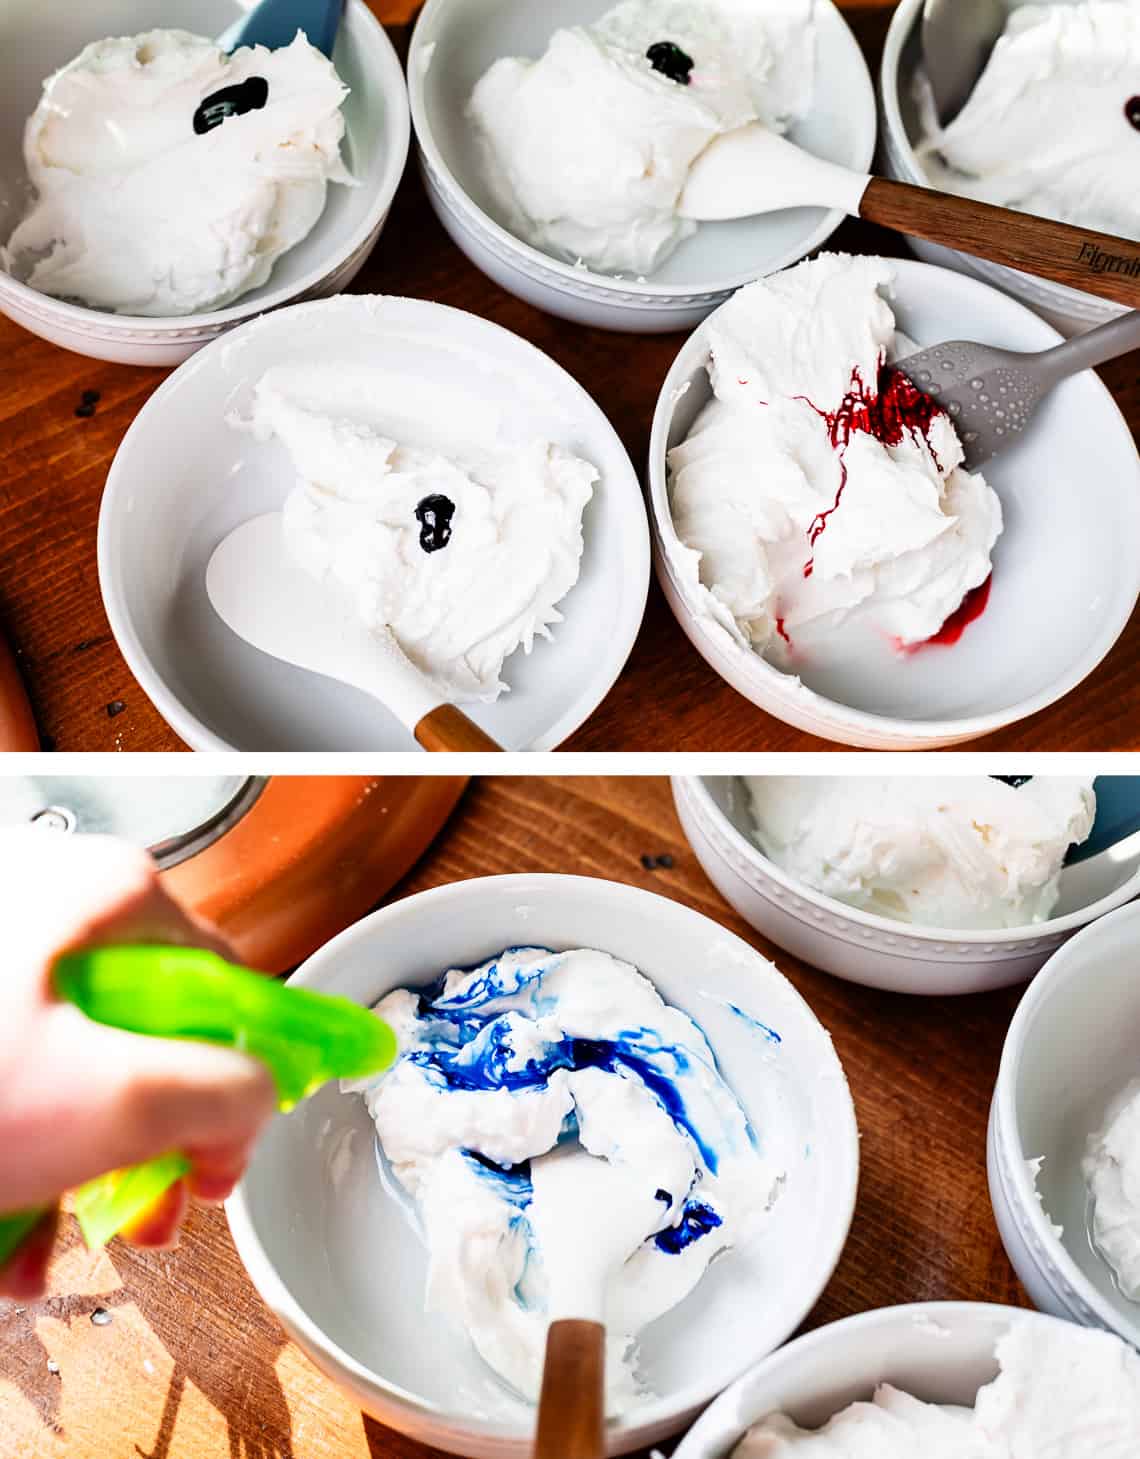
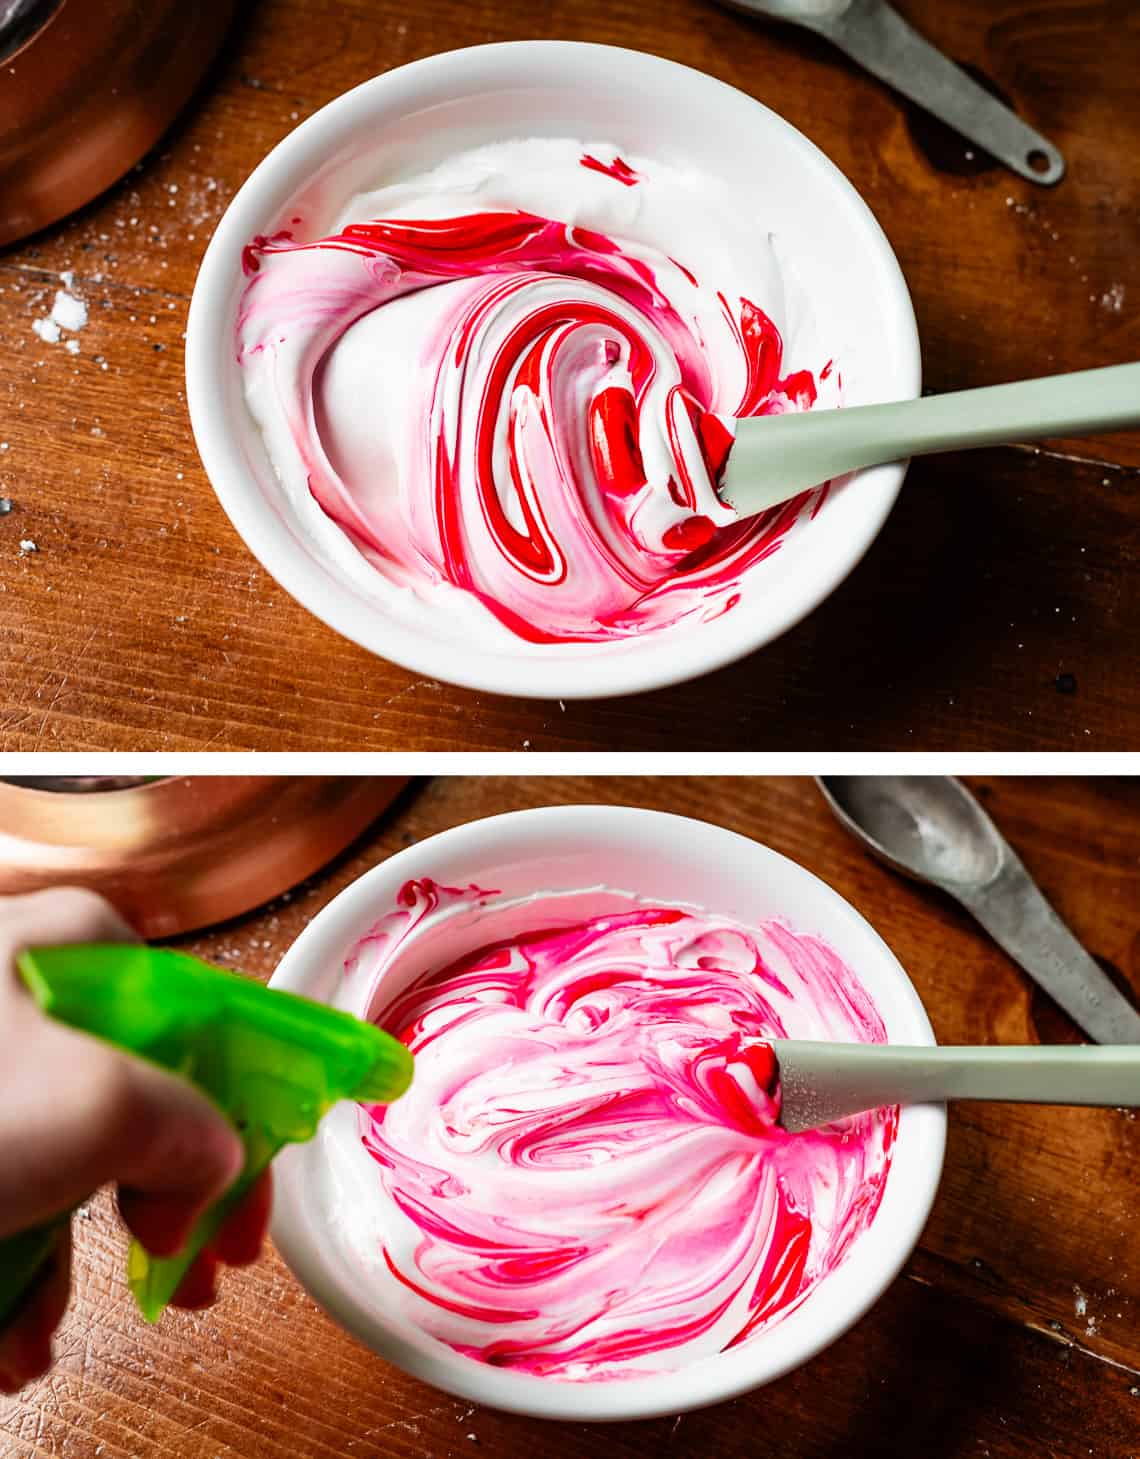
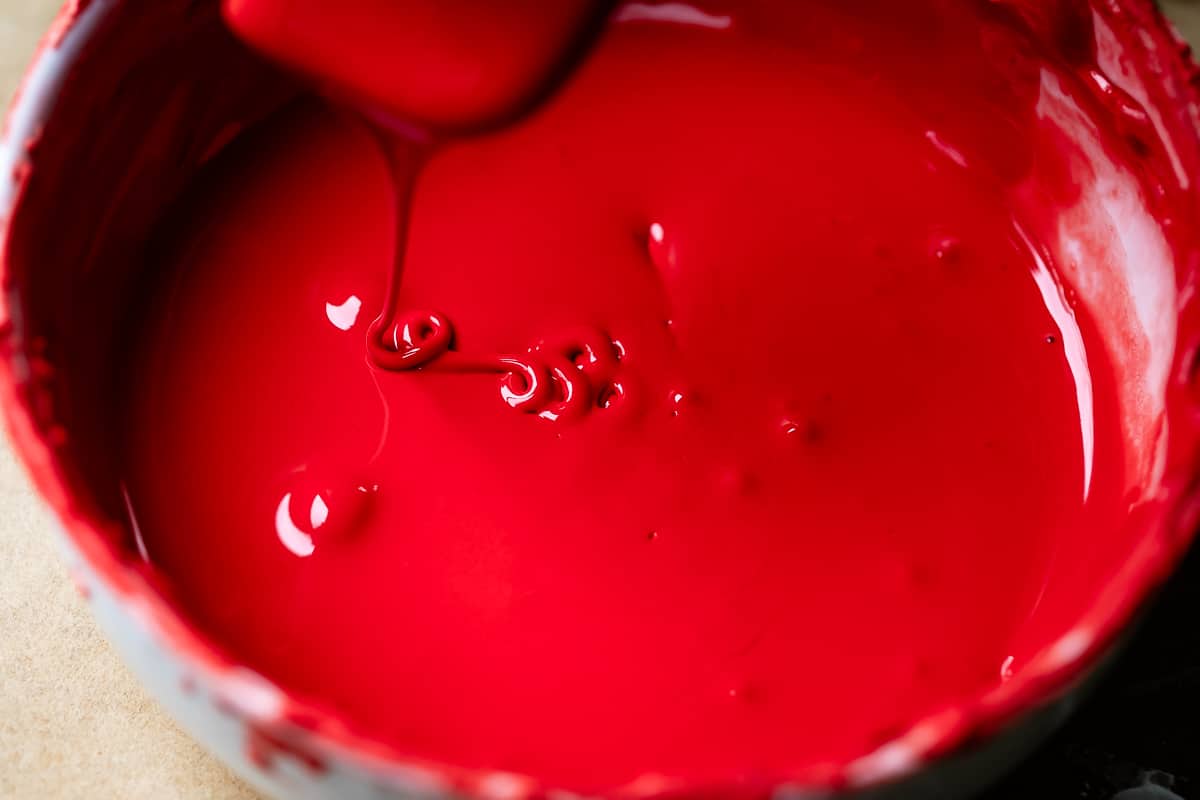
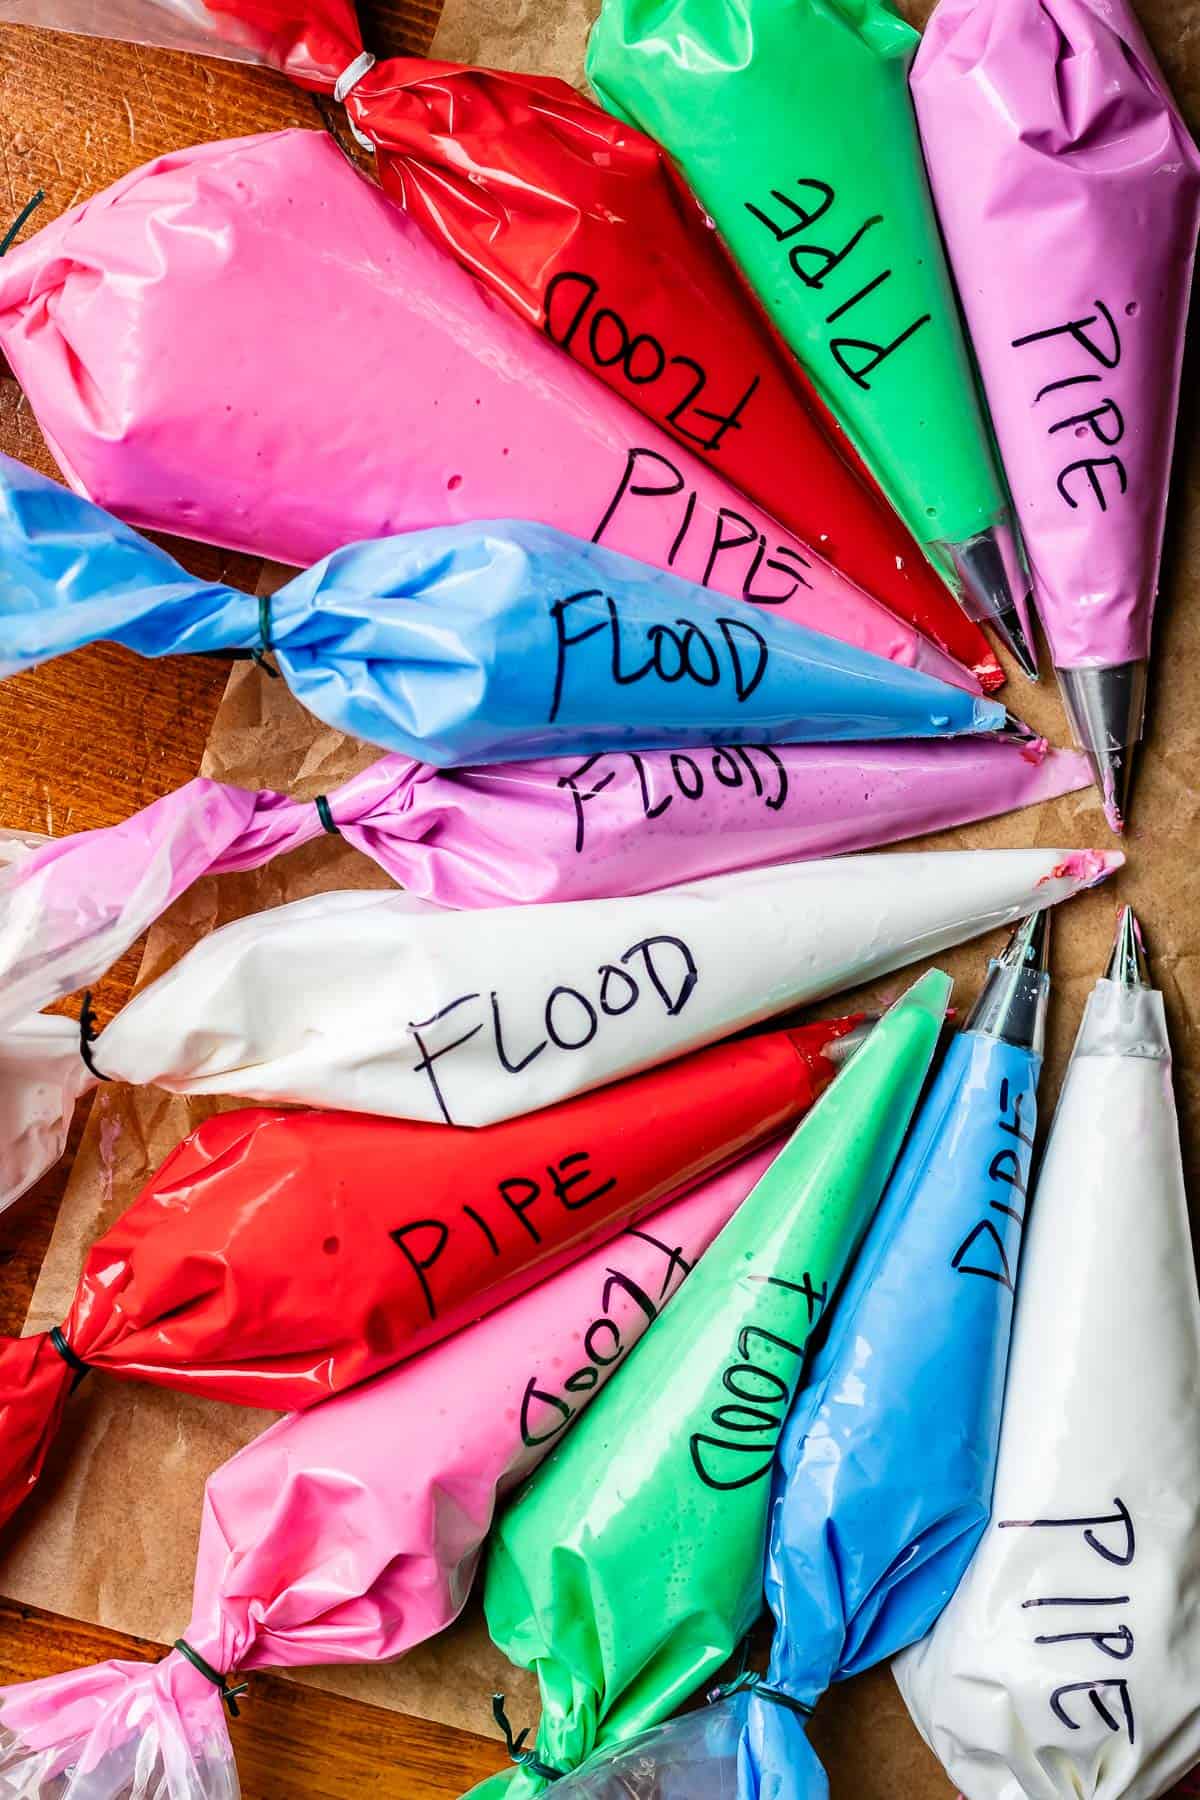
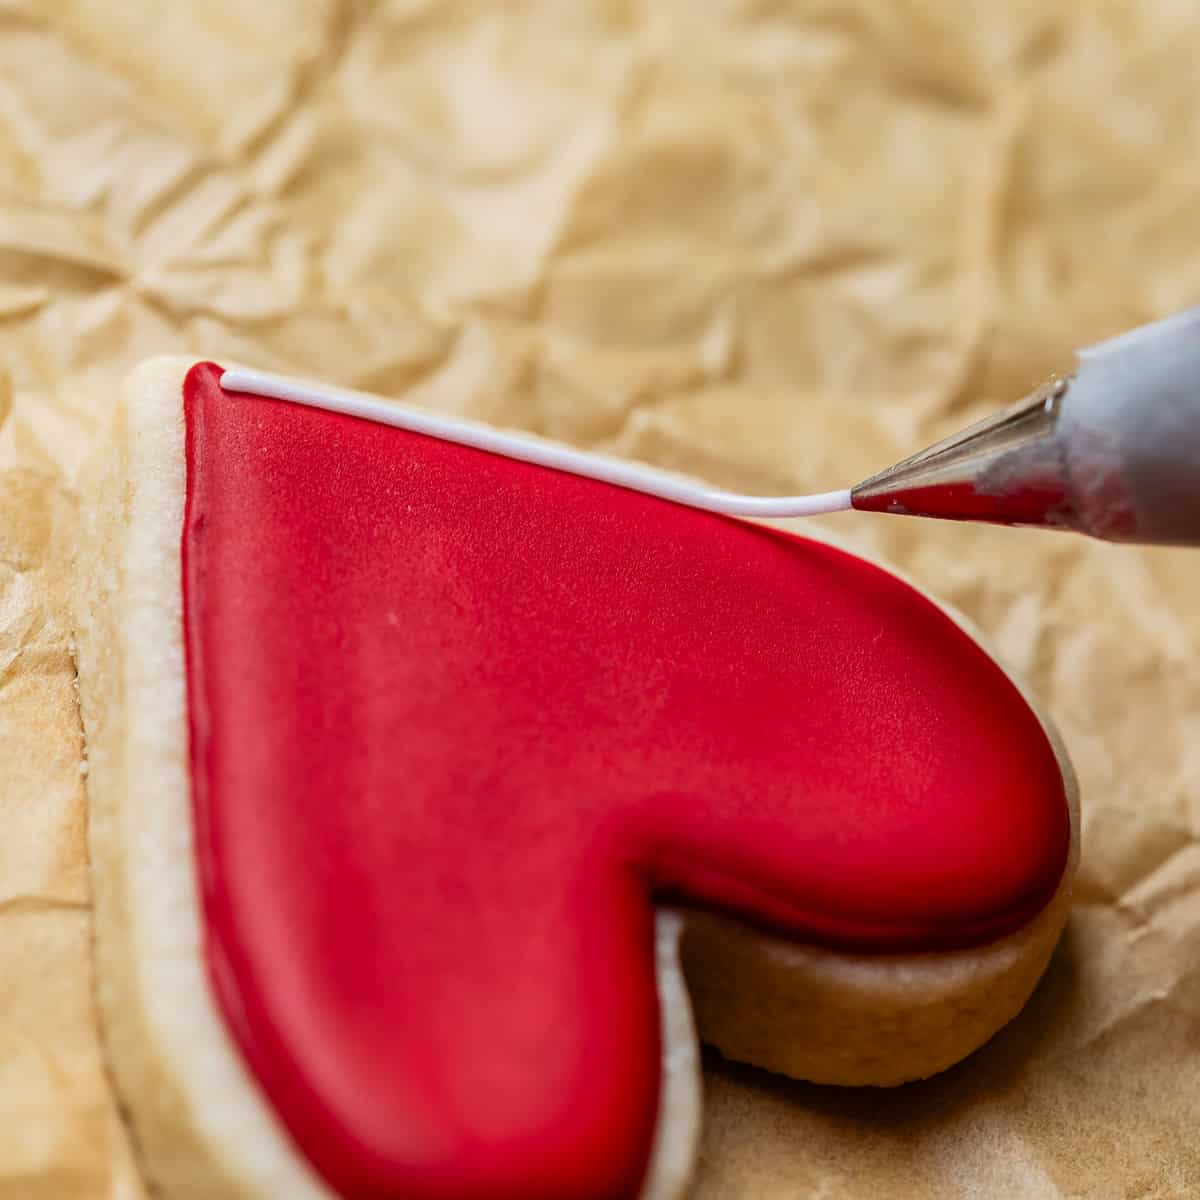
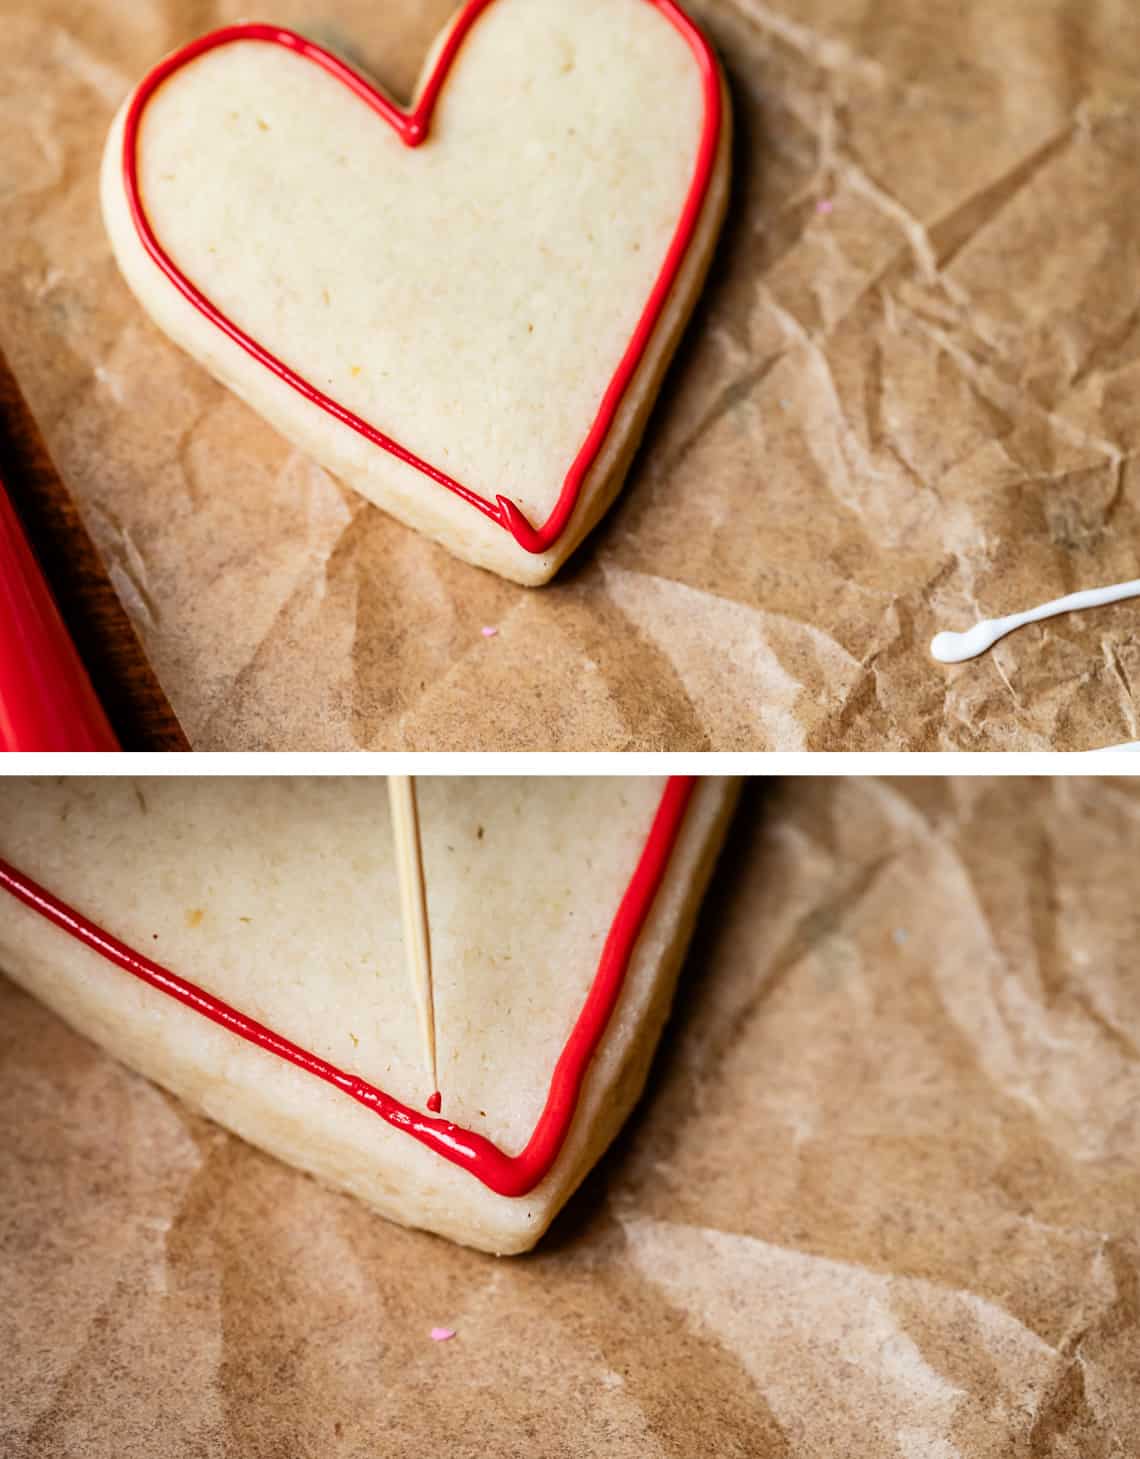
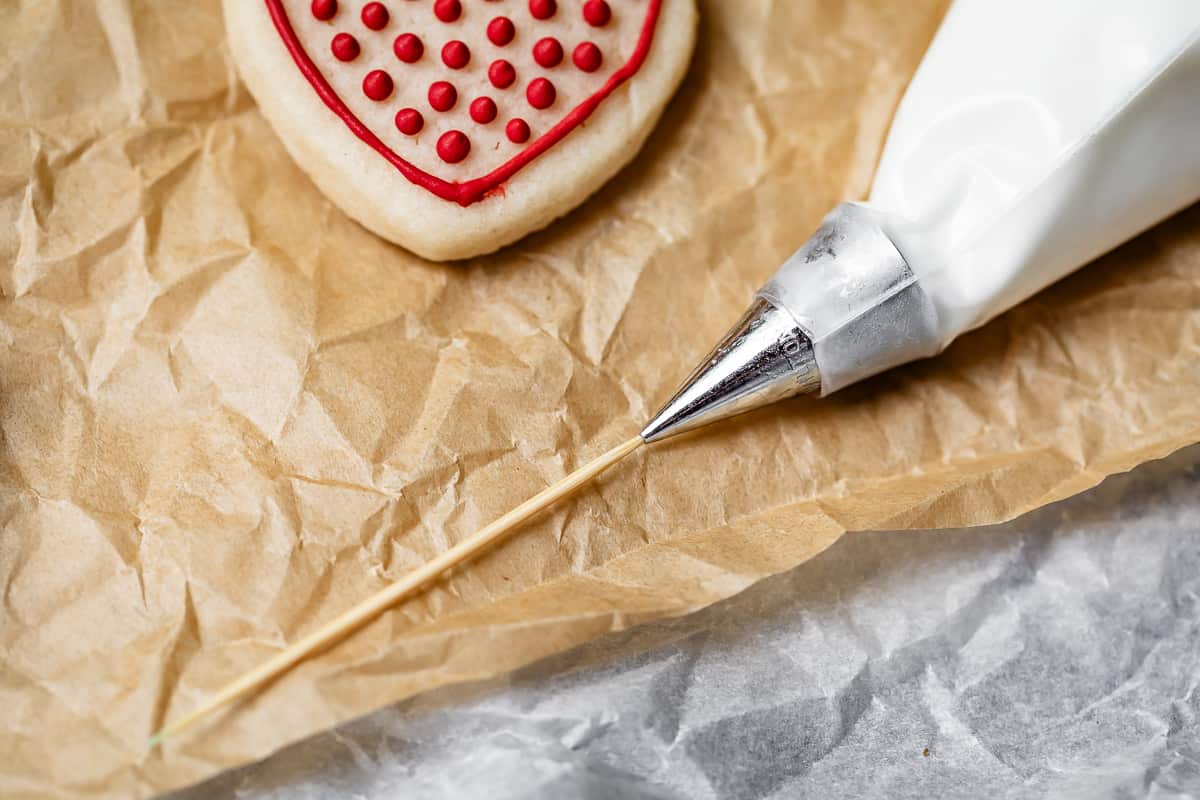
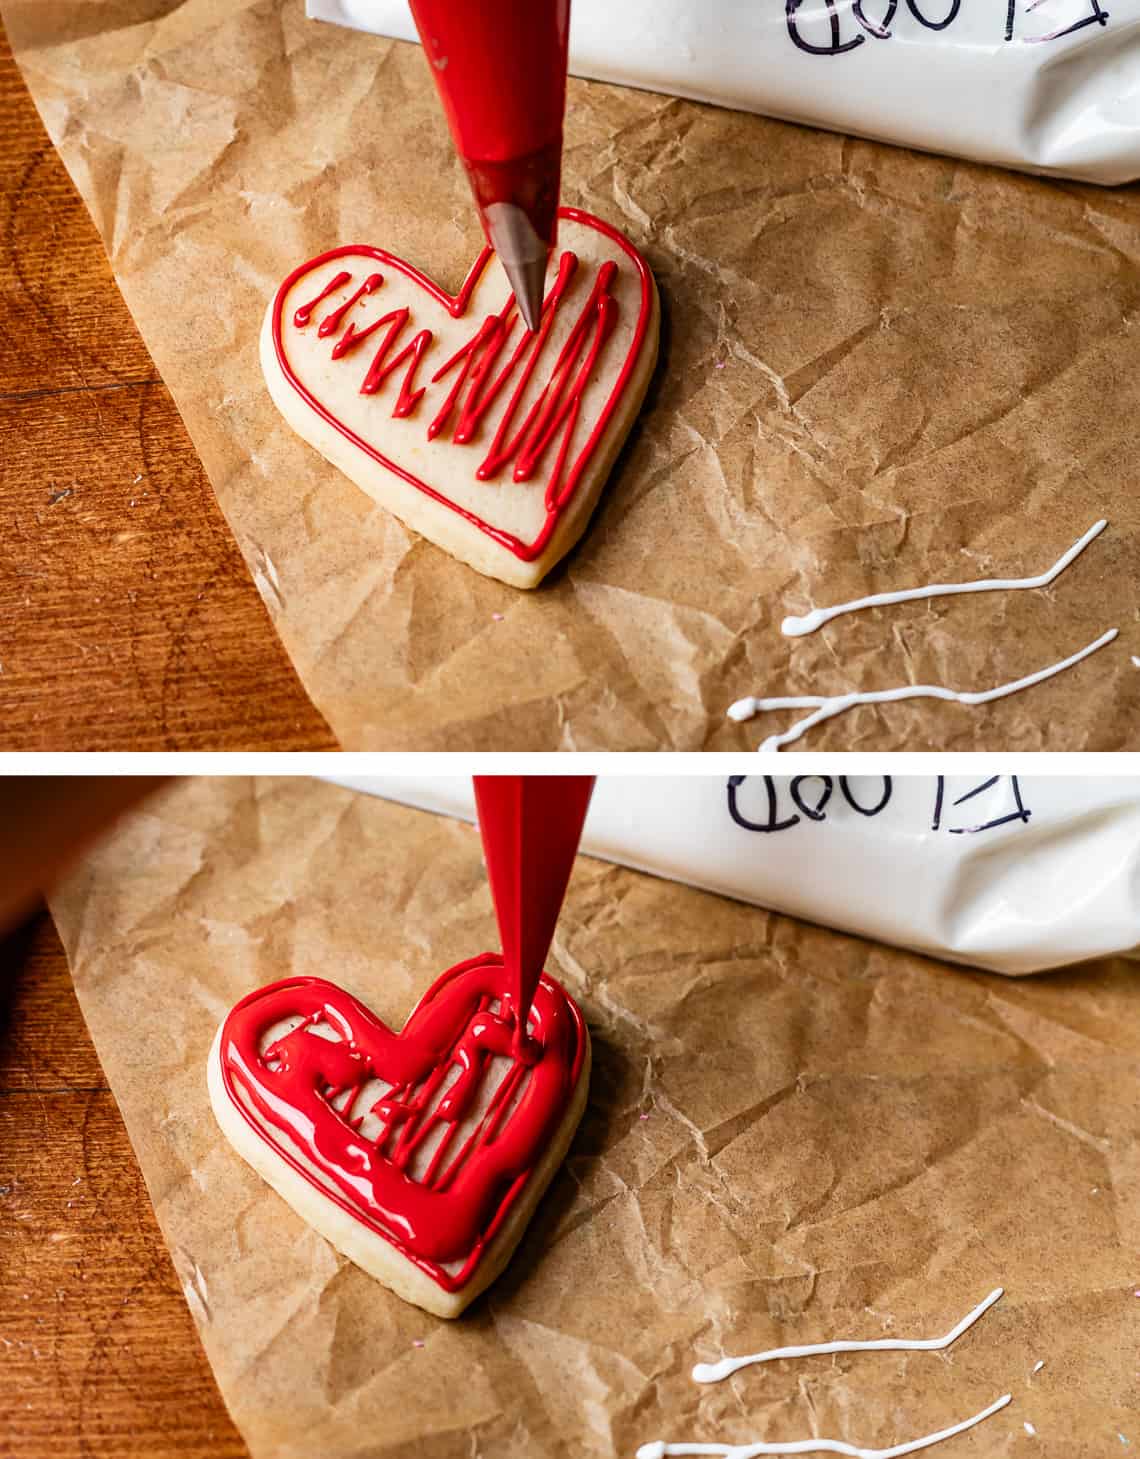
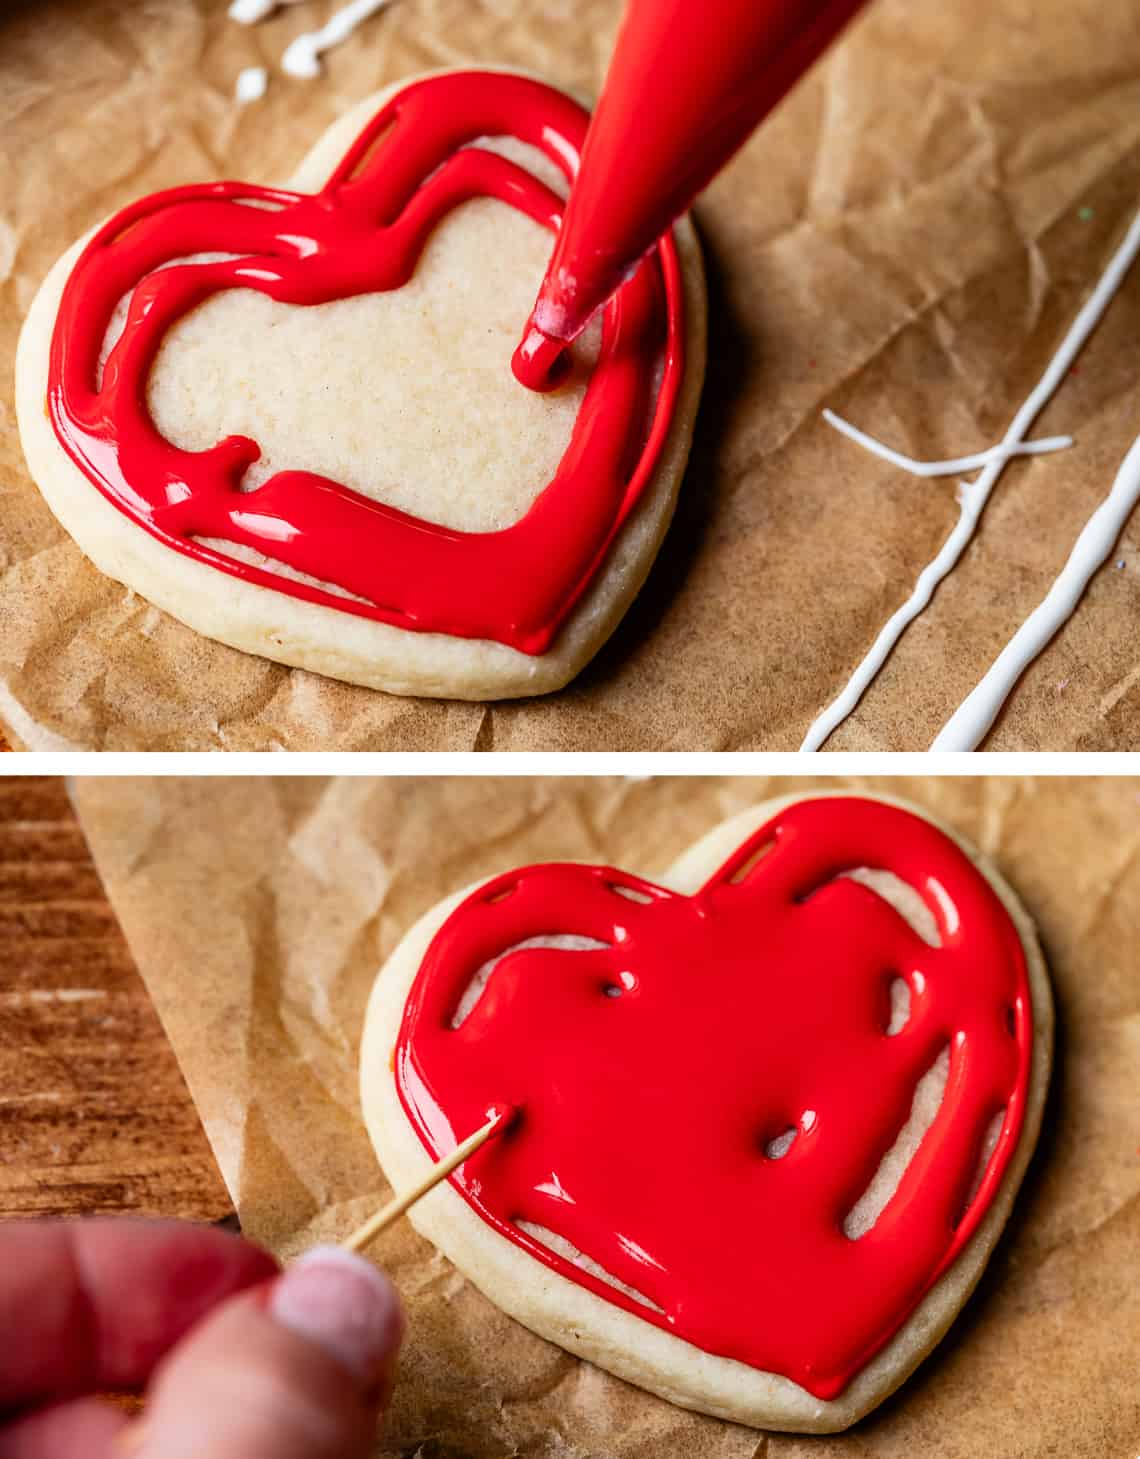
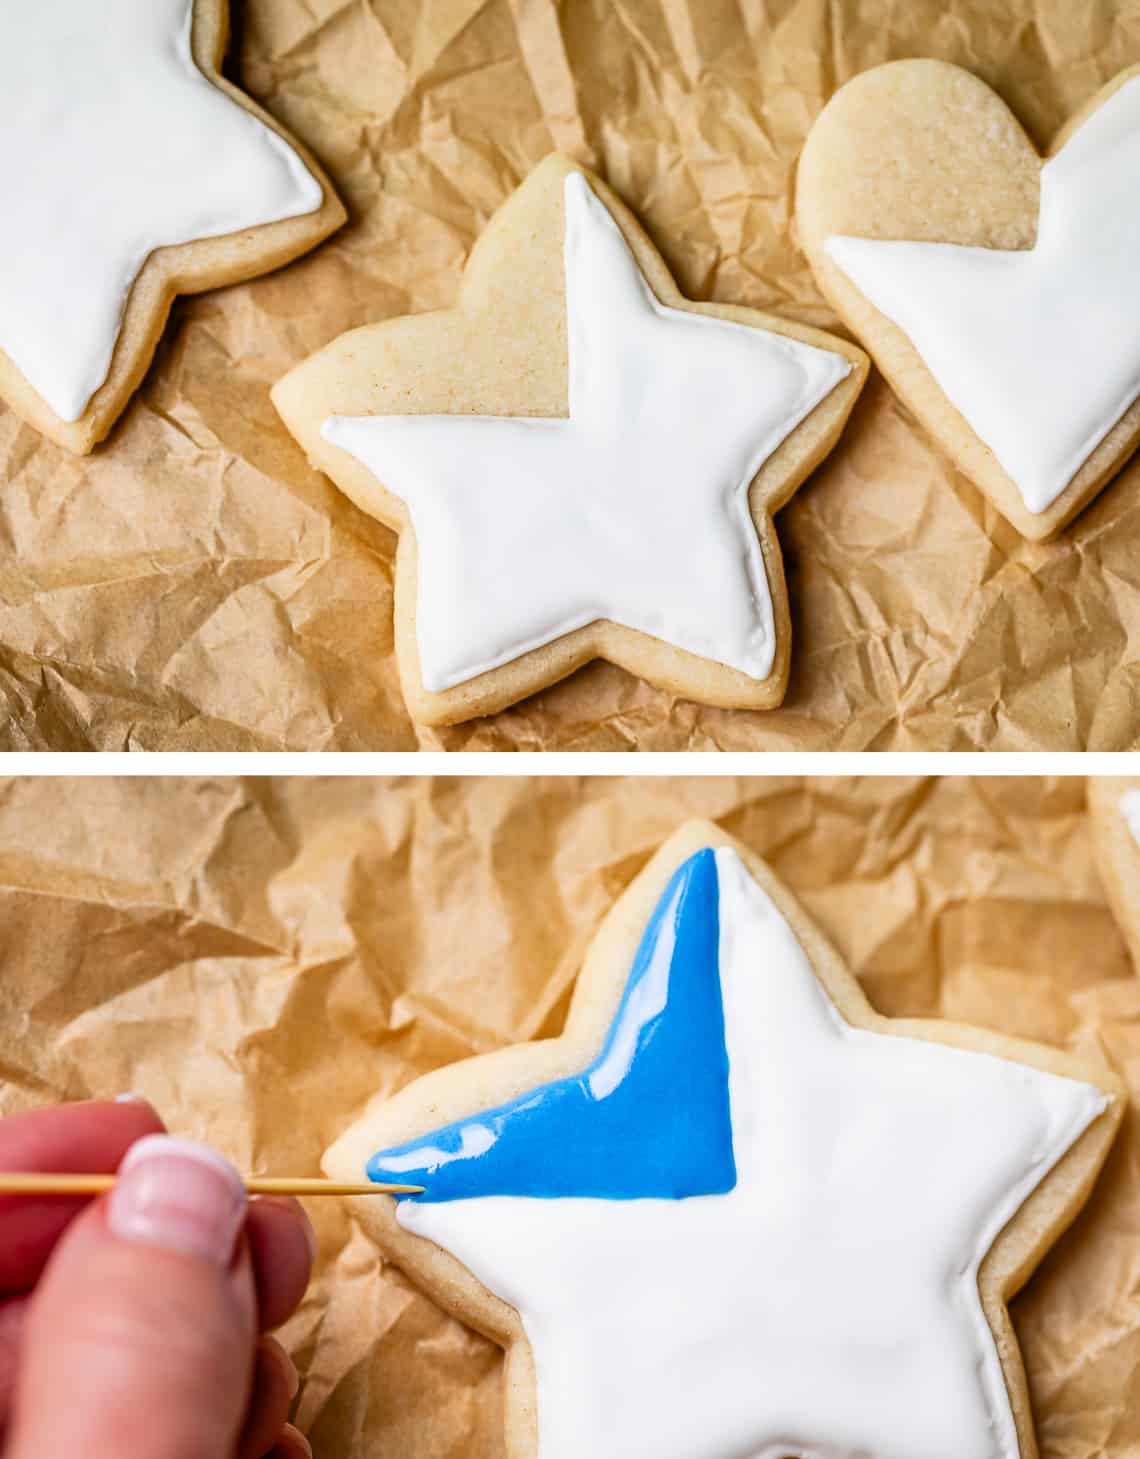
If there is even a speck of grease that gets in your icing, it will not whip properly. I like to use vinegar for degreasing because I always have it on hand. I used a tea towel, but a paper towel is probably easier. Just get it damp and rub the whisk attachment and bowl. I prefer to use my stand mixer, but a hand mixer will work too. I did this whole royal icing project over the holidays when I had 18 people in my house, and my kitchen was trashed for days: tips and icing and cookies everywhere. We had so much fun! Anyway, my nephew kept telling me that something in my kitchen smelled weird, and the next day I realized I had left this vinegar towel hanging out in the corner of the kitchen. Yup, that was it! Ha. oops. Add your dry ingredients to the bowl first: meringue powder, a little salt, and cream of tartar. Measure out a 1/2 cup water in a cup, then add the extracts to the water. We are using clear vanilla, almond, and coconut. This is my FAVORITE combo for sugar cookies, I add these 3 extracts to the cookies themselves, but also to the Buttercream Frosting I usually use. It’s so good! If you are making gingerbread, replace the coconut and almond with vanilla. You need to use clear vanilla, or you risk tinting your icing with the brown vanilla. This might not be a problem if you are using dark colors, but if you want white icing, you should probably get some clear vanilla. Another tip from pro decorators: if you want REALLY white icing, use white food coloring. Yes, that’s a thing! It will also prevent the other colors from bleeding into your white. Add the water and extracts to the bowl with the dry ingredients and whisk together. Once it has come together, start adding in your powdered sugar. I add it straight from the bag, no need to sift unless it’s mega-clumpy. Add in that tablespoon of corn syrup (or glycerine) and keep mixing. Eventually it will start to look like this: This is when things start to get tricky. Pay attention! You need to add more water but NOT TOO MUCH. It’s getting closer. I’m going to include a million pictures now since I haven’t made a video of this yet. You want to bring this “base” icing to about the consistency of thick toothpaste, and no thinner. This toothpaste-frosting is holding its shape pretty well, but will fall into itself eventually. When you drag your spatula through this frosting, you want to see the mark you’ve made for about 25-30 seconds before it disappears and melts into itself. This is called “piping consistency” and you want a thicker consistency. This thicker icing is what you need for outlining and lettering. Err on the side of too-thick rather than too-thin. I made this recipe several times, and the photo here is a little thicker even than toothpaste: That’s ok. I moved a portion to a bowl and sprayed water on it until it was a “flood consistency”, with a disappearing-mark point closer to 15 seconds. This just means it is a thinner icing than “piping consistency” and is great for filling in large areas quickly. But I’m getting ahead of myself. Divide your base frosting into different bowls to add gel food coloring: Again, this base is a little thicker than it needed to be. I could have added another tablespoon or two of water to the mixing bowl. But that’s okay, we can add it to the individual bowls too. Use your spray bottle and go carefully, mixing in the color and water until you get the desired consistency. Here is what red looks like. Pretty pink to start, but it darkens and develops over time. This photo hopefully shows what I mean by the “disappearing point.” You can see on the right where I started to drizzle, that the marks are fading, even by the time I moved over to the left. This is closer to a flood consistency, for filling in large areas. It has a disappearing point between 5-10 seconds. See recipe for all the details for how to tell when to stop adding water for what you want to do. At this point, you can divide each color into two bowls if you like: one as a piping consistency, one as a flood consistency. (OR you can use a medium consistency for both outlining and flooding, see recipe.) Now it’s time to add the icing to piping bags. For outlining, lettering, and detail work, I like to use piping tips 1 or 2, they are the smallest there on the left. Here are tip sizes 1-5, in order from left to right: You don’t really need a tip for the flood bags; Flood consistency is for filling in large spaces, so we want it to come out fast and easy. Here you can see I am using a glass to help give my bag structure so I can fill it easier. I have a damp paper towel at the bottom, to keep the end of my tips from drying out. You can see how thick this frosting is, it’s not the same frosting from the red photo above with the 5-second-drip. This is the thicker piping frosting, more like slightly thinned-out toothpaste. Now it’s time to decorate! My biggest tip for outlining detailed things is to not put your tip too close to the cookie. You want the icing to “fall” out of the tip and lay smoothly on the cookie, in order to get clean lines. Do you see how there is a bit of a drag between the tip, the icing, and the cookie? That’s what you want. This takes some practice and a steady hand. Sometimes I use my other arm to help steady my working hand. Don’t freak out. This takes practice. All that said, I haven’t practiced much and I don’t have a very steady hand and I definitely freaked out😂 So I use toothpicks to fix just about everything. You can see here how with a piping consistency frosting, if you work very quickly before it sets on top, you can move and shape it to how you want (to a point). I also want to remind you that you have lots of icing (this recipe makes a ton!) so if you are just starting out decorating a cookie and you royally mess up (see what I did there? I kill myself), just use your fingers to wipe off the icing from the cookie and start over. You could even use a damp paper towel. I just want to remind you that you have options! And it’s okay. You are not a professional, you are just having fun. Another toothpick trick, if you forget to put your piping bags back in the glass with the damp paper towel that is supposed to keep the end of the tips from getting clogged with hardened icing (or have too many bags for it to be convenient), just use a toothpick to clean it out. Here I am using a piping-consistency icing to zigzag over this heart that I want to fill in: Then I use the flood-red to fill in over the top. The reason I did the zigzag first was to prevent what is called “cratering.” This is when you fill a very large area with flood, but air gets trapped underneath, and as it dries, it collapses and doesn’t look smooth anymore. Here is another heart where I didn’t zigzag first. Mine all ended up being okay and didn’t collapse. Just be sure to pop any air bubbles you see with the toothpick! After filling these hearts, I let them dry overnight. I saw how to make these cute little doily cookies on Little Penelope’s Cookie Boutique. It’s such a cute idea and SUPER easy. Looks impressive but was not hard to do, and there is room for error. That’s my kind of technique! First use a white piping icing to outline the heart with little scallops, then right away use a paintbrush to drag each scallop toward the center. Let this dry a little while (just a few minutes, it didn’t take long because it’s so thin) and then add a second heart outline on the inside. Then after that dries completely, you can either leave it as-is, or fill in with more red or pink or whatever you want. Here is how I did the star: Do the white first and let it dry completely. Then add in the blue and dry. Then add in the red piping stripes. Straight lines are actually kind of a beast, not gonna lie. The dots were way easier. I just want to remind you that sometimes SIMPLE is best, and can still be really impactful and pretty. Don’t let Instagram get the best of you. I took the time to look up some easy designs I thought I could do. Don’t choose Santa Claus’s face on day one of using royal icing! Remember, have fun! And if they still look like a kid did them, that’s okay, I promise they taste good :)
If you want, you can use plastic wrap inside of your piping bag. Add your icing to saran wrap, fold over, then add to a piping bag. pull the plastic through the tip and snip. Then when you are done, you can just thow the plastic away and don’t have to clean your bag. (I find it easier to use disposable bags, but they are kind of expensive.) Use a wet paper towel for any resting bags you aren’t using. But who am I kidding? I forgot half the time. Dig that toothpick in there to unclog and you’ll be fine. Color more of the icing than you think you will need. You will never be able to match the color perfect-perfect if you need more later. Make a TON of frosting. Last I checked, a 2 pound bag of powdered sugar costs like 4 bucks, even in this economy (and I live in CA). Then it’s just the gel coloring and the meringue powder. You are making this royal icing to have fun and be creative. You will have more fun if you make a ton of frosting and have lots of extra, instead of being stressed that you don’t have enough. Use a high quality brand of gel food coloring. I like Americolors or Chefmasters. Liquid food coloring won’t give you strong colors, and on top of that, the liquid added to the icing can mess with the consistency that you are trying to be so careful about. If you accidentally add too much water to your icing and it is too thin for piping, add a spoonful at a time of the thick base icing to the too-thin icing, until it is a more workable consistency. (If you have made both flood and piping consistency icing, add spoonfuls of the same color base (rather than white base) if possible, so that your colors will still match each other perfectly. If you don’t have any thick base frosting left, you can try adding sifted powdered sugar a little at a time, but this is not ideal.) Consistency is everything, and this takes some practice. Don’t freak out if you don’t get it right the first time. Royal icing is an advanced technique and takes some time to learn how to get the consistency exactly right. Be patient!
How to store royal icing for sugar cookies
Royal icing is pretty forgiving as far as storage goes. The icing doesn’t spoil because it’s basically just sugar; there is no way for bacteria to grow.
Thick & SOFT Sugar Cookie Recipe (That Holds Its Shape) » truly, these are the best sugar cookies I have EVER had, and so easy to cut/decorate The Softest Chocolate Sugar Cookies (That Hold Their Shape) » same as above, but in chocolate. Yes, please! Unbelievably Soft and Chewy Gingerbread Man Cookies (No Spread!) » a gingerbread cookie that actually tastes good, and is still perfect for decorating Royal Icing Transfers from Tiny Kitchen Treats Homemade Sprinkles from Royal Icing from Really Into This As a coating for things like pretzels, Nutter Butters, or Oreos. Just dip them in the icing, let the icing drip off, then lay on parchment paper til dry. Use as an icing on top of cupcakes or cakes! You will need to coat the top of the cake or cupcake with something like syrup, marzipan, or buttercream so the royal icing doesn’t dry it out.
Keep the icing in an airtight container, press plastic wrap directly on top, and then add the lid. This will help prevent it from drying out. Once covered, the icing can sit out at room temperature for 2-3 days, but after that, store it in the refrigerator. You will need to let it come to room temperature and give it a stir before using again. You can store royal icing in the fridge for up to 3 weeks. (After that move it to the freezer, see below). To use, stir carefully to take care of any separation. Add water if necessary to get the consistency is what you want it to be, then add to piping bags. You can add food coloring before or after this storage process. Facebook | Pinterest | Instagram
The BEST Buttercream Sugar Cookie Frosting Recipe » fluffy, smooth, and tastes AMAZING Buckeye Candy Recipe » the classic chocolate and peanut butter combo, in an easy to make (and decorate if you like) candy The Absolute Best Rice Krispies Treats Recipe » the gooiest, softest treats around, and so easy to add sprinkles to or dye for fun Soft and Chewy Sugar Cookie Bars » just as tasty as frosted sugar cookies, but without the headache of cutting cookies The BEST Snickerdoodle Recipe (Perfectly Soft and Chewy) » does anyone say no to Snickerdoodles? This recipe is the BEST The BEST Cinnamon Roll Cookies » basically, a cinnamon-lover’s dream come true Decorated Chocolate Covered Strawberries from Studio Delicious


![]()