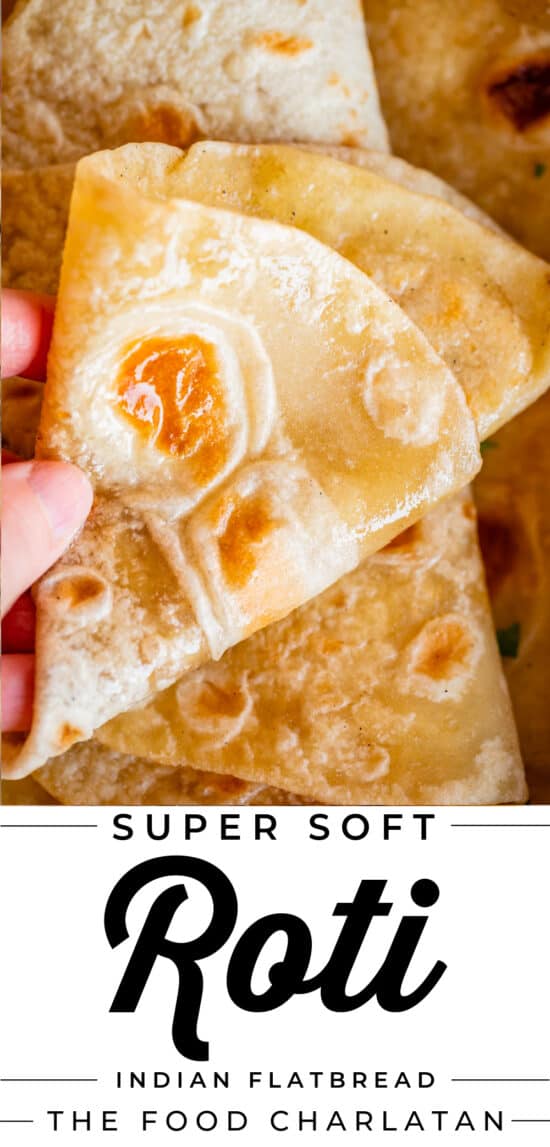
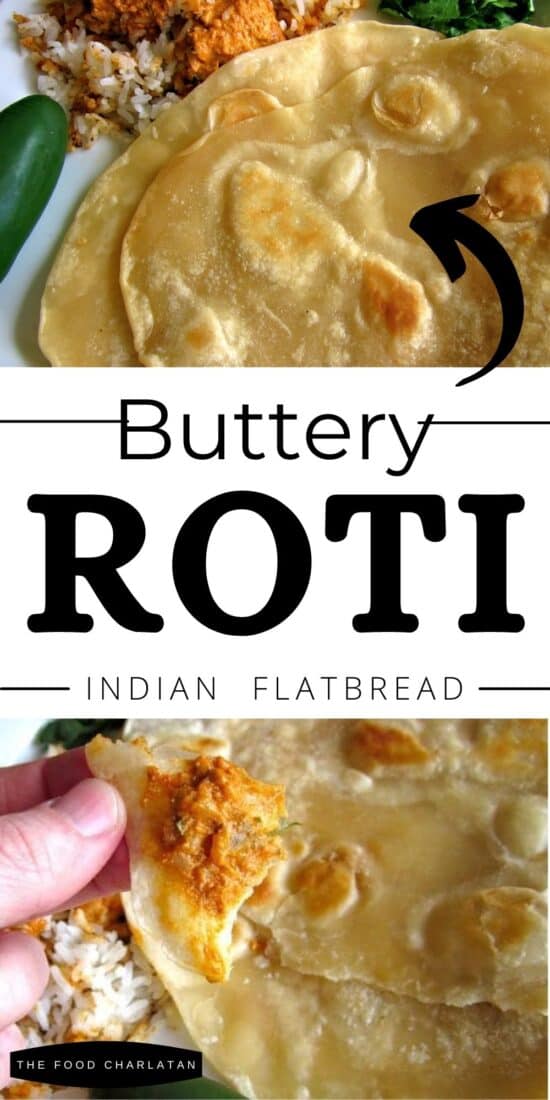
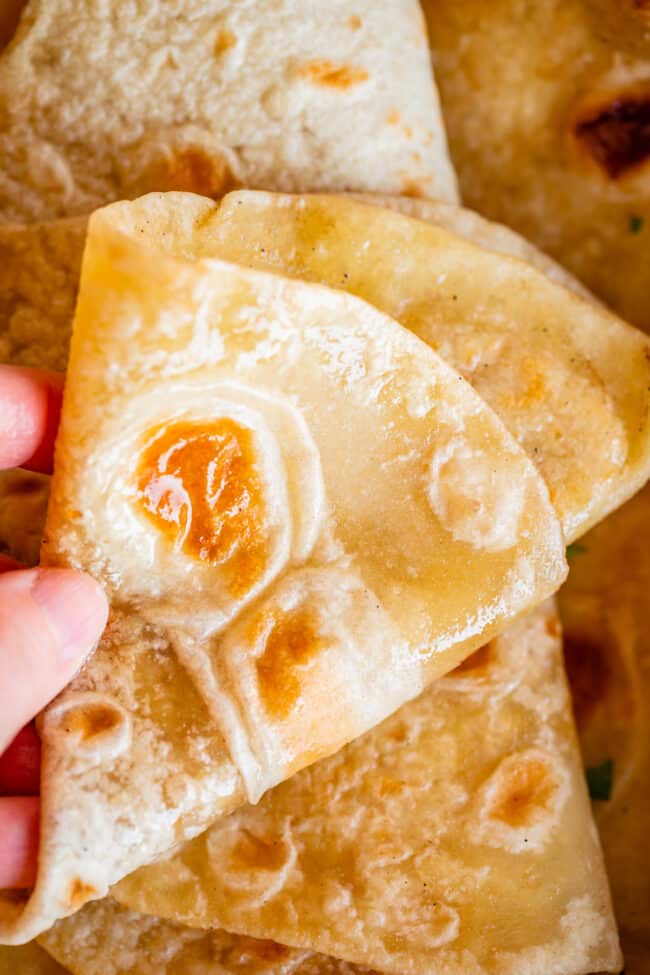
I was over at my parents house the other day and checked the fridge, obviously. I don’t think I will ever grow out of this habit. Mom’s fridge has Mom’s Food in it, and there’s just something nostalgic about your mother feeding you, even if you are in your 30s and have kids of your own. And even if all Mom has in there are some unrecognizable leftovers, I’m still going to check them out. Just to make sure, you know. But last week I was over there and opened up the fridge to find a Little Caesar’s gift card on the shelf, propped up front and center. I asked my dad, what the heck is there a gift card in your fridge for?? He said, “oh, yeah, someone gave it to us and we keep forgetting to use it. So we put it in the fridge to help us remember. Next time we’re hungry, we will open the fridge and remember, hey, pizza!” I love me some Homemade Naan but I feel like the world needs to know about Naan’s skinny kid brother Roti, who could totally take Naan down in an arm wrestling match, I’m just saying. He might be skinny but he’s smooth. He might not have that yeasty Naan puff but he’s soft and pliable for days. Okay this analogy is going downhill fast, let’s get into the details: You know what I can’t get for free? Roti bread. Have you tried this stuff? I’M OBSESSED. I can’t even find it on the menu in most Indian restaurants where I live in California (all hail the Naan, apparently, sheesh talk about a diva). Roti is unleavened, meaning it doesn’t have any yeast or baking powder to give it that springy texture. It is traditionally made with just two ingredients, Indian whole wheat flour (“atta”) and water. When made correctly, it is soft and buttery and chewy and tender, similar to a Mexican tortilla. Roti also is sometimes called Chapati. Roti is traditionally made with just flour and water, some define chapati as a version with flour, water, salt and oil (or butter, as in today’s recipe). Some regions or families might roll theirs out to different thickness levels. There’s always more than one way to make a classic recipe like Roti! But the result is always a soft, pliable, deliciously flavorful vehicle to get even more saucy curry into your mouth. Yum.
Can you make roti vegan?
Facebook | Pinterest | Instagram My brother was over this week and was enjoying some of my test Roti, and was going on about how he likes it so much more than Naan. He lived in India for a summer, so has a lot more first hand experience with legit Roti than I do. I don’t pick favorites, give me Roti or give me Naan and I will be double time excited about my curry!
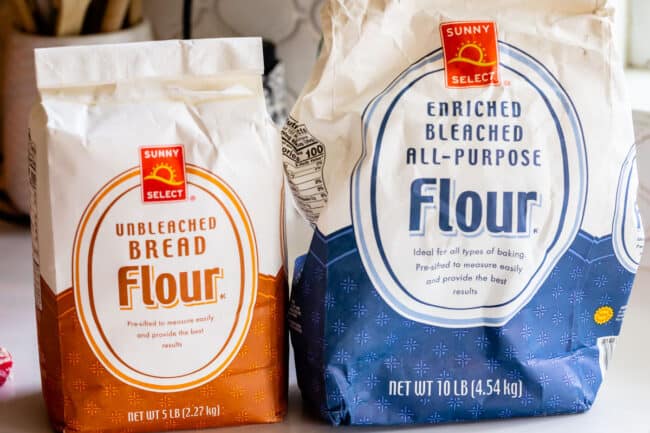
Bread flour. You can substitute all-purpose flour in a pinch, but your roti won’t be as chewy. More about flour choices below! Salt. I like to use kosher salt, but table salt is fine too. Butter. I use salted butter. Vegan variation: use oil! Water. I like to use warm water to make the dough nice and pliable.
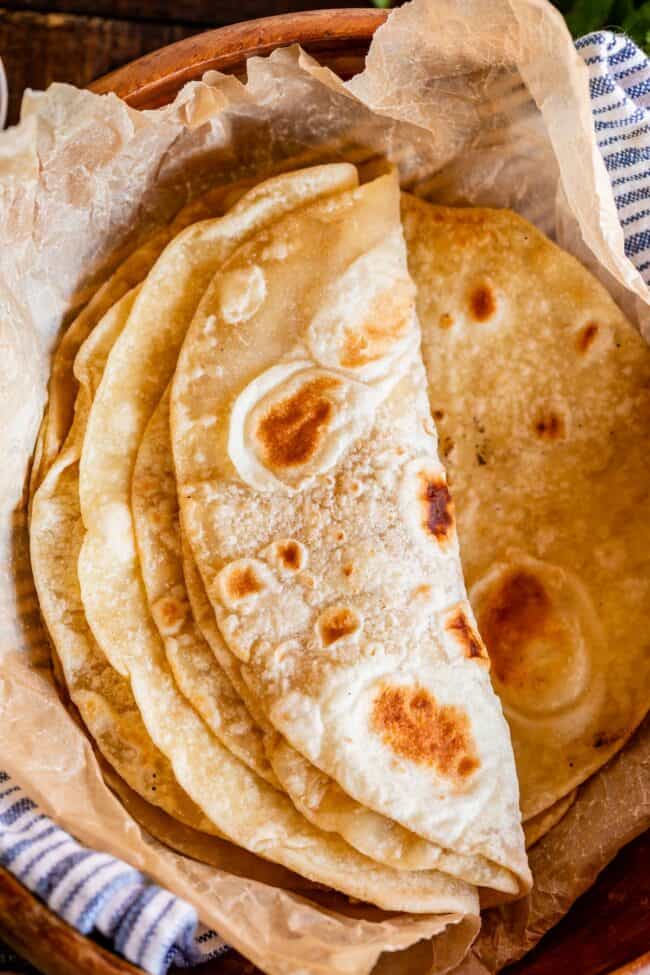
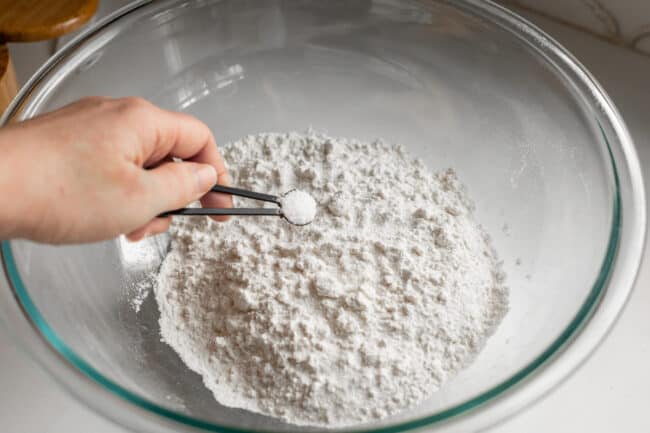
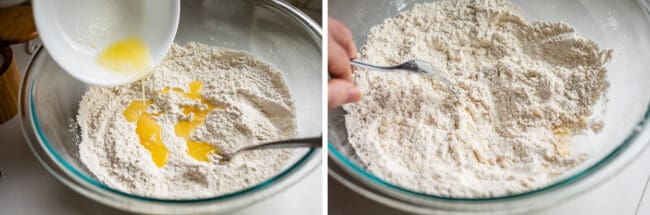
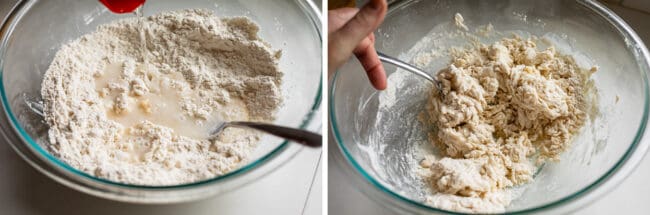
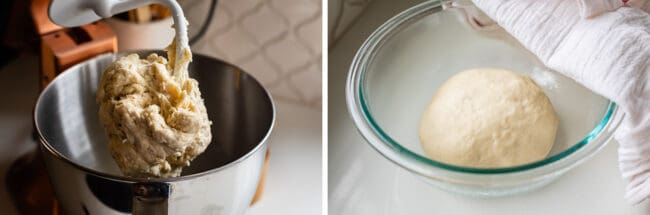
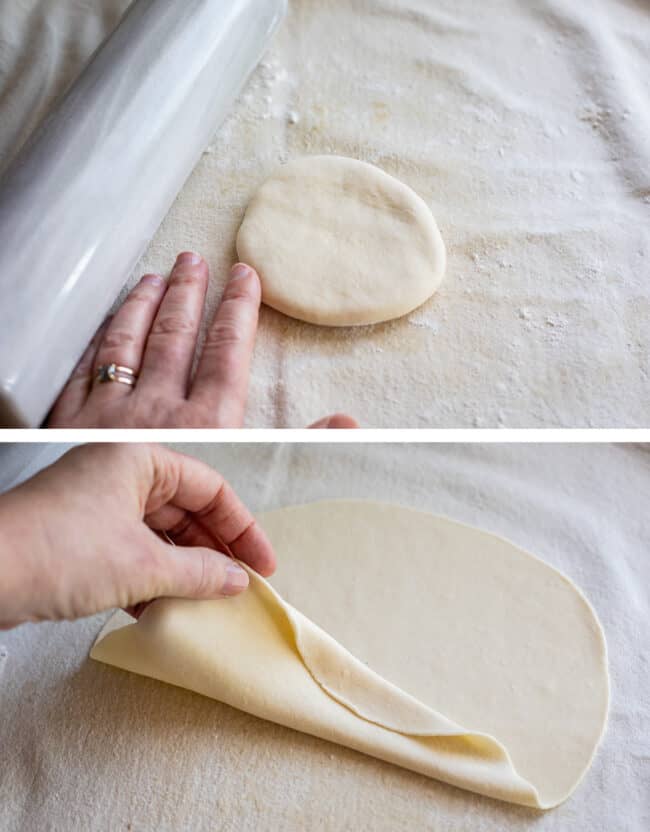
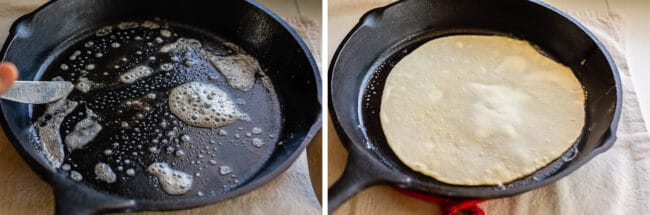
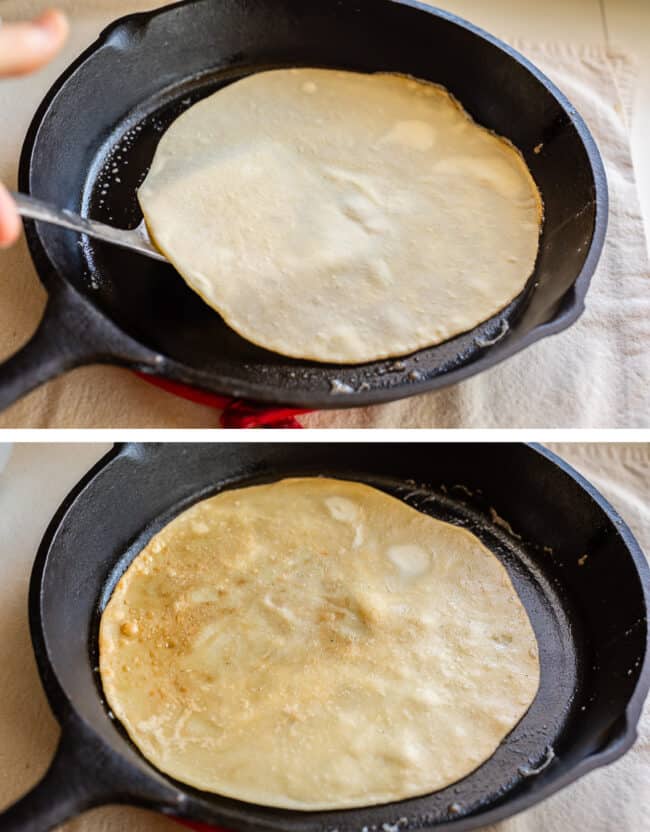
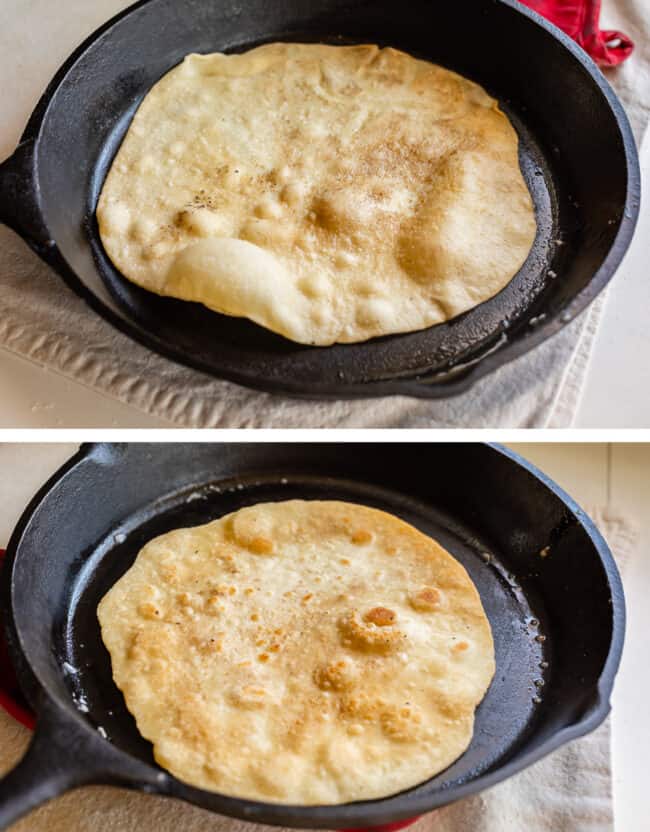
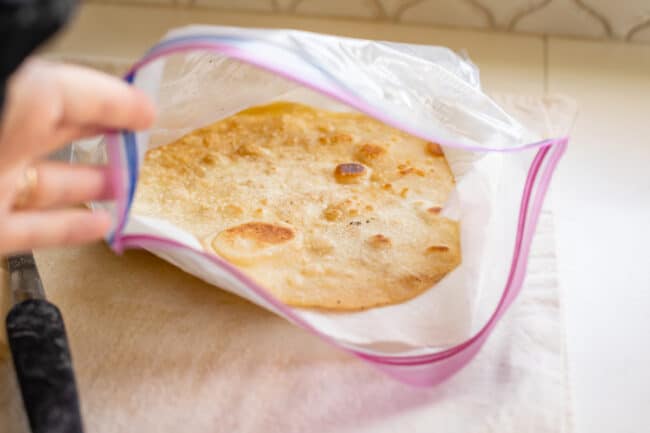
Since Atta is not a common ingredient where I live, I substitute bread flour. Bread flour has a high protein content just like Atta, and is much more pliable than the whole wheat flour options we have available around here. (If you use whole wheat flour, your roti will be very difficult to roll out, and will be tough instead of chewy.) Add some salt to your bread flour and whisk it together. Traditional roti is unsalted, but I’m sorry, I just can’t. Bread is just not worth the calories if there is no salt in it, haha. All the Florentines in Italy are coming for my head too. (Florentines are famous for not salting their bread.) Before we move on, a note about the flour you use: You can also use all-purpose flour. Since all-purpose doesn’t have as high protein content, your bread will be a little less chewy, but it will still be good. After whisking your flour and salt together, pour in about 2 tablespoons butter and cut it in with a fork. This makes your bread extra tender and adds great flavor! Oil or ghee will work fine too. Next add some warm water. Use the same fork to stir it all together until a dough forms. Knead for about 8 minutes. You can do it by hand or use a stand mixer. As you knead, all that protein in your flour is going to combine to form strands of gluten, making your dough nice and strong and able to be rolled out. Let the dough rest covered for about 20-45 minutes. It is not rising, as with yeast dough. Your dough is going to look exactly the same at the end of the rest time, and you are going to curse my name and hate me for wasting your time ;) But trust me! The rest time allows the gluten in your flour to relax after all that kneading, making your dough much easier to roll out. If you try rolling out your dough and it just keeps springing back to the same shape, rest it a while longer. The longer it rests, the easier it will be to roll out. Divide the dough into 6 pieces, and use your fingers to pinch them into smooth round balls. Take one piece and flatten it out into a disk with your fingers. Use a rolling pin to roll the dough out into a circle. See how thin it is? If you don’t roll it out thin, your bread won’t be as tender. I like to roll to about 8-9 inches. It’s okay if it’s not a perfect circle! Embrace it! Next, heat a skillet over medium or medium high heat. You will have to figure out what heat level is best on your own stove, to make it cook fast without burning. I like to use my cast iron skillet. When the pan is nice and hot, add about a teaspoon of butter to the pan and swirl it around. Carefully transfer your rolled out roti to the hot pan and then count for about 6-7 seconds. After a few seconds, carefully flip the roti with your fingers or a spatula. Add more butter if necessary. The bottom side is not cooked yet, we just wanted to coat it with butter so that it doesn’t dry out. Cook the roti for about 30-50 seconds. You will know it’s ready to flip when bubbles have formed on top, and the underside is browning. Flip the roti, adding more butter if necessary, and cook the second side just until brown spots appear, another 20-40 seconds. Now for the most important step: steaming. If you have plans to eat this roti within 30 seconds of it coming off the pan, perhaps over the kitchen sink with a rabid gleam in your eye, then feast away. However, if you are planning to serve this at dinner like a civilized human, there is going to be some wait time between coming off the pan and eating. If you leave your roti sitting out, it will get tough as it cools and even (gasp!!) start to get crackly. No, no!! Steaming is the answer, just like is done for tortillas. If you have a tortilla warmer, use it! I don’t have one, so I use a ziplock bag as a makeshift steamer. Place a paper towel in a large ziplock. Add your hot-off-the-pan roti on top of the paper towel. Top with another paper towel and quickly zip up the bag. When you add a second roti, place it directly on top of the first one, with no paper towels in between. They will steam each other and get all cozy and soft. For frying, use an oil that has a high smoke point so that you don’t set off your smoke alarm. Canola oil, vegetable oil, or LIGHT olive oil will all work fine. (Light olive oil means it has a light olive taste, unlike extra virgin. Wouldn’t it be nice if it meant light in calories? It’s definitely not, haha.) If you have leftover roti, store in that same paper towel-lined ziplock bag. There is no need to refrigerate. Store it at room temperature for 1-3 days. To reheat, you can either let thaw in the bag at room temperature, then reheat gently in the microwave (don’t overdo it or they will get tough.) Or you can re-grill the roti straight from frozen, using the same method as the first time.
Check out some of my other top recipes!


![]()