“Making a lattice pie crust is a lot easier than you think! Easy as pie, they say!” Kind of like how it’s a lot easier to eat kale chips all day instead of Cheetos. Lies. It’s all a pack of lies, my friend.
I’m a pretty experienced baker and have made hundreds of pies, and I still struggle with the elusive lattice. Maybe it’s the Food Charlatan coming out in me. But listen. Sometimes you want to impress. Sometimes you want to get your bake on. Sometimes you just want people to say, “Wow, you really made that??” It’s a good feeling! I was researching lattice pies and found instructions from Joy the Baker. Here’s how she says to do it: Step one: hold your breath. Step two: cross your fingers. Step three: close your eyes tightly. Step four: hope for the best. I like your style, Joy! Let’s get started!
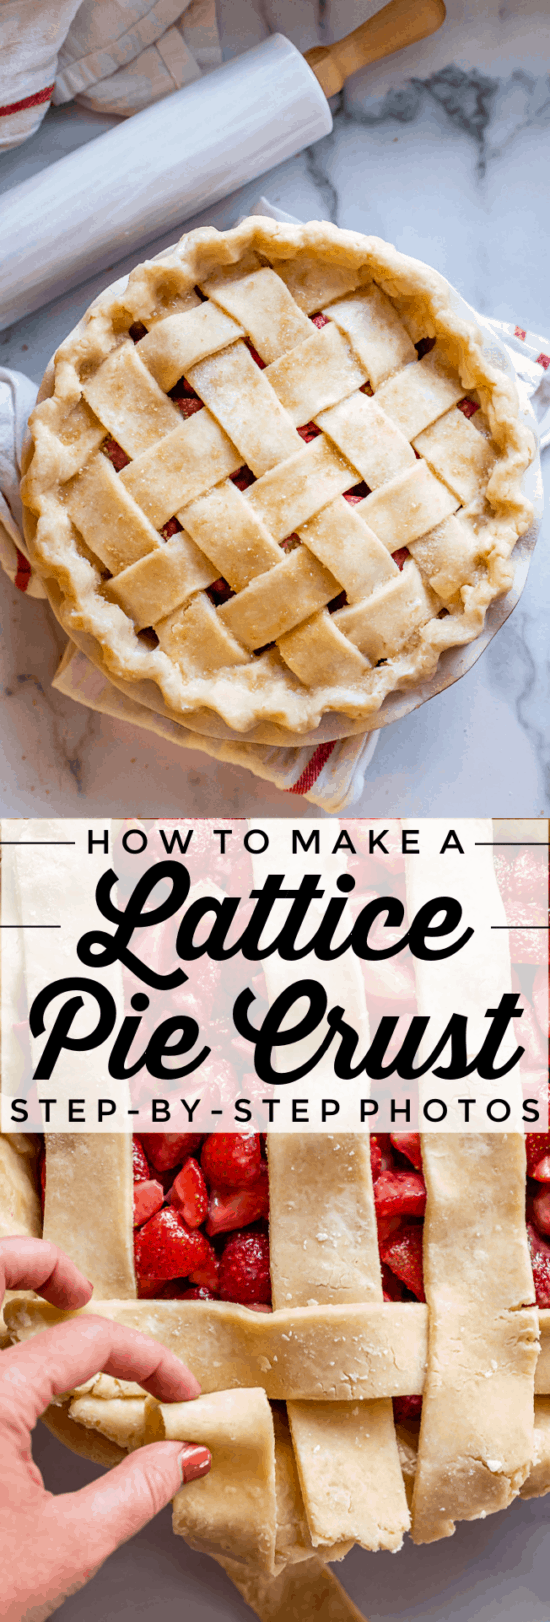
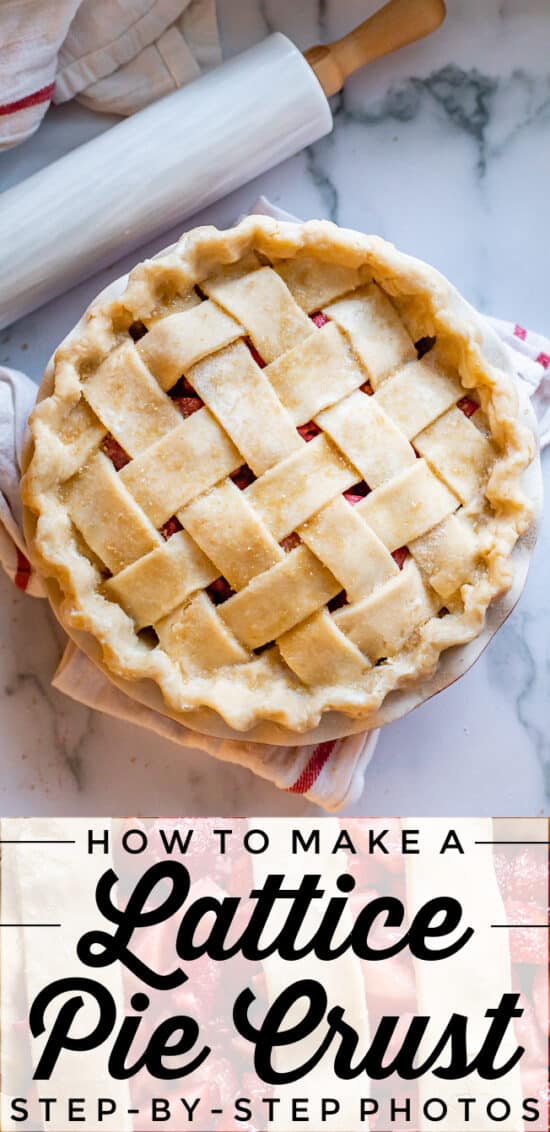
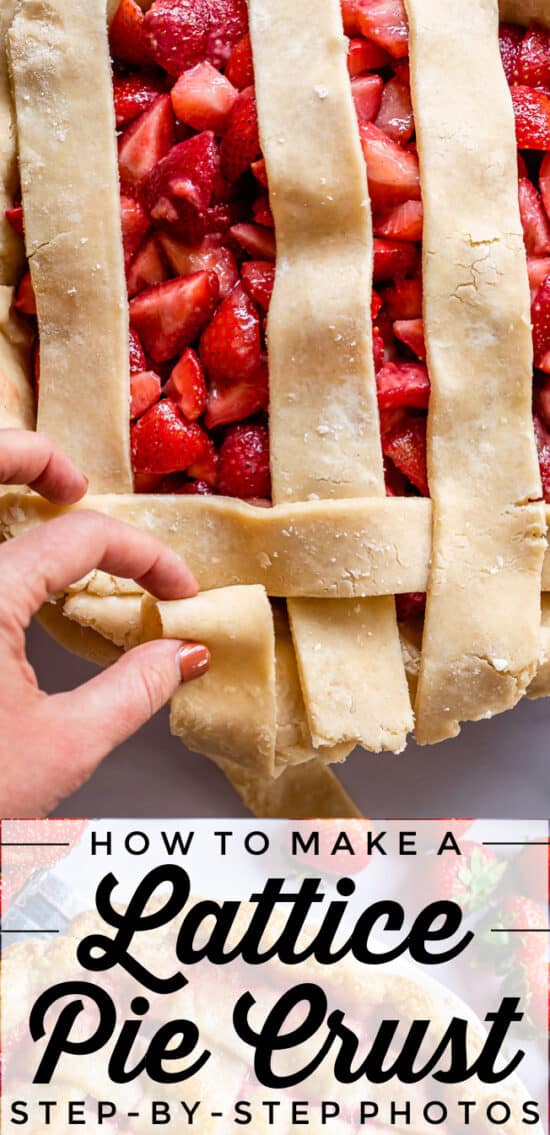
How to Make a Lattice Pie Crust
The first step is to make make a really delicious pie dough. Check out my post for How to Make Flaky Pie Crust for all the details!
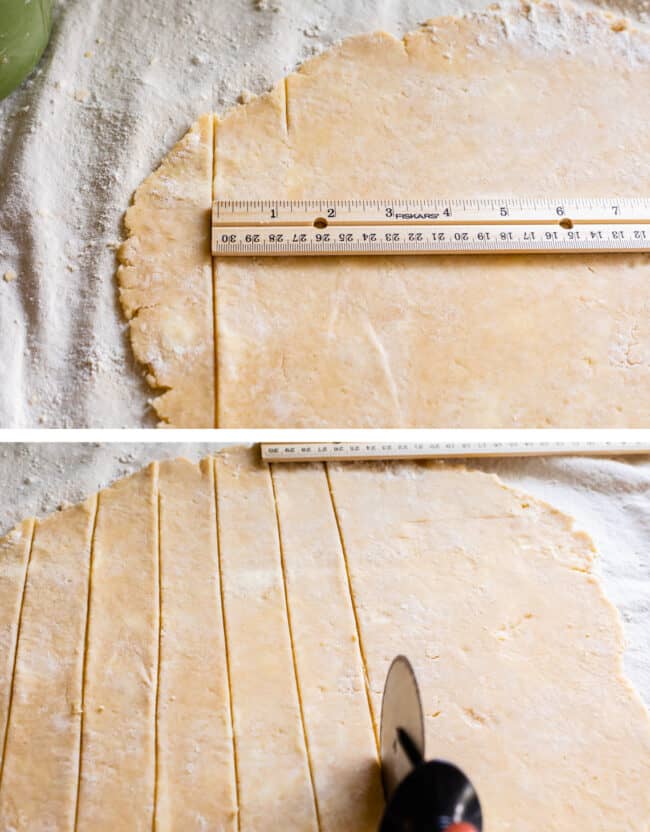
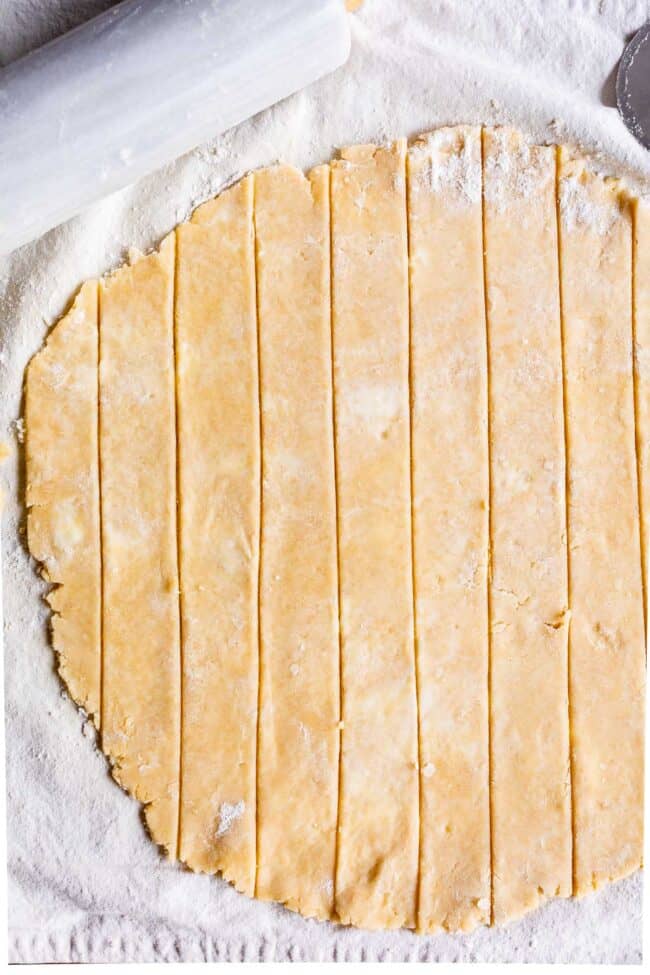
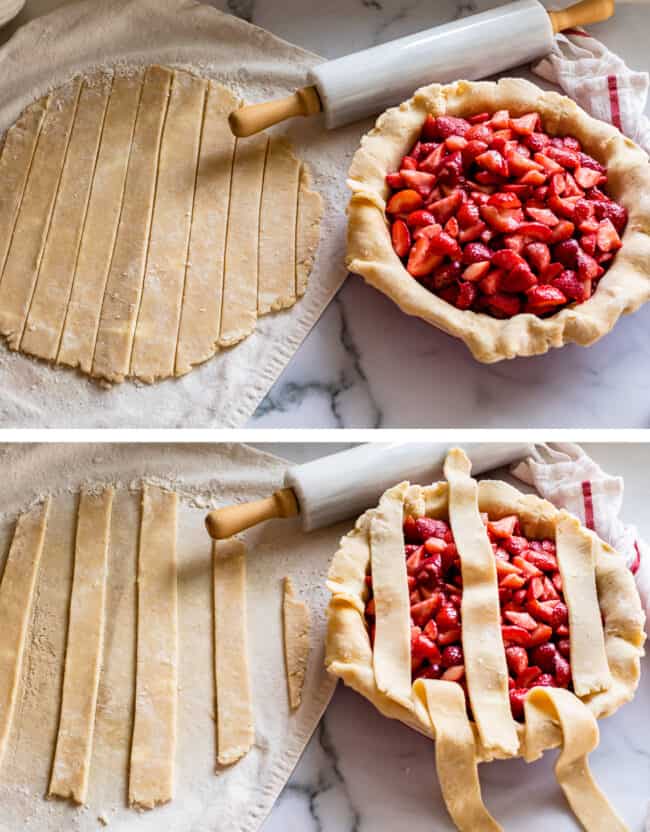
Start by rolling out your chilled dough to about 10-11 inches. You don’t want to roll it out too thin, or the strips will melt in your fingers and be really difficult to manage. Use a pizza cutter rolled in a bit of flour so that it doesn’t stick. You can make your strips as wide or as thin as you like! I made mine about 1 and 1/4 inches wide. Take some time to clear out a space in your fridge or freezer, if possible. If your dough starts to get soft and warm on you at any point, toss the whole thing in to chill for a few minutes before continuing. This is why I love to roll out pie crusts on pastry cloth. Rolling out on parchment paper works just as well.
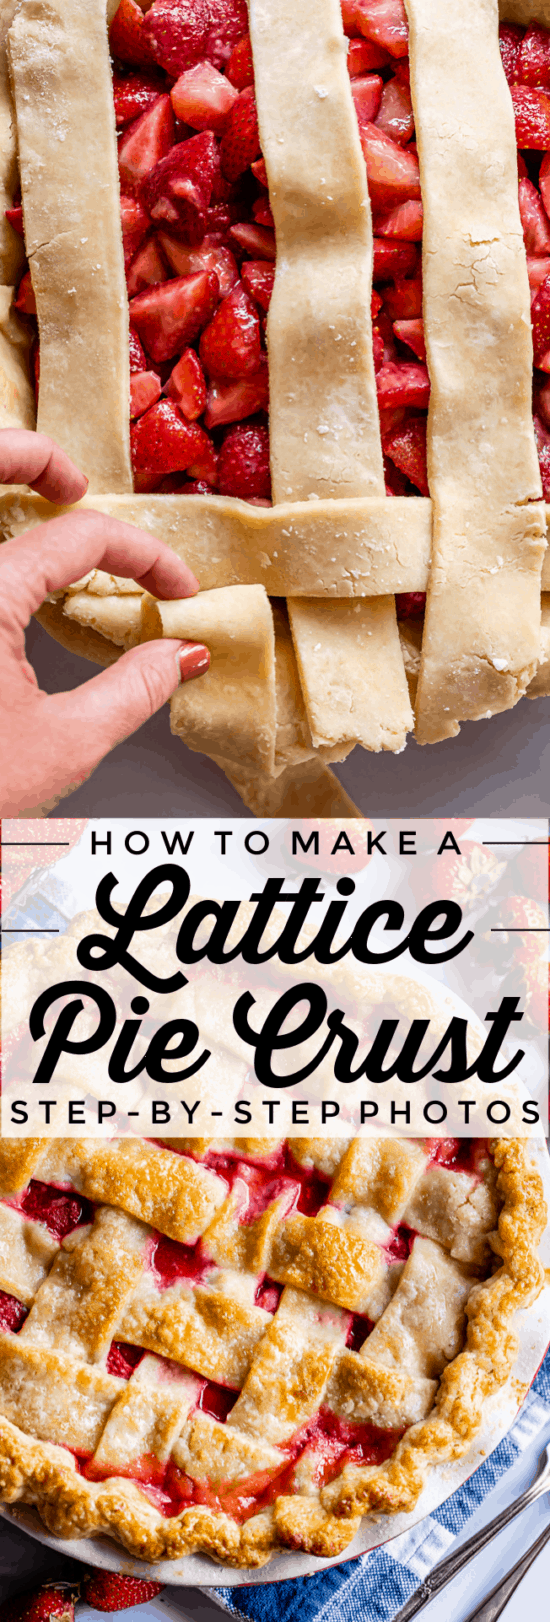
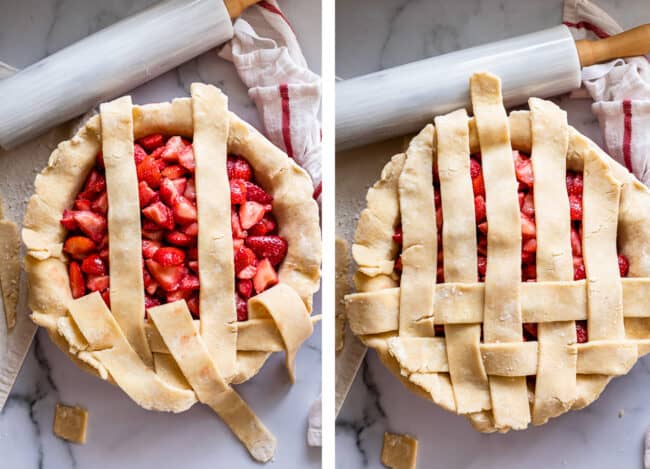
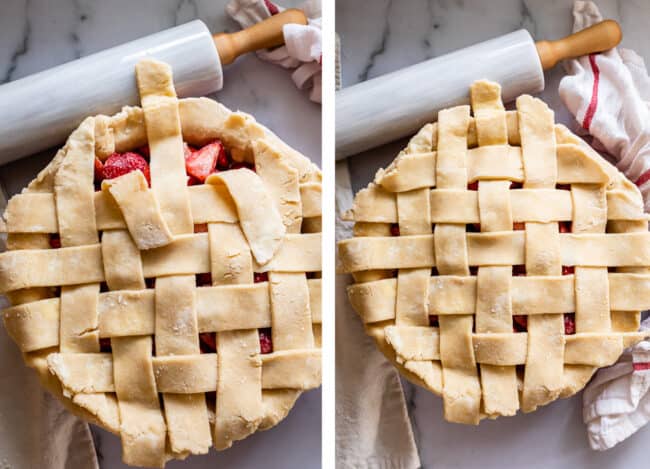
Fill your pie pan with filling. It’s nearly impossible to create a lattice pie with warm pie filling, like cooked apple pie filling. You must chill the filling until it is at room temperature at a minimum; cold or frozen is even better to help your lattice strips stay cold as you maneuver them. Annoying step, I know, but you are the one who decided to make a lattice crust. You knew what you were getting into, Snow White. Take every other strip of the pie dough and lay it like the photo above. One should go all the way across, one folded back completely, the next one laid down, the next folded back.
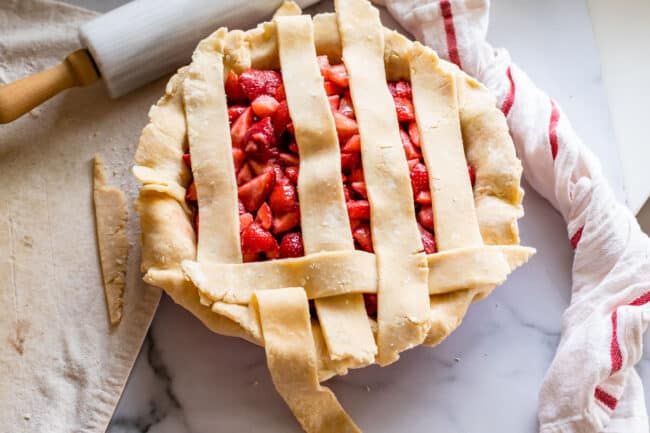
Take an edge strip of pie dough and lay it perpendicular to the other strips, right up against the edge. Pretend I took a photo before I replaced that strip of dough on the right to it’s spot.
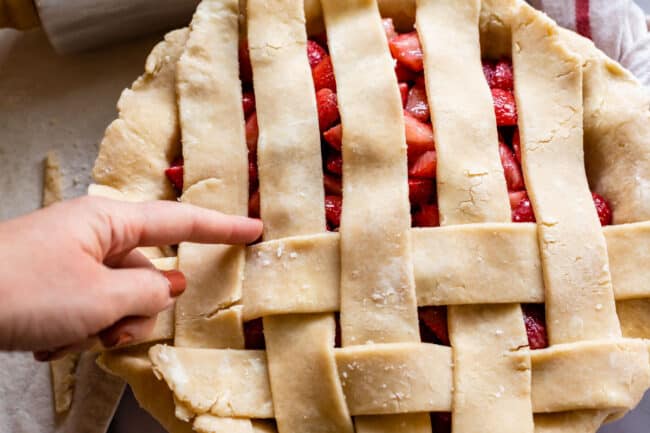
Take a moment to tuck this first perpendicular strip underneath, so that it’s nestled right up against the edge of the pie. Replace the folded back strips to their spots across the pie.
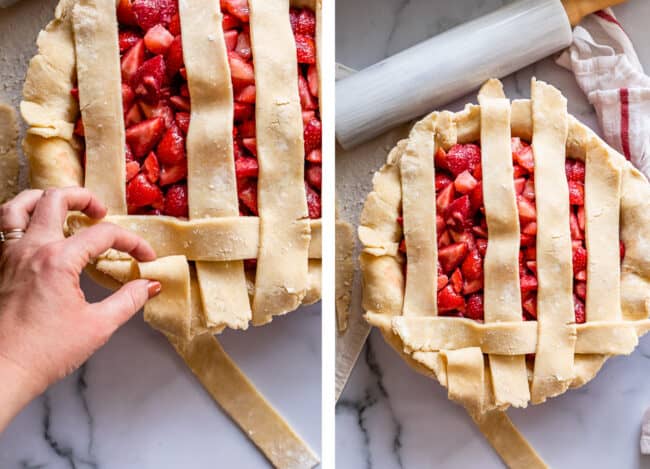
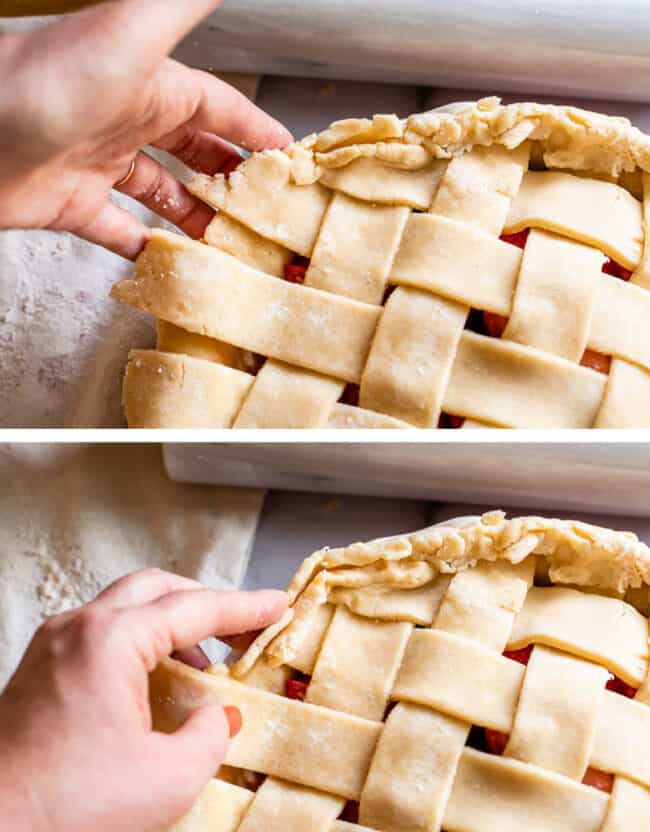
Next, fold back every OTHER strip of dough. Fold back the strips that are underneath (the one I’m pointing at). Remember, if you get a tear like I have here, just use a finger dipped in ice water to patch it up. Don’t cry. Put the whole thing in the freezer for a minute if you get frustrated.
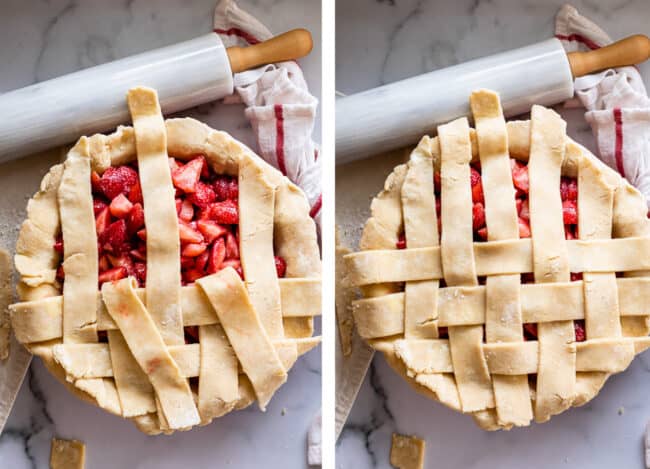
Once all the underneath-strips are folded back, place the next strip of dough across, tucking it a little under the folded back strips if necessary. Replace the folded back strips to their normal spots.
Fold back the strips of pie dough that are underneath.
Place the next strip of perpendicular pie dough, then replace the folded back strips to their normal spots. (Eric walked in while I was editing this photo and did a double take because it totally looks like this pie is giving you the bird. I was thinking the same thing!! Ha!)
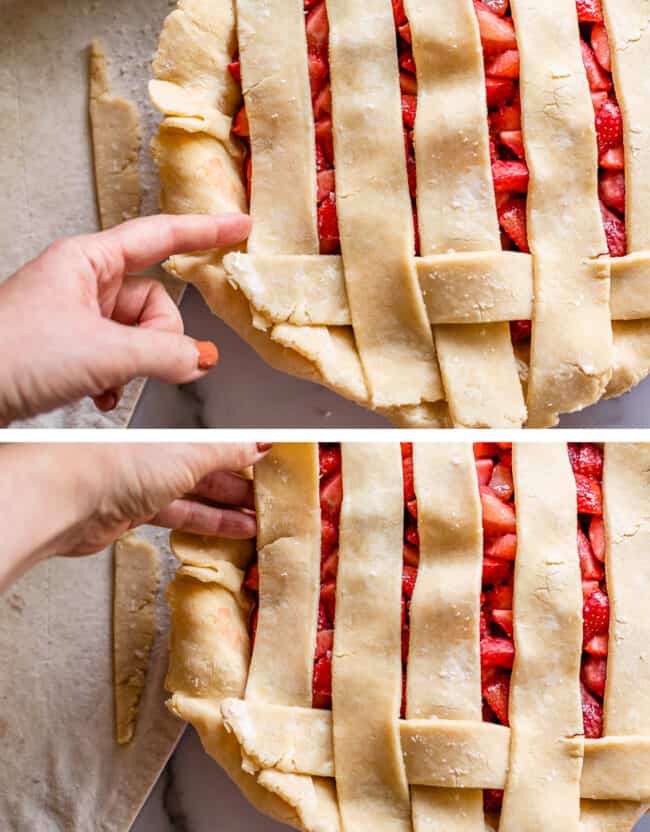
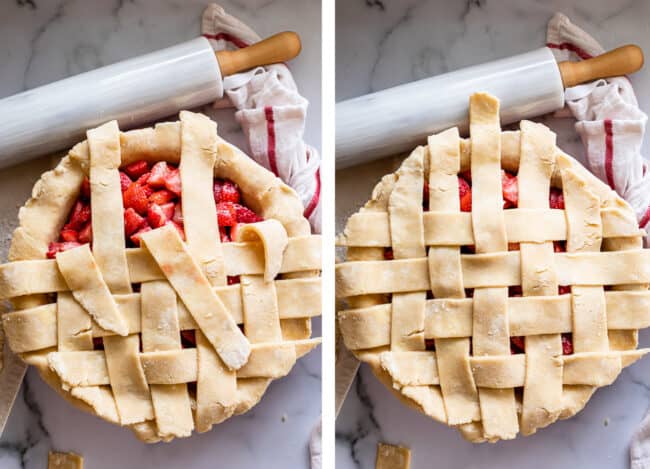
Fold back the strips underneath…
Place the next strip of perpendicular pie dough.
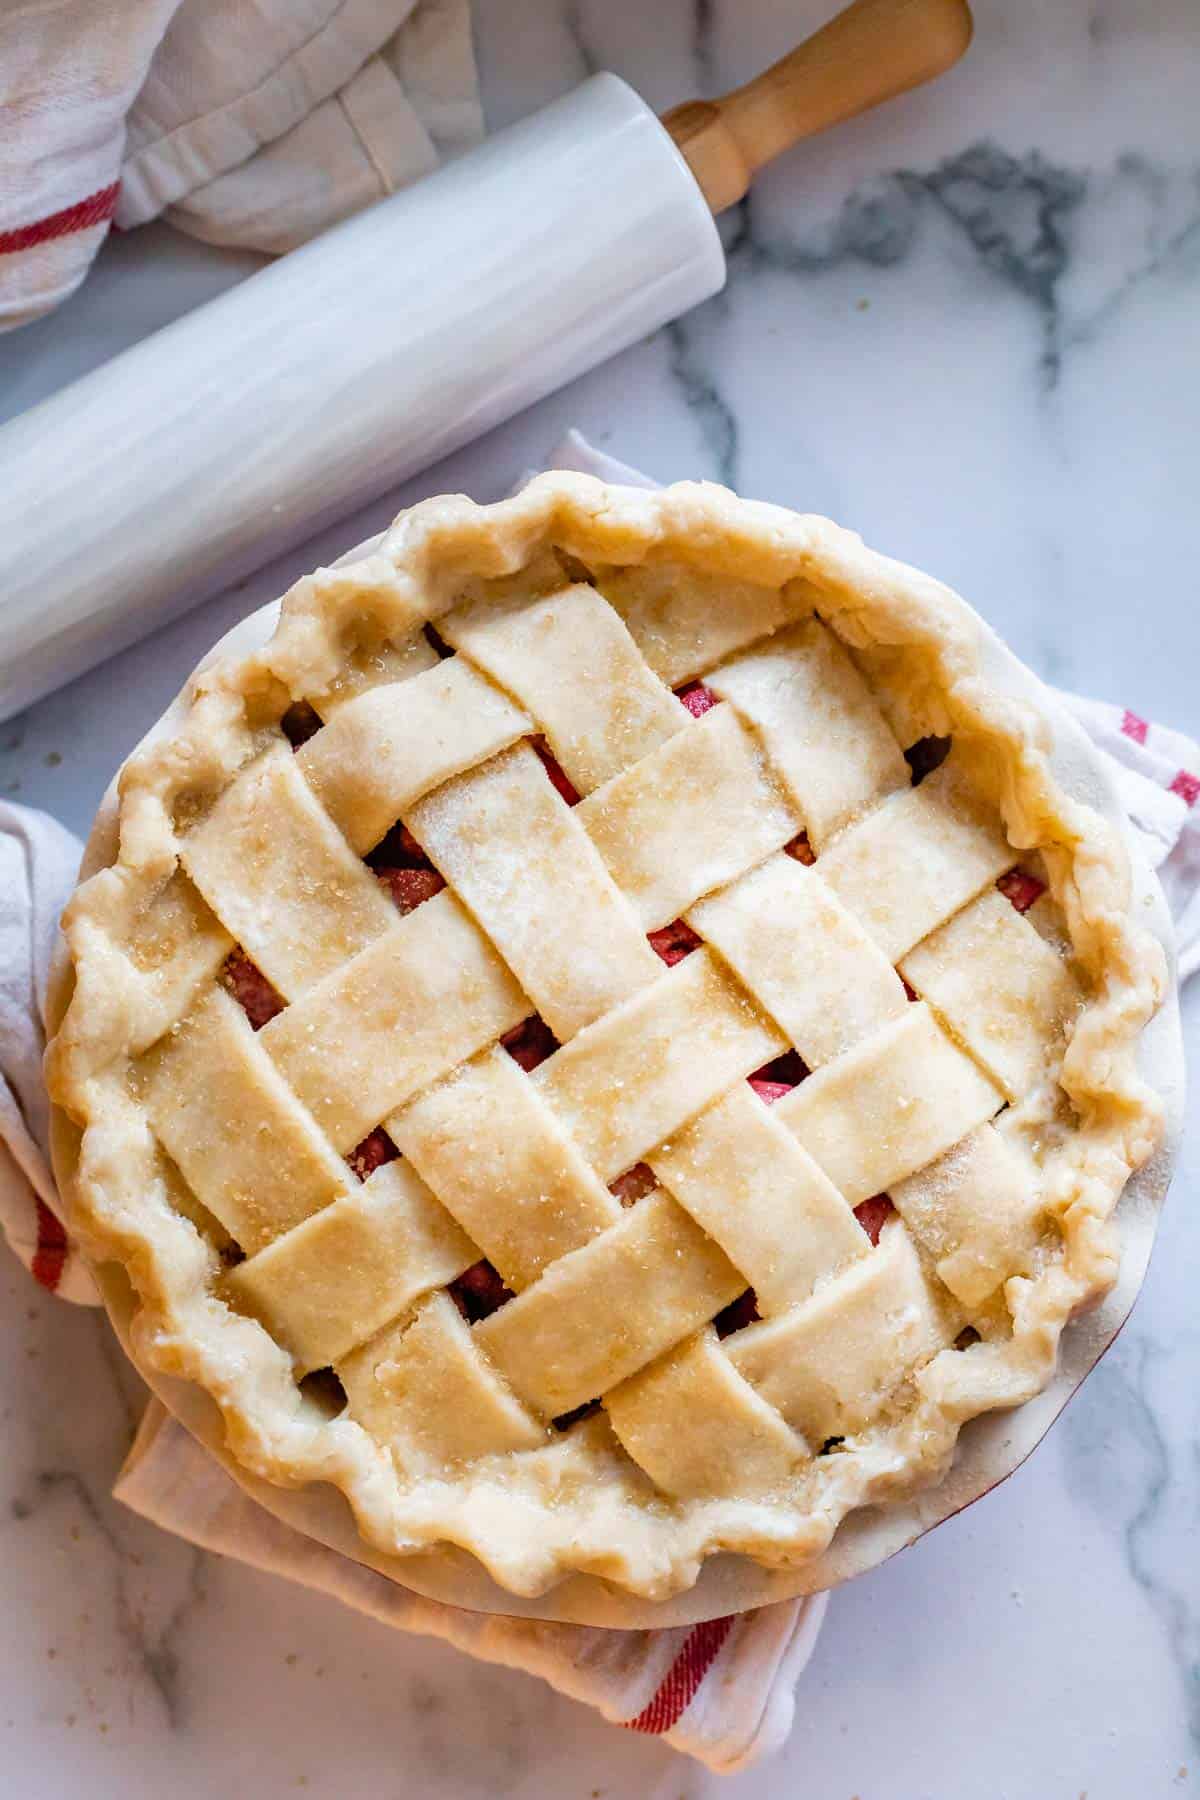
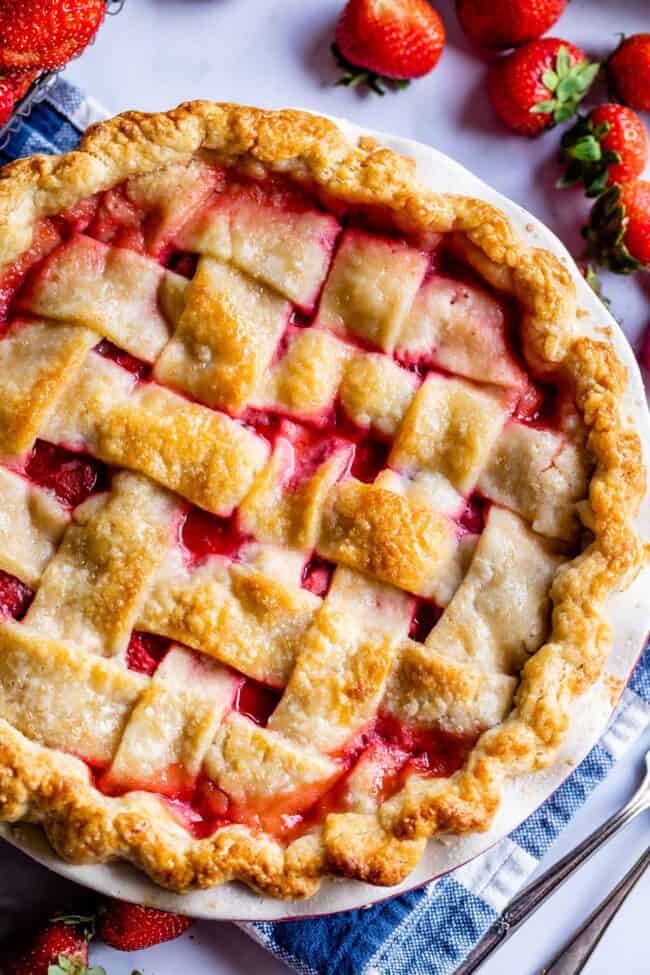
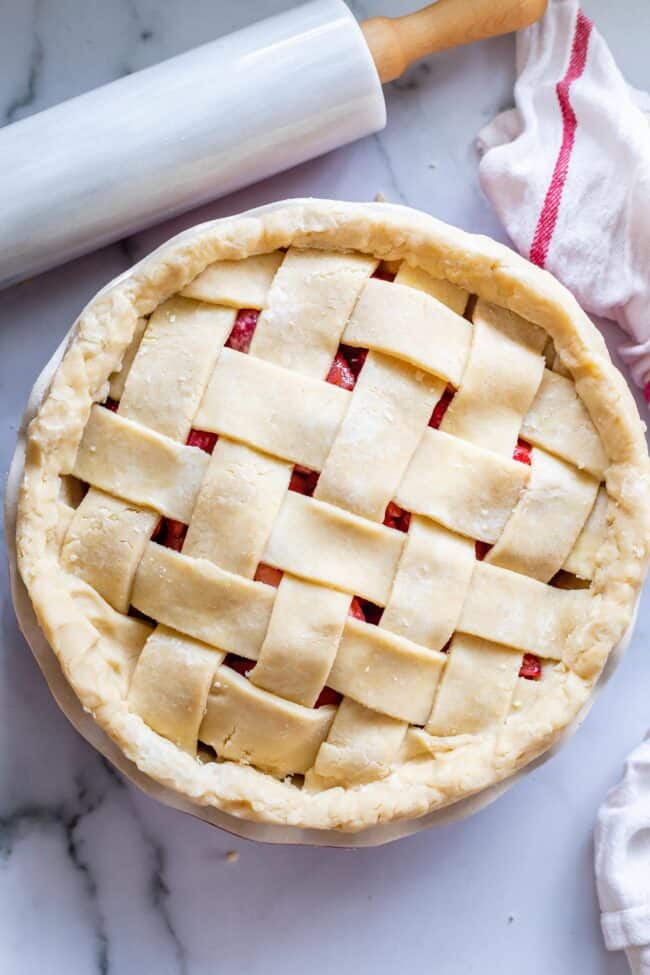
Fold back the underneath strips one last time, and add the last strip of dough, replacing everything afterward. And voila! A perfectly weaved lattice pie crust! You did it!
How do you crimp a lattice pie crust?
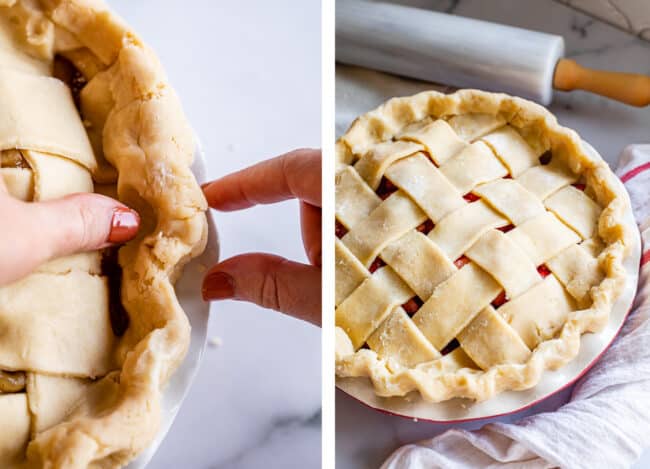
But what about the edges? Some people will tell you to trim the edges. Heresy, I say. You worked way too hard on this pie dough to just toss it out like yesterday’s jam. (IT Crowd reference? Anyone? Anyone???) I prefer to just fold the longer pieces of lattice back into the edge of the dough. To shape the crust, I like to fold the edges of my pie up and over, like so:
You can fold the edges underneath if you prefer. You can see that the pie dough is looking pretty crumbly and crackly and sad. Pretend it’s play dough and fold and mold it back together so that it is smooth, like this:
Once your crust is nice and smooth, use your fingers or knuckles (or a fork!) to crimp the edges of the dough however you want. I like to keep it simple by pressing my thumb in between two fingers, like so:
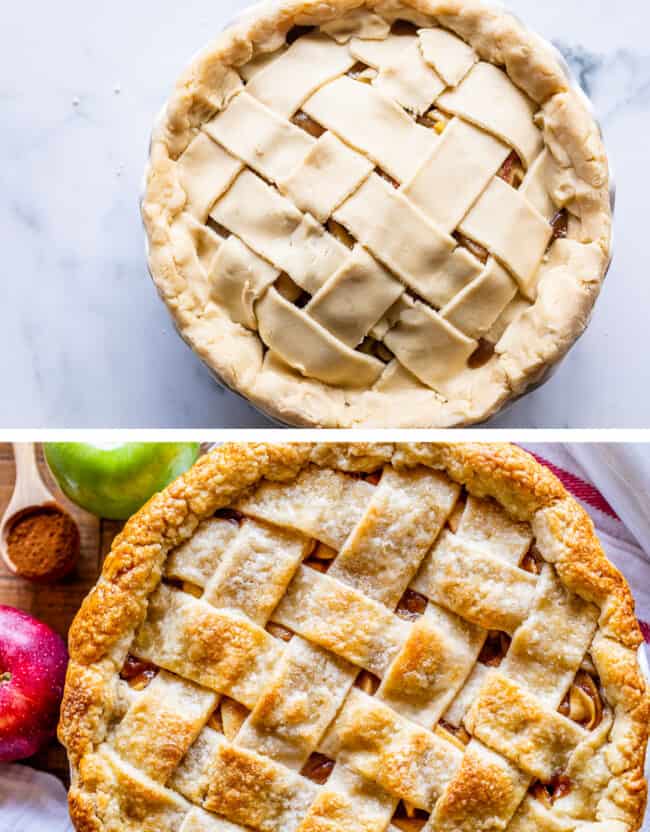
Now it’s time to bake! Don’t forget to brush with egg or milk (or both) and sprinkle with sugar. See my post for How to Make Flaky Pie Crust for details about baking your pie crust.
Done is better than perfect
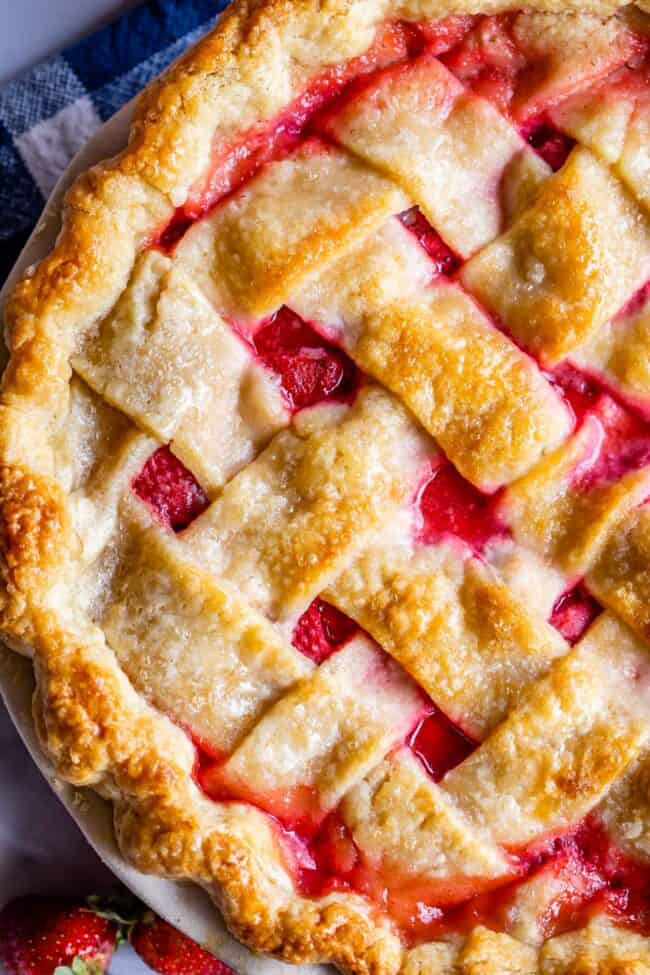
Here is my first lattice that I made for this post. Not too bad, right? I was super frustrated that the lattice strips kept tearing. But I learned how to patch them up a bit.
I’m showing you pictures of this first “failure” lattice to show you that even if it’s not perfect, it still usually looks great once you bake it up, and no one will be the wiser that you were about to tear your hair out trying to get all these dough strips weaved together. Done is better than perfect, and I promise, anyone you serve your pie to is going to be very impressed that you did a lattice crust! Well done! Here is the recipe for my favorite pie crust: How to Make Flaky Pie Crust (Step by Step) « it’s so flavorful and easy to work with! How to Blind Bake a Pie Crust « Blind baked pies are what you need for cream pies. They are so easy!
Double crust pies to make with a latticed crust:
Cranberry Custard Pie « This is one of my favorite pies to make during the holidays! Rhubarb Custard Pie « Probably my favorite pie of all time. No lie. Rhubarb, you precious thing you. Cranberry Cherry Pie « cherry pie filling with cranberries. What could be better than this sweet tart combo? Apple Pie « This is the only double crust apple pie I will eat. So good! Cherry Pie for 4th of July! « It’s not summer without cherry pie. Blackberry Pie « my mom’s recipe. I probably ate this more than any other pie growing up! Baked Strawberry Pie « The one in all these lattice pictures. Recipe coming soon :) Blueberry Pie Recipe from Natasha’s Kitchen Four Berry Pie from FoodieCrush
You can lattice savory pies too!
Classic Double Crust Chicken Pot Pie « The best comfort food out there, I say! Roast Beef, Carrot, and Creamy Potato Pie « It’s like a roast beef dinner, all wrapped up in a pie crust. YUM! Beef Pot Pie from Good Dinner Mom
Here is


![]()