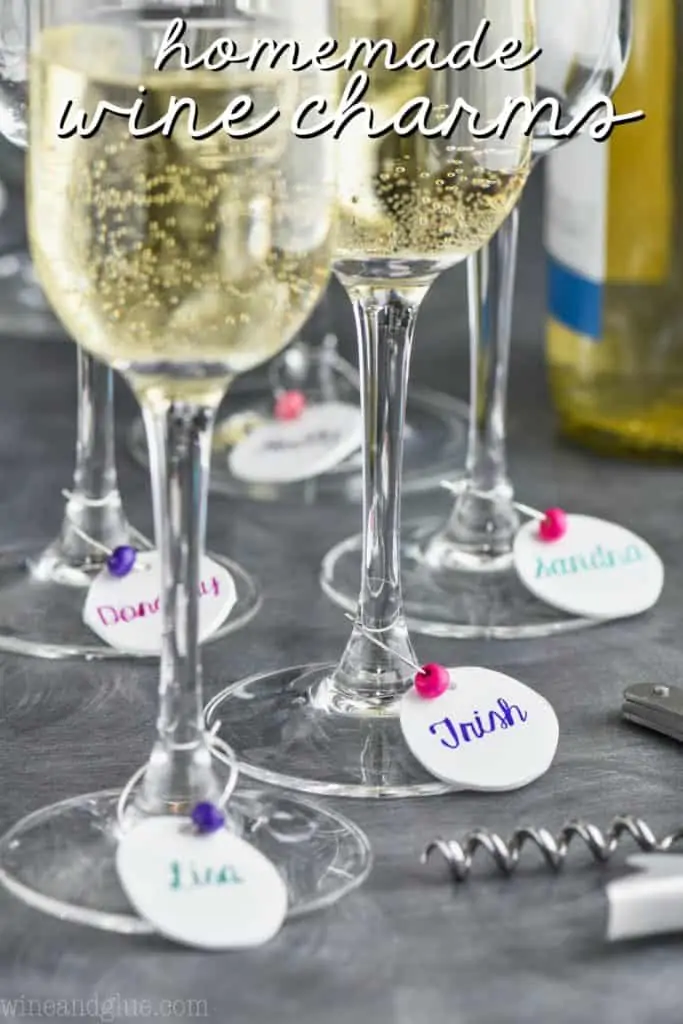
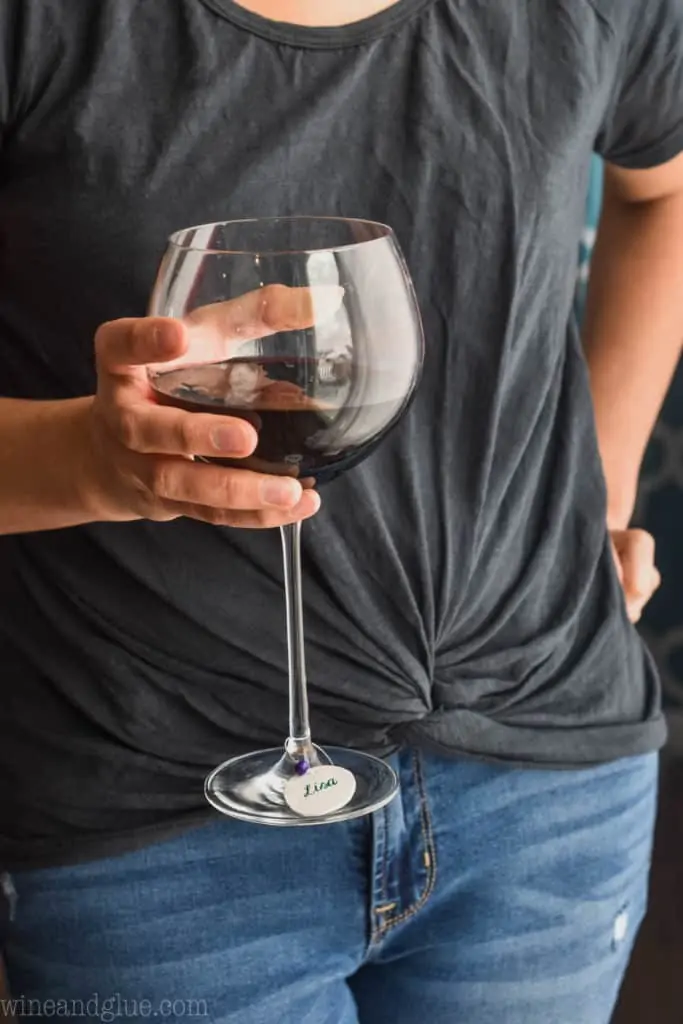
You Guuuuuuuuys! It has been WAY too long since I have shared a craft with you! But happily, I have one for you today that I know you are going to love! Homemade Wine Charms! One of the things that I love most about this project is that they are personalized! I put some (just some) of the names of friends I love splitting a bottle with on them. I thought they would make a perfect gift! Can’t you just imagine a book club with some of these? And obviously, by book club, I mean some of your favorite friends getting together pretending they read a book but actually just drinking wine together. These are so fun to make! They start with Shrinky Dinks paper! Did you guys know that you can just buy whole sheets of it?? I know! It’s so fun to play with. And if you don’t feel like tracing yours (my method shown here) you can even buy Printable Shrinky Dinks paper and just print out what you want them to look like!
WHAT DO I NEED TO MAKE WINE CHARMS?
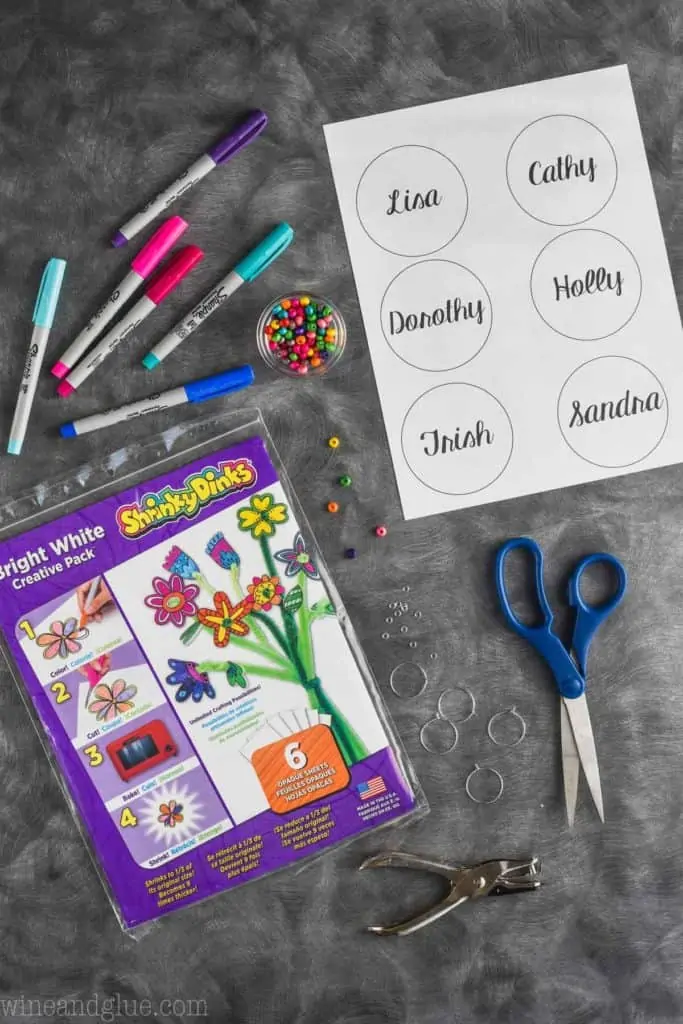
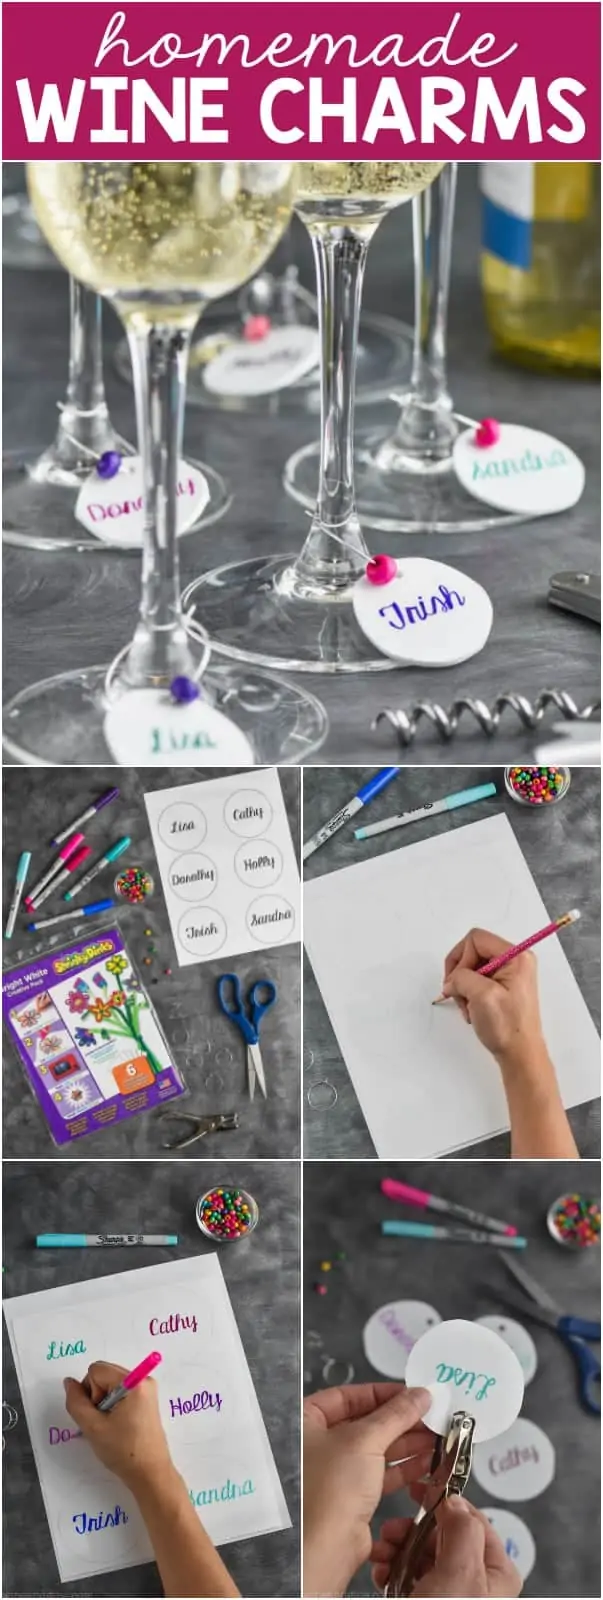
Shrink Dinks paper scissors hole punch Sharpie markers wine charm rings beads baking sheet and aluminum foil
HOW TO MAKE DIY WINE CHARMS
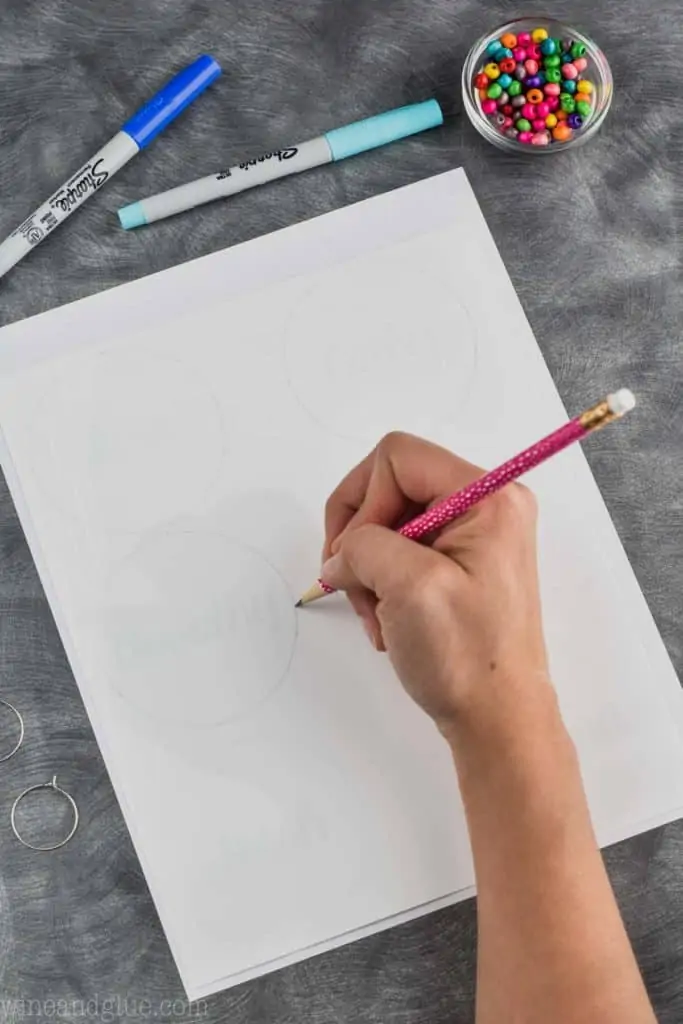
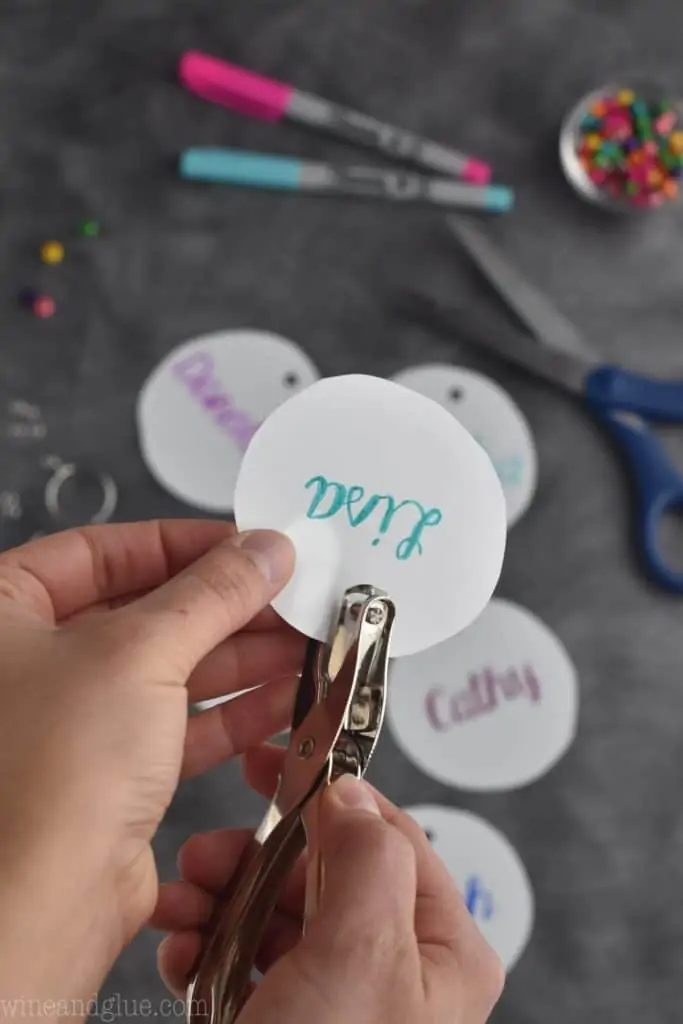
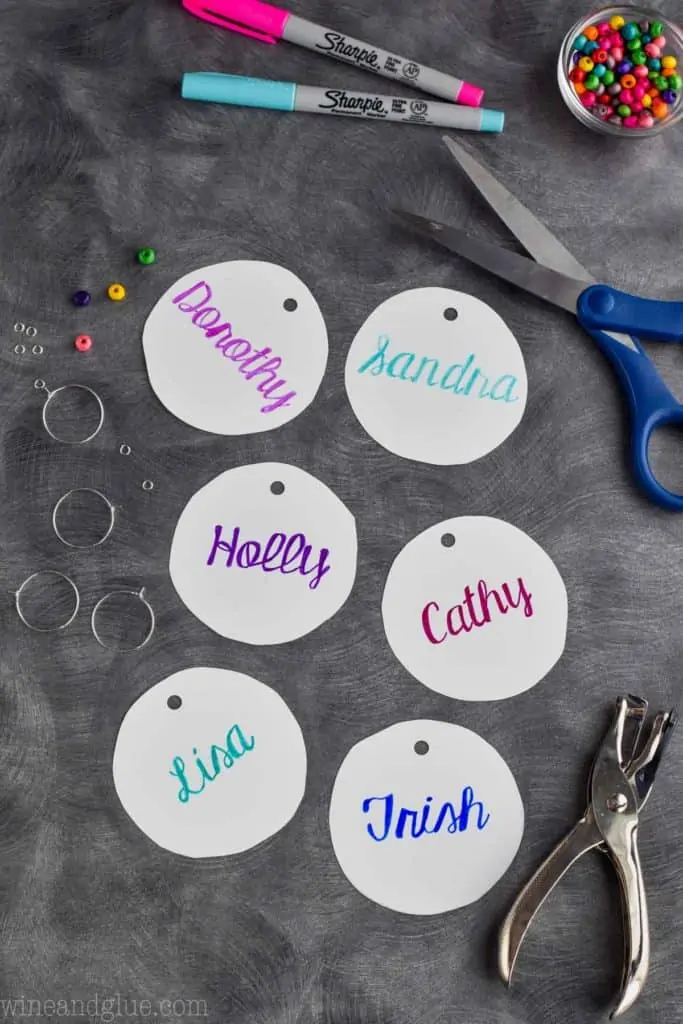
Trace the Circles with Pencil You don’t really need to be perfect here. And it does help to tape the Shrinky Dinks paper to the template so nothing shifts. Additionally, as I mentioned above, if you want to skip the printing out a template and tracing, you could just get some printable Shrinky Dinks paper and print out what you want them to look like! Trace the Names with Sharpie Markers As I mentioned above, you don’t have to be a perfectionist here. As you can see in the photo above, the names look pretty good, but they are definitely not perfect. As it gets shrunken down, they look a lot more perfect.
Alternatives to Name Charms
Additionally, you could do names but it would also be fun to do other things! You could do:
city names authors & book titles funny words nick names types of wine
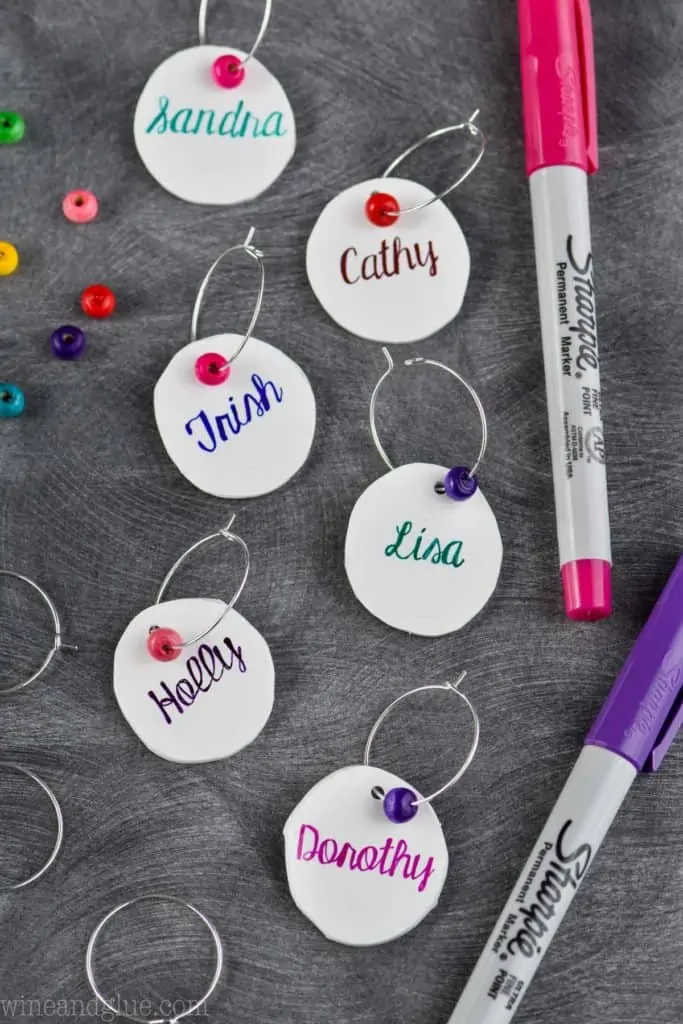
Cut Out the Circles and Punch a Hole in Them As mentioned above, you want to cut the circles out as perfectly as you can. As they shrink, the uneven circles really show up. Definitely don’t forget to punch that hole in them! Now they are ready to go in the oven! Just pop them in and keep an eye on them. If they start to flip in on themselves you want to pull them out and pull them apart. Otherwise they will stay stuck to themselves after cooking.
TIPS TO MAKING SURE THESE HOMEMADE WINE CHARMS WORK
All of these tips are mentioned above within the post, but if you are like me and super eager to start a craft, a list of bullet points might be helpful.
If you don’t feel like tracing, print out what you want your wine charms to look like with this printer paper. Don’t worry if your tracing isn’t perfect. Do worry if your circles aren’t perfect. (See photo above.) While cooking, if your wine charms start to flip in on themselves you want to pull them out and pull them apart. Otherwise they will stay stuck to themselves after cooking.
Enjoy friends!
Watch me make Homemade Wine Charms