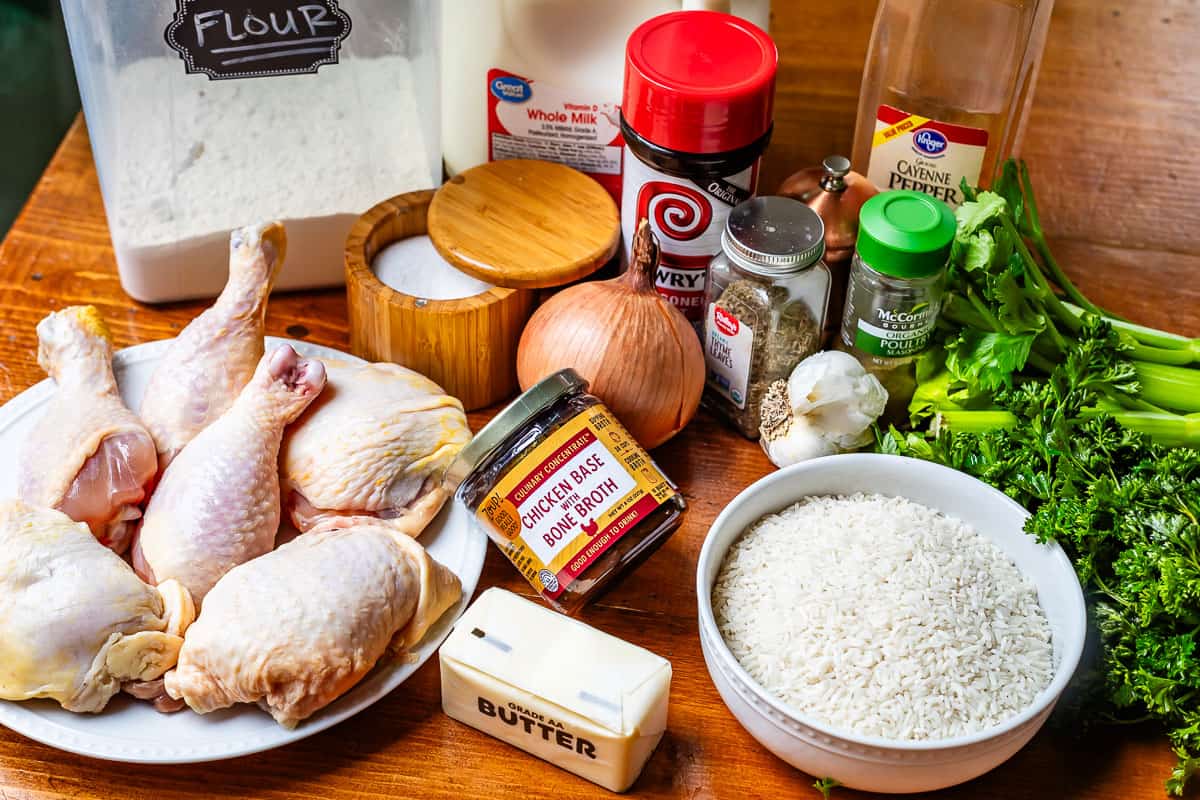
Chicken and rice casserole recipe ingredients
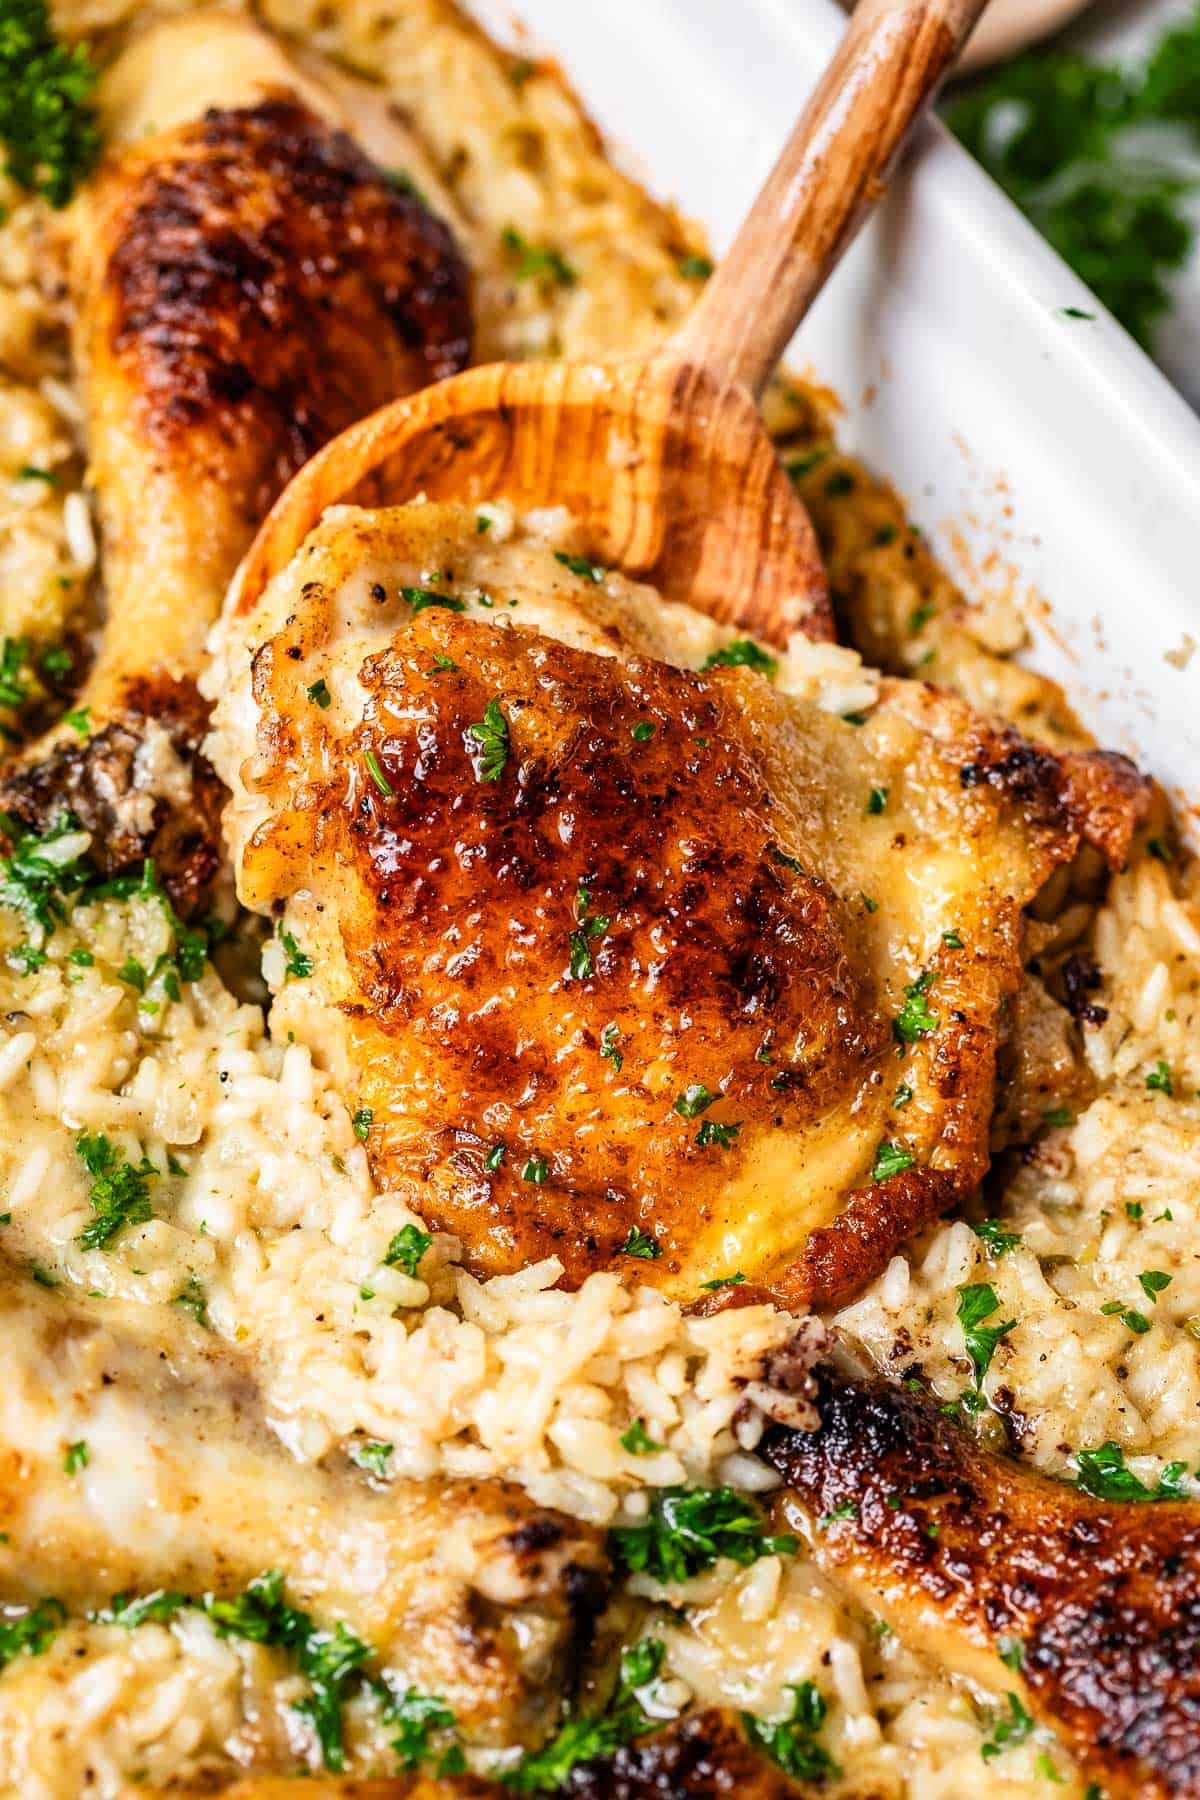
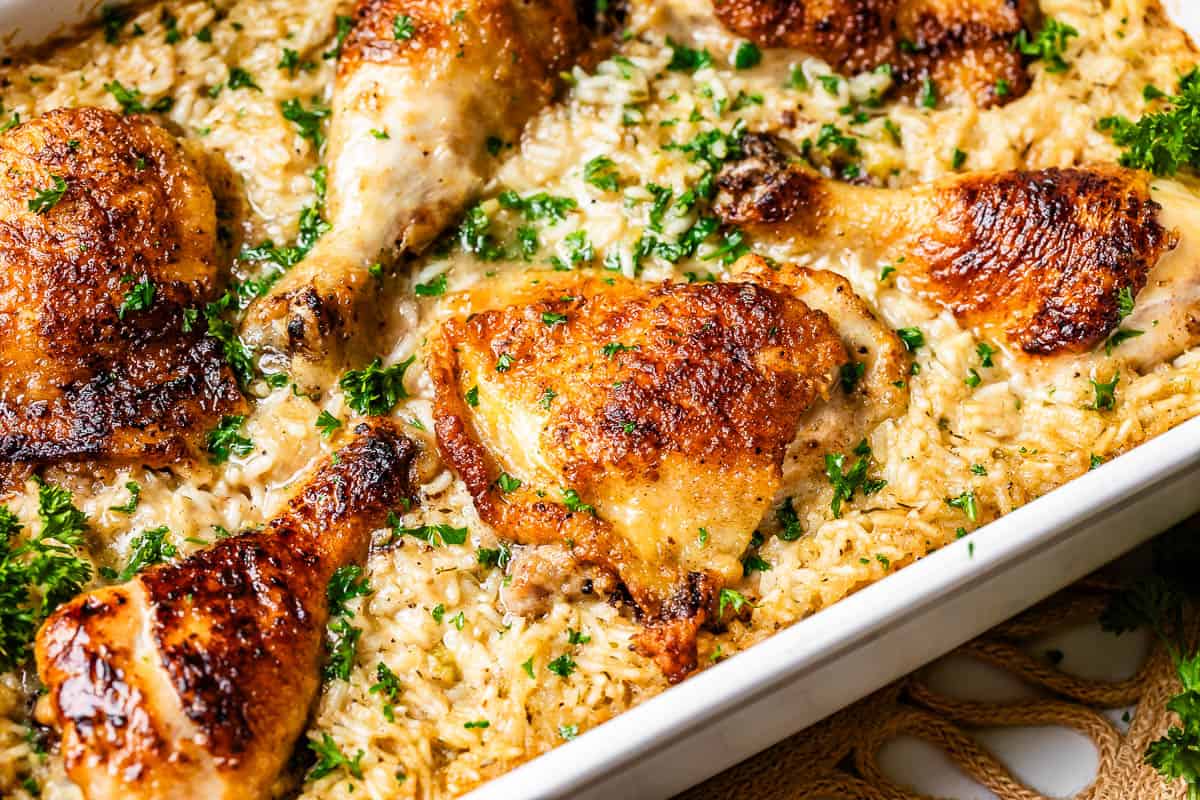
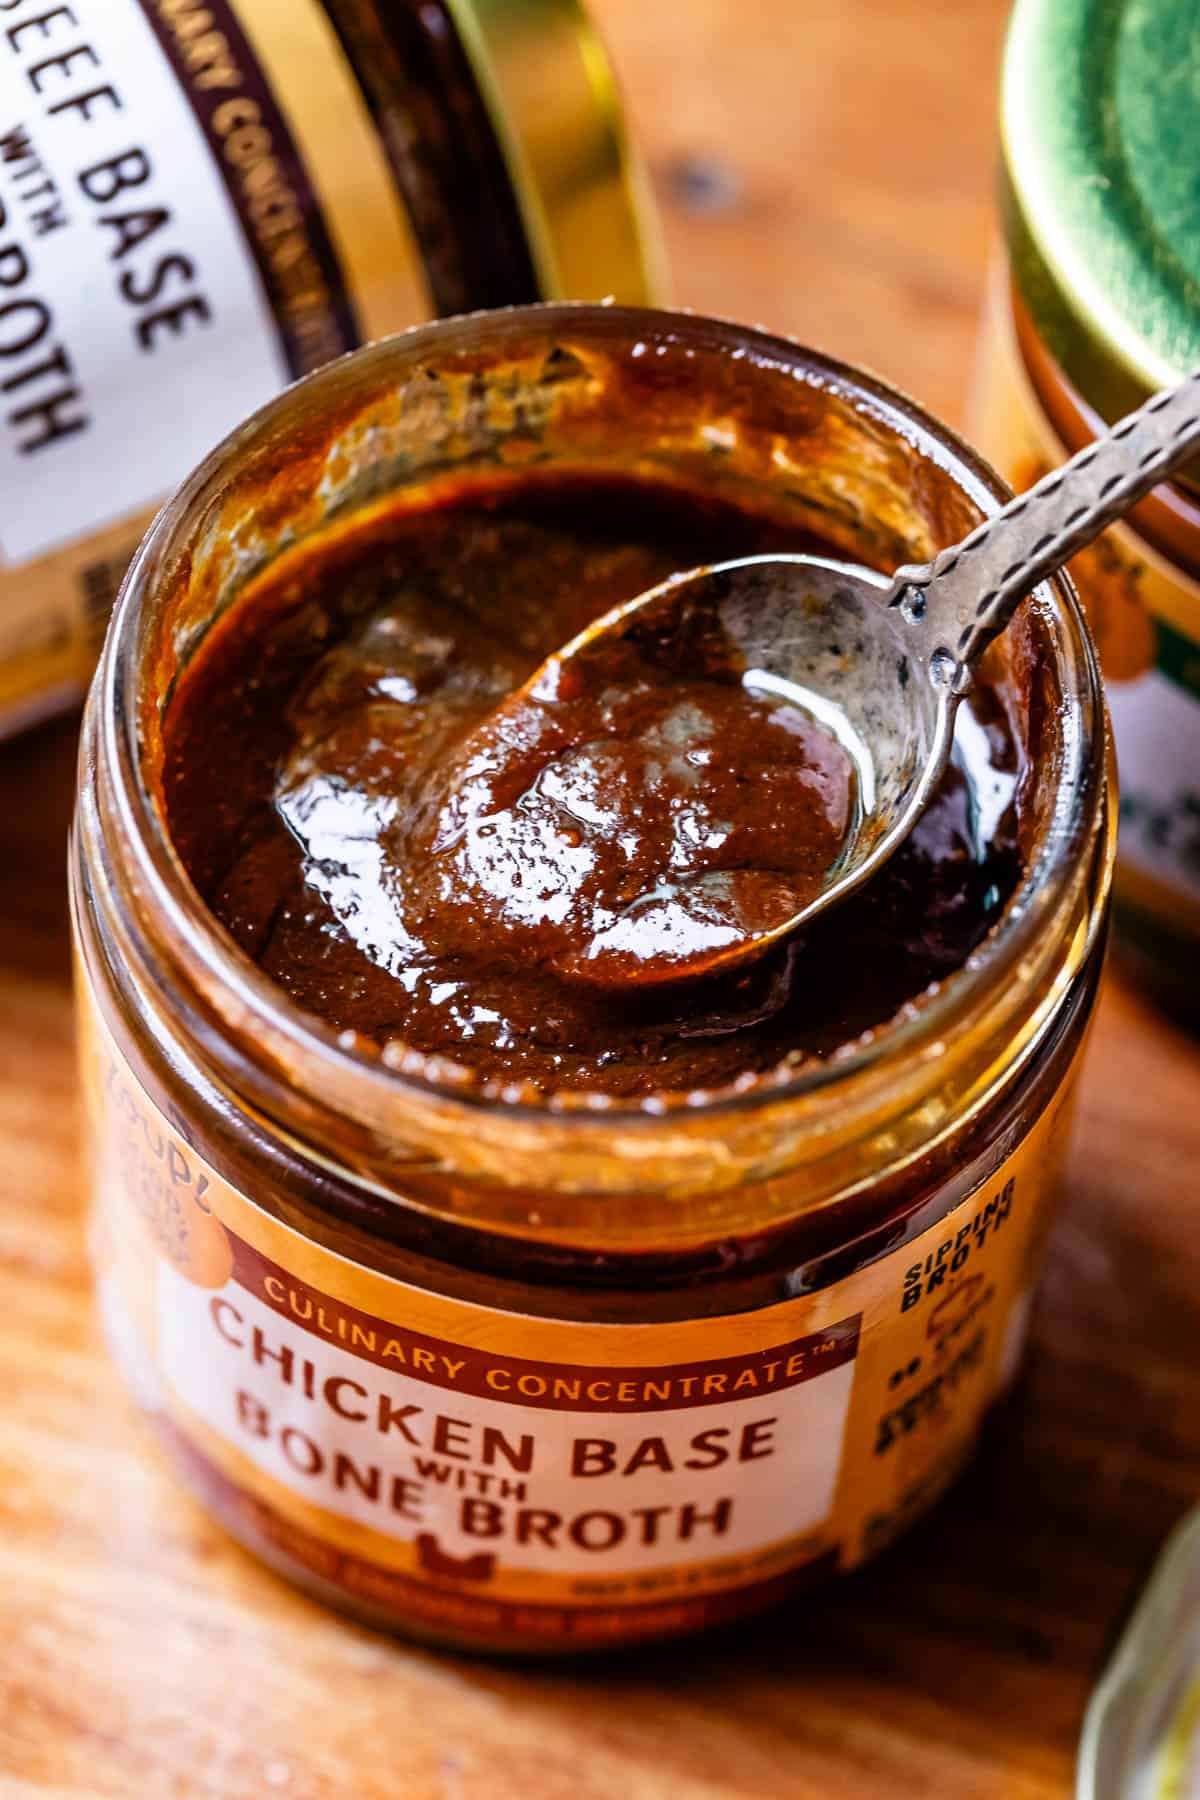
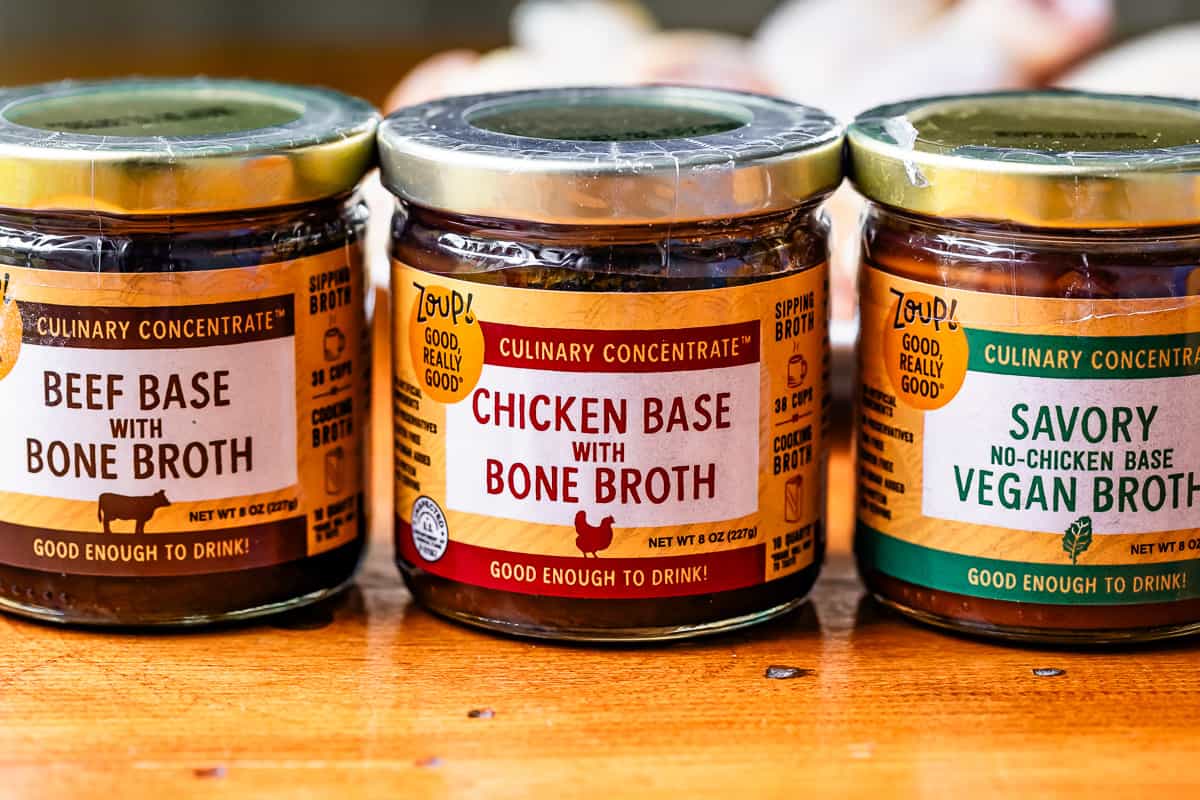
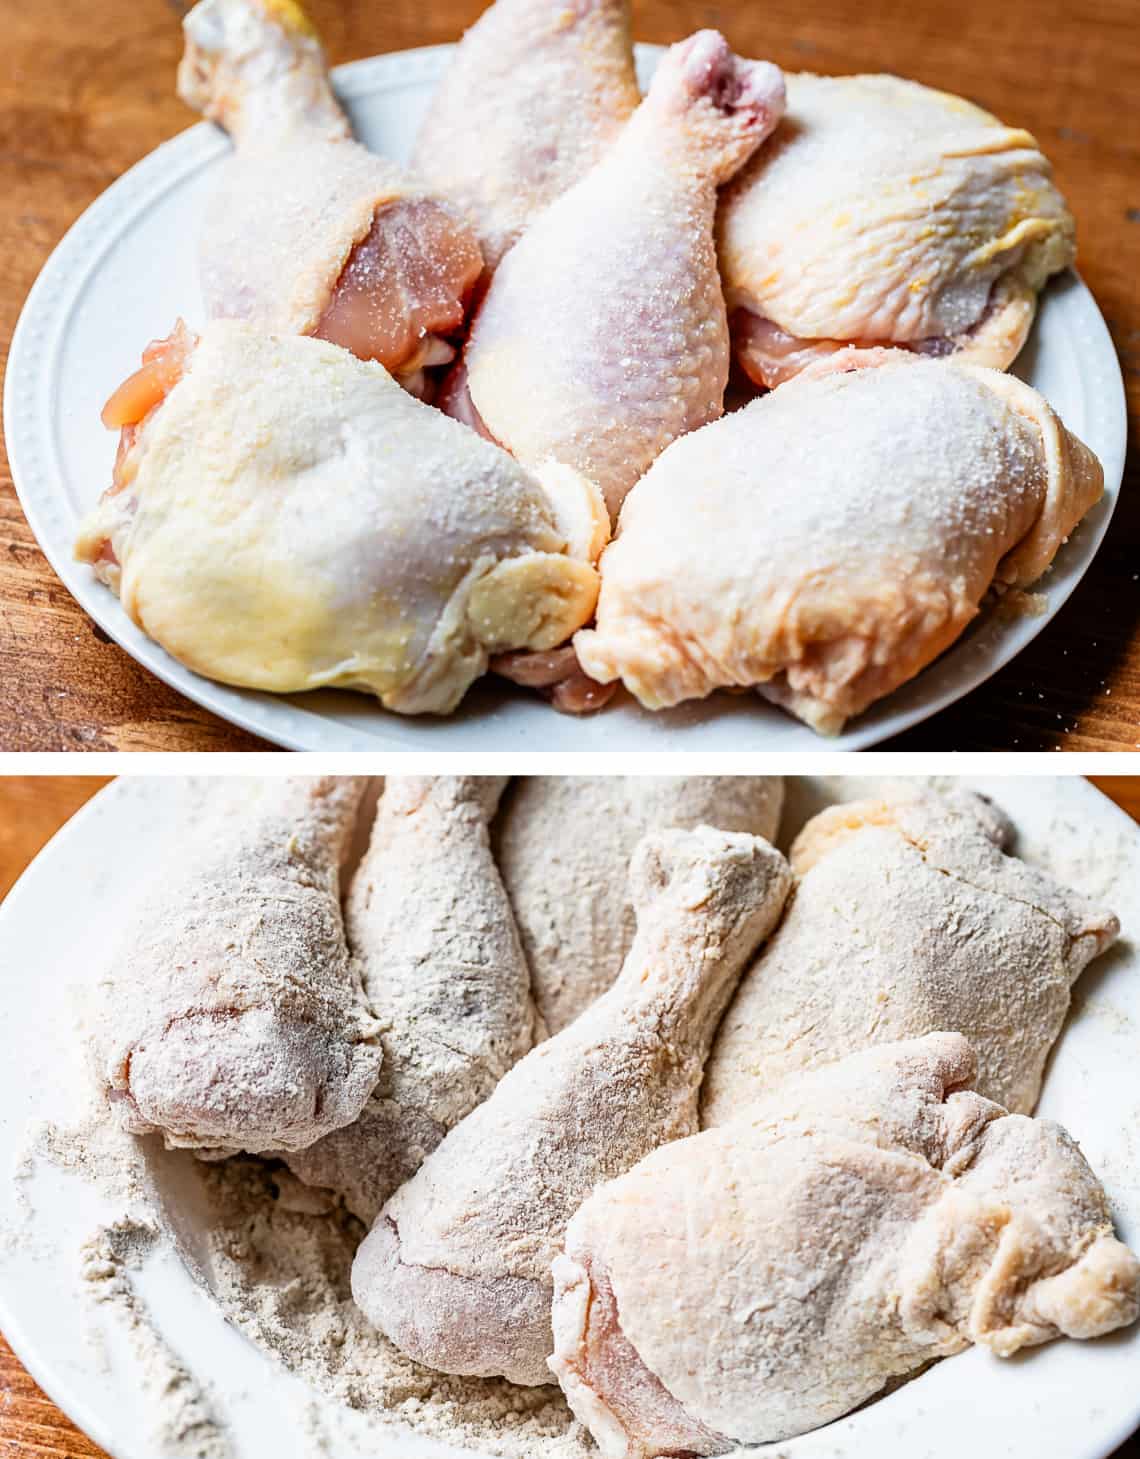
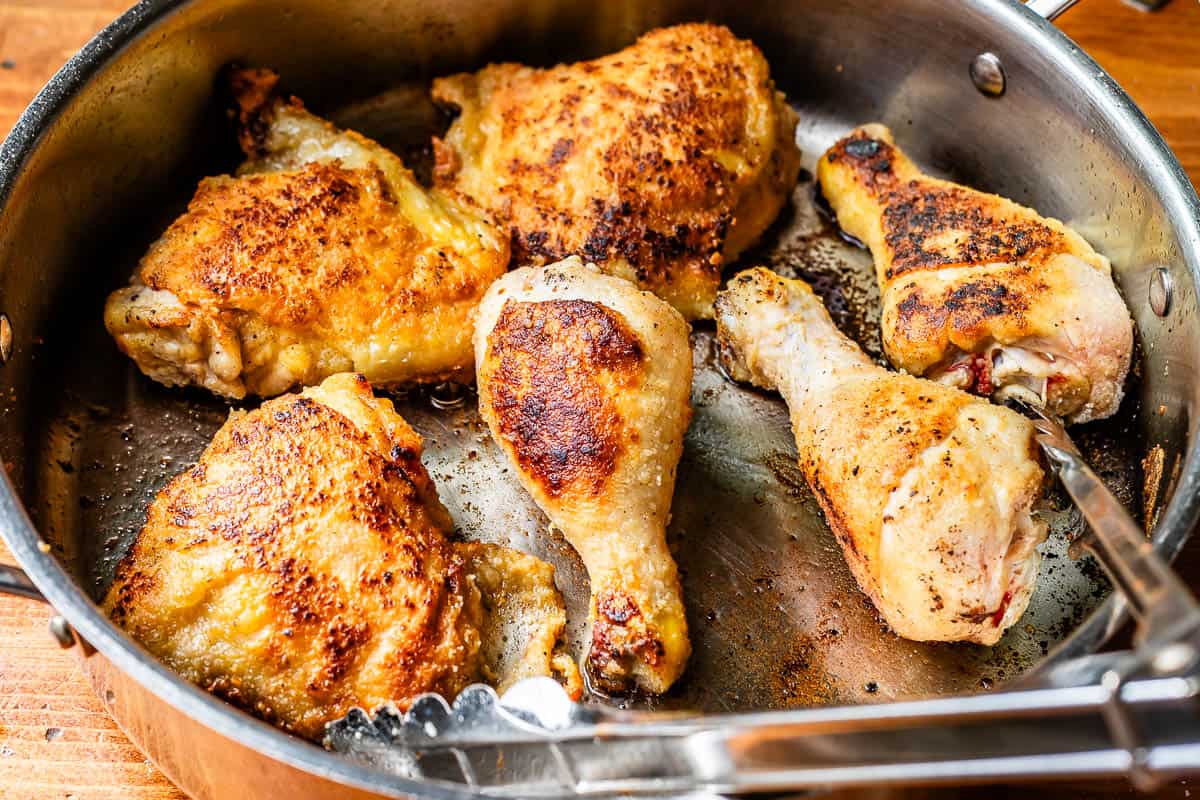
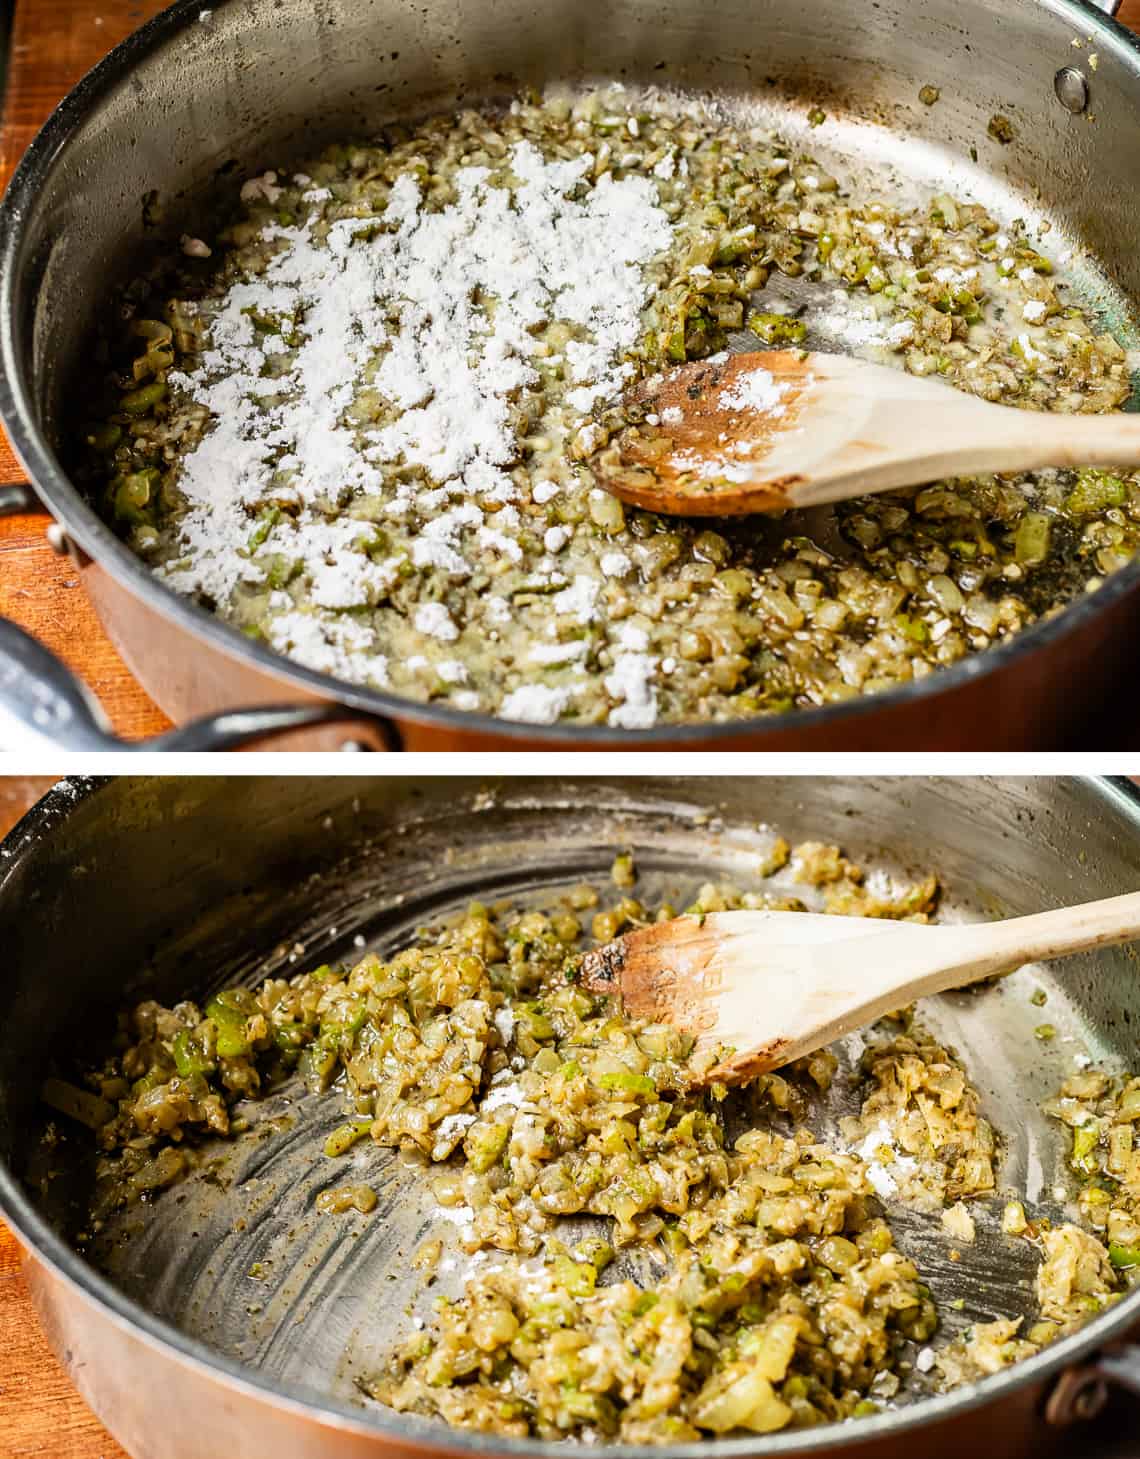
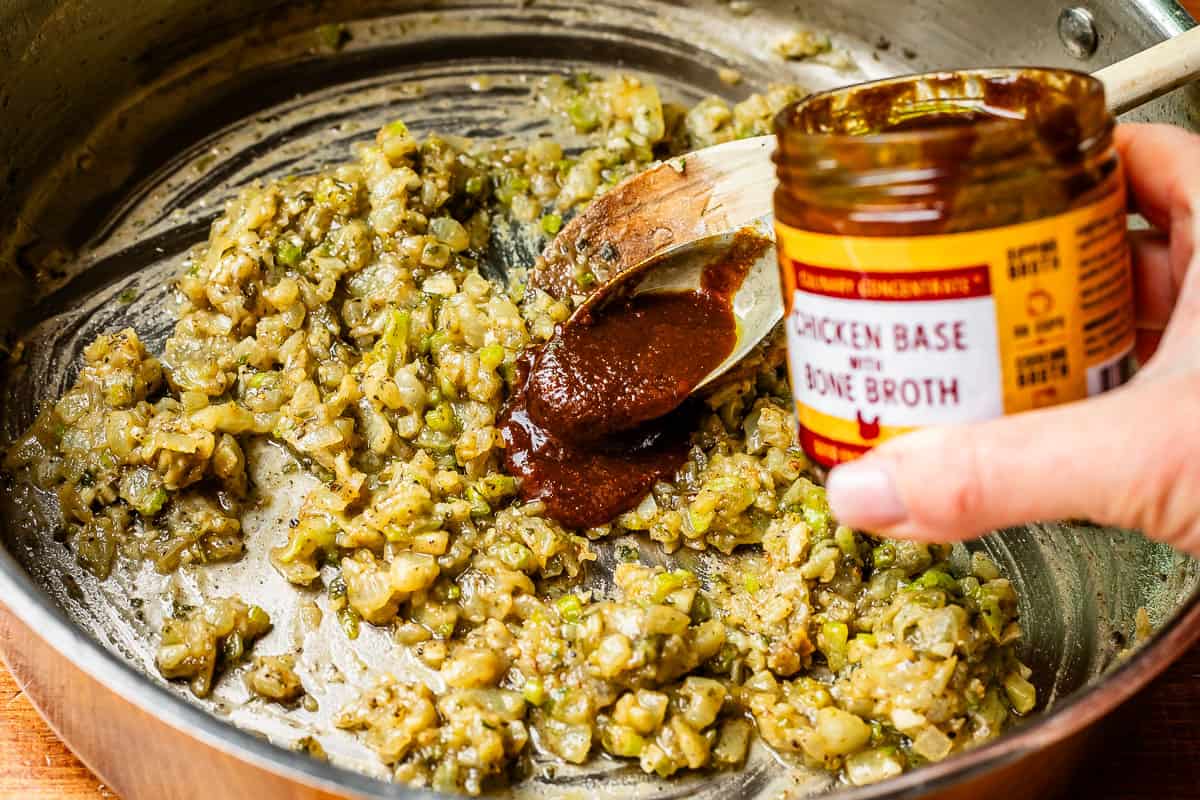
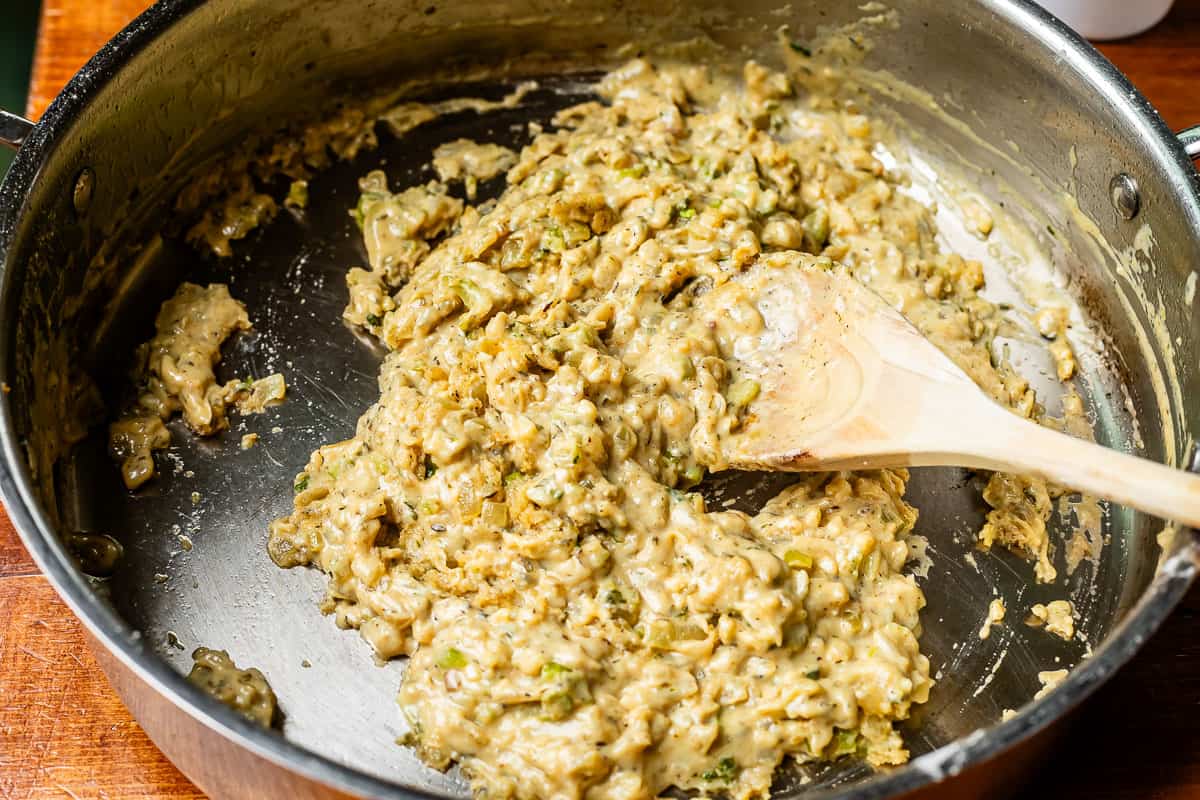
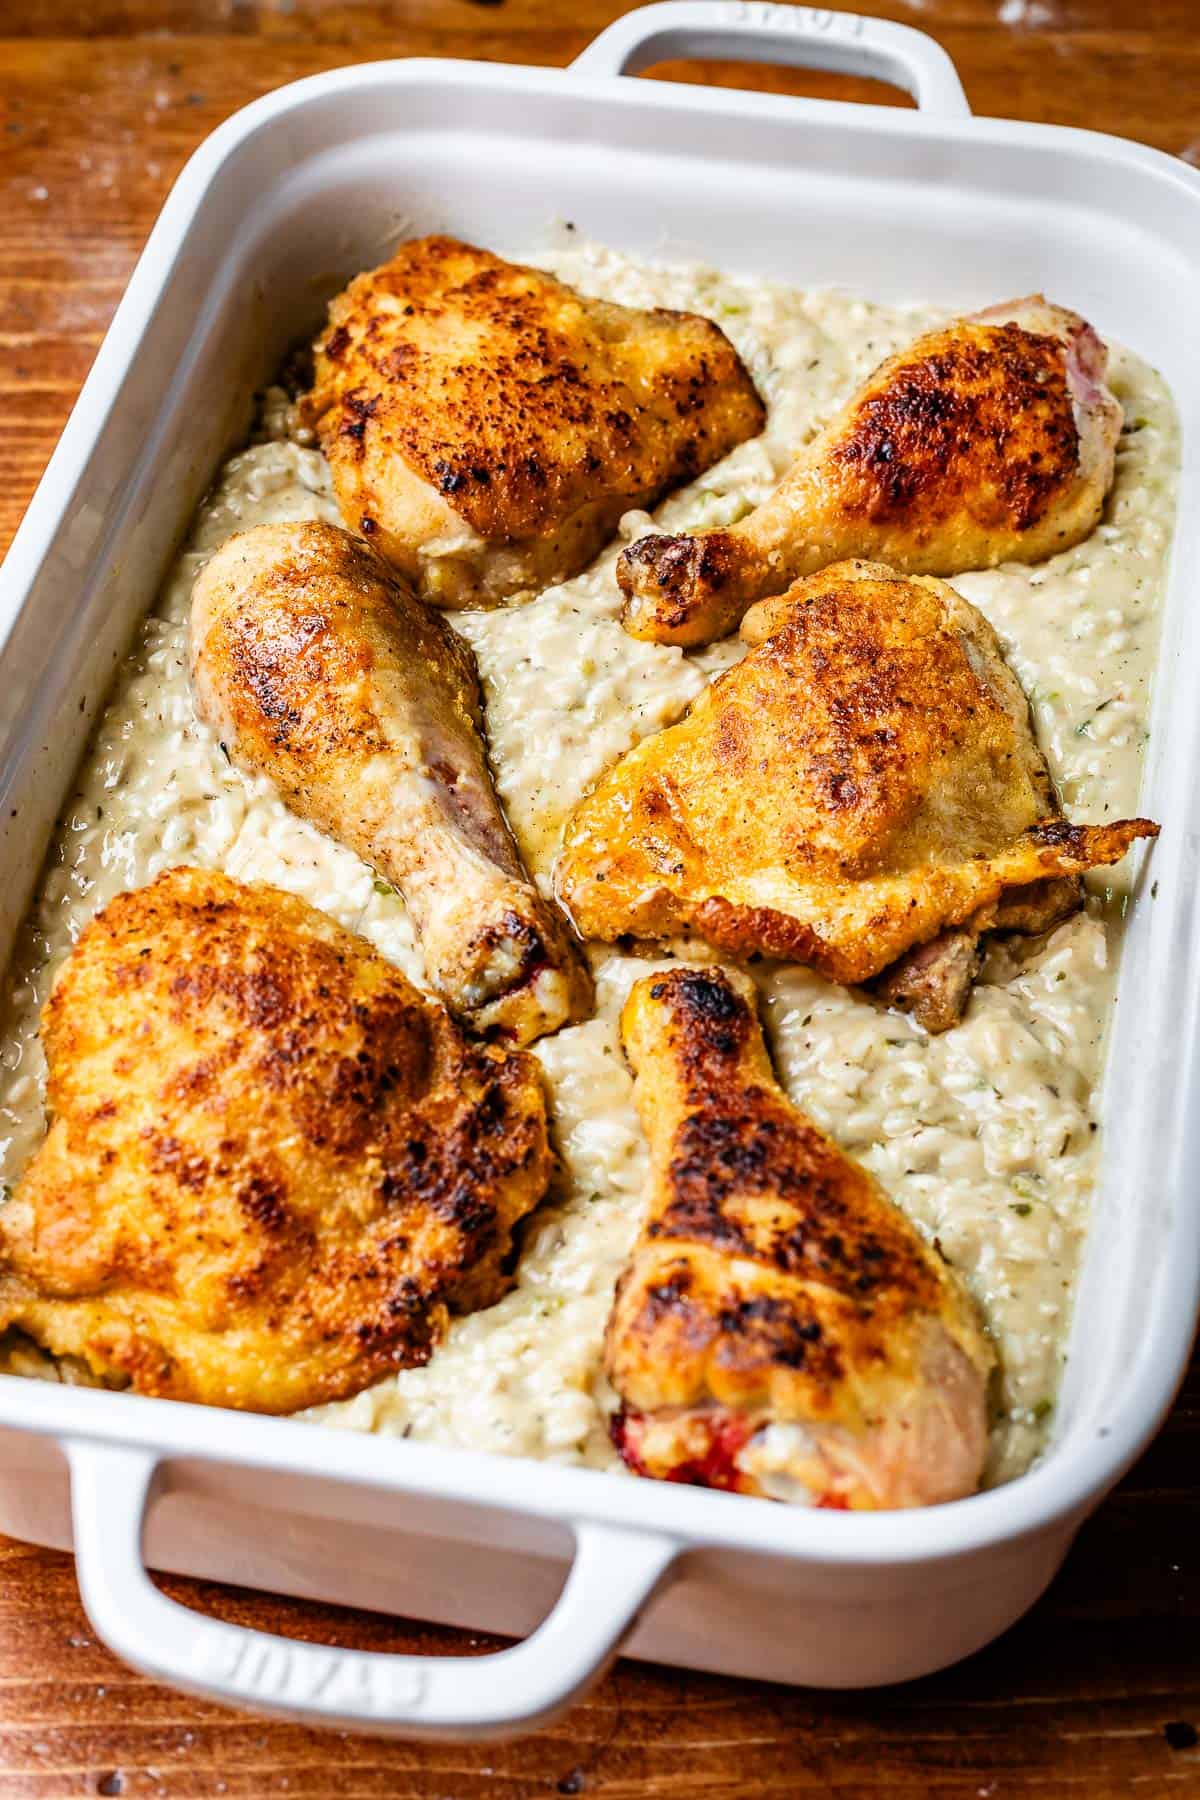
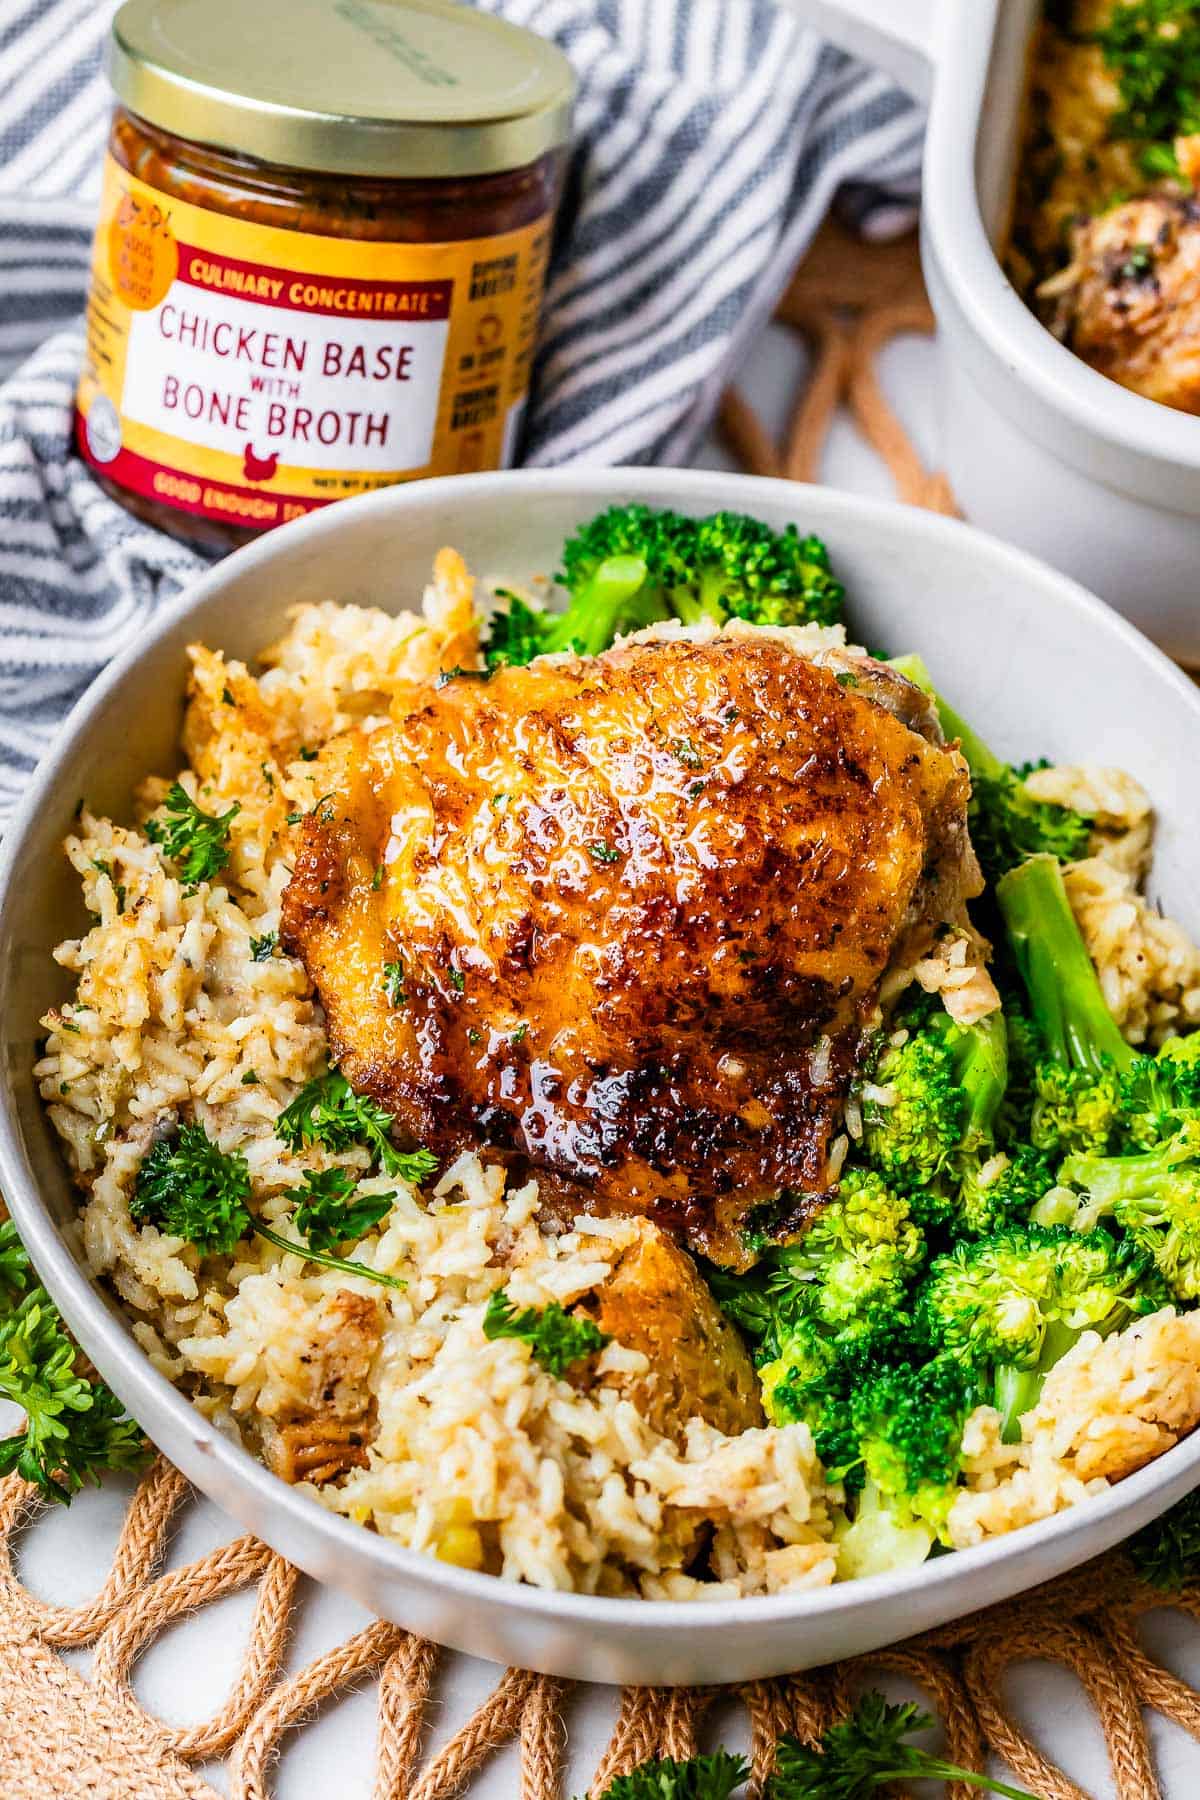
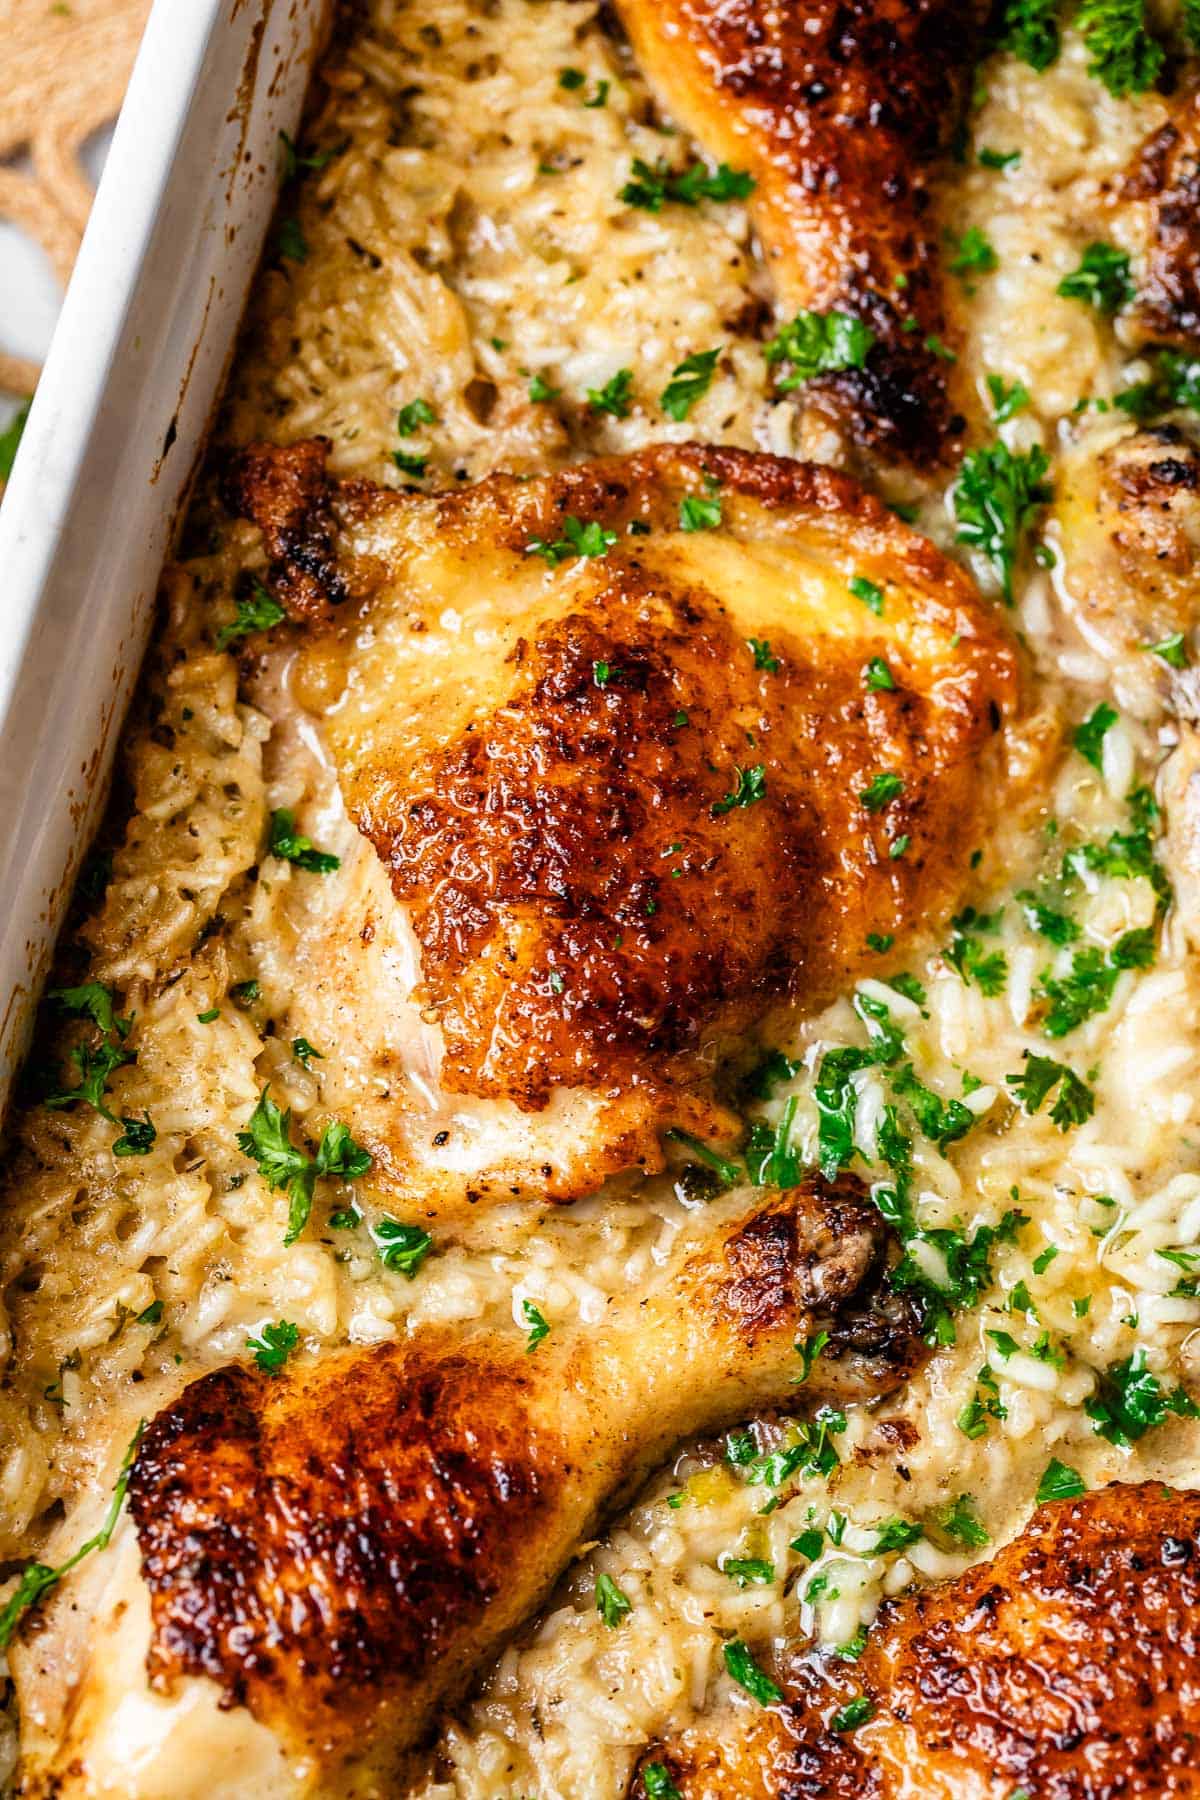
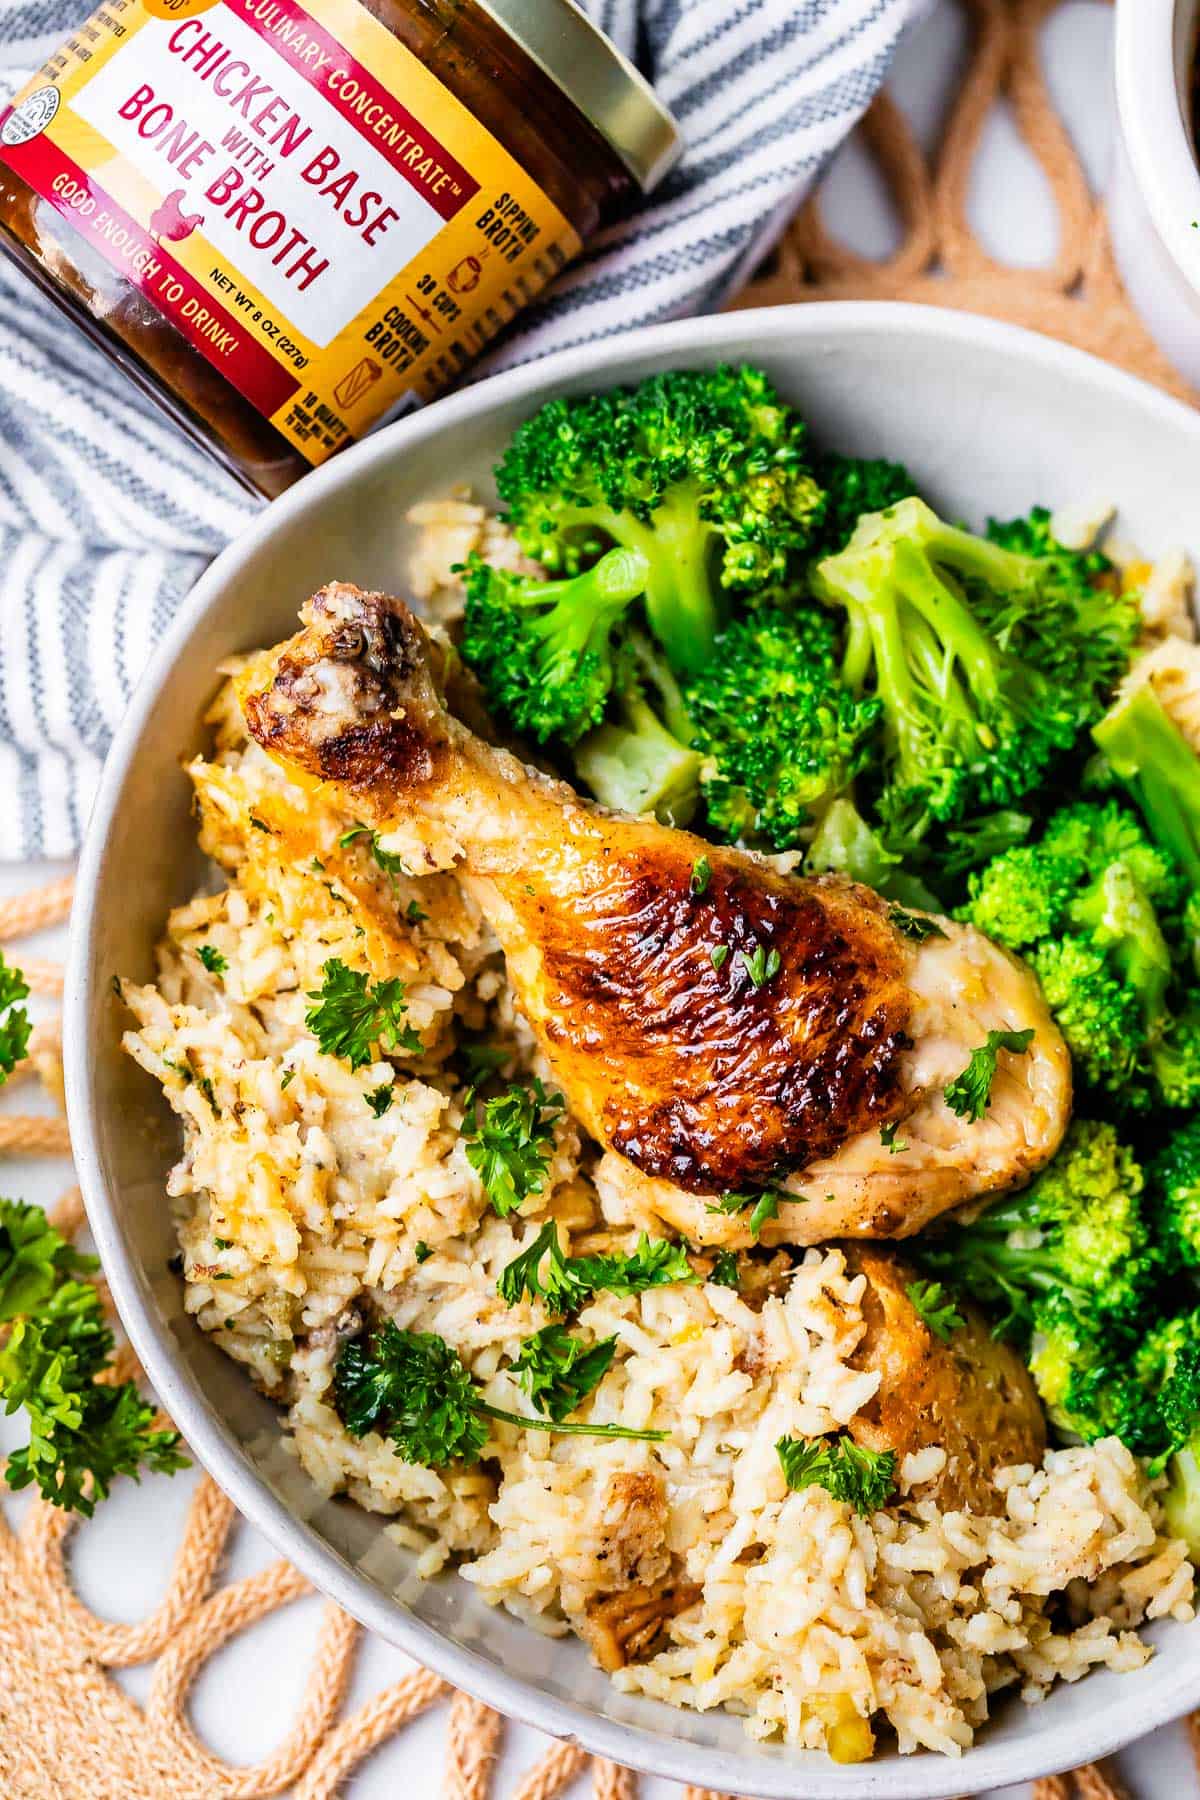
Grandma would bring us roses cut from her garden every time she visited in the spring. She had porcelain figurines (dogs, cats, dancing ladies) all over her house that I adored. She made me a homemade dress every Christmas, and quilts too. She grew her own grapes and blackberries in the backyard and made the most amazing juice and pies. One time when I was very young, grandma had to cancel dinner plans because she got a stomach bug. We decided to make her get well cards. I drew an extremely detailed picture of her bathroom, down to the bath toys she had for us, and the potpourri on the back of the toilet. I was very proud of my picture, and devastated when my sister told me we probably shouldn’t give it to her…because it also showed grandma on her knees violently throwing up in the toilet. (Still wish someone had saved that picture, ha!) I’ve come to terms with it, but there is still a hint of yearning, a little bittersweetness, whenever I think deeply about her, that I don’t think I will ever lose. Her signature dish was this “Chicken Continental,” or chicken and rice casserole. I can’t even describe the dreamy look in my dad’s eye when he talks about his mom making this dish. There is something about food from your childhood, right? His and mine both. It’s like a hug from your dinner…the next best thing to an actual hug from your Grandma. The depth of flavor is legit. The chicken gets cooked alongside the rice, and absorbs all the amazing flavor. We are using skin-on, bone-in chicken, and that’s not an apology. I told you, this recipe is old school. After breading and browning it, the skin magically stays super crispy throughout the bake, even with the moisture of the rice. After searing the chicken, Grandma mixed together a couple cans of cream of mushroom soup with some Minute rice and tossed it all in the oven. Today we are making our own sauce instead of canned soup. I promise it’s not hard, and the flavor is so good. We are also using regular white rice. Minute Rice is basically half cooked white rice, and it turns out pretty gummy. It also doesn’t have a lot of nutrients (we need that fiber!), and it’s not an ingredient I usually have in my pantry (but I always have rice). The total time for baking ends up being longer using white rice, but I think it’s worth it. No no no. I LOVE me some cheese my friends, but it has no place in this dish. Cheese would overpower the deep chicken flavor we are going for in this recipe. My absolute favorite part of this dish is the crispy bits of rice on the edges and bottom of the pan that Sarah mentioned. Almost every culture that uses rice as the staff of its diet has a name for the crispy, golden rice. Persians call it Tahdig. In the Dominican Republic they call it “concon.” In Indonesia it’s called “intip.” This time they asked me to try out their new product, Zoup! Culinary Concentrate™. I was SO excited. I’ll tell you a secret, I almost never have regular broth on hand in my kitchen. I rely on broth bases that are concentrated, so that I can just add water to them to make broth when I need it. It’s not only my favorite way to have instant shelf-stable broth on hand at all times, but it’s also my secret ingredient in SO many recipes, even those that don’t call for broth. A spoonful-here or a stir-in there takes your ho-hum soup or stir fry up about 10 notches in 10 seconds. Dark meat all the way! (You could certainly make this with chicken breasts, but your chicken might get a little dry in the oven since it has to cook so long.) Coat your chicken in the flour mixture, and DON’T throw away the leftover flour! Now it’s time to sear the heck out of your breaded chicken! Crank up the heat and brown the chicken in some oil. My grandma did this in butter (that’s what the recipe says!), but I have no idea how she didn’t burn the butter in the process. Vegetable oil has a higher smoke point, so it can handle a hot sear without smoking or scorching. To add in the flavor of the butter though, we are flipping the chicken and adding it to the pan for the sear on the second side. It does the job great! Gimme all that buttery flavor. Now if you haven’t already, take a minute to chop up your veggies: onions, celery and garlic. I used fresh garlic this time, but I often cheat and just use the jarred stuff. You want to chop your veggies on the small side. We are looking for flavor, but the onion and celery should kind of melt into the sauce and rice. My grandma actually grated her onion, and didn’t use a ton, just a few tablespoons. I wanted bigger onion flavor (and I’m way too lazy to grate…are you noticing a theme here?? 😂) It’s workin for me guys! Okay now we are going to turn this into a white sauce. Mine is usually not white at all, because I tend to be an onion browner, not to mention a chicken-searer-gone-rogue. I love blackened edges too much, okay?? Your onions will start to stick together like this once you add the flour to the mixture. Now it’s time to add in our Zoup Culinary Concentrate™! This stuff is liquid GOLD you guys. Give it a sniff, it will knock you out, it smells so good. Stir it into your onions and let the aroma transport you to your childhood. Next we’re going to add in some milk and water to turn it into a creamy sauce. You have to stir constantly as you add the liquid, so the sauce doesn’t get clumpy.
Do you cook rice before putting it in a casserole?
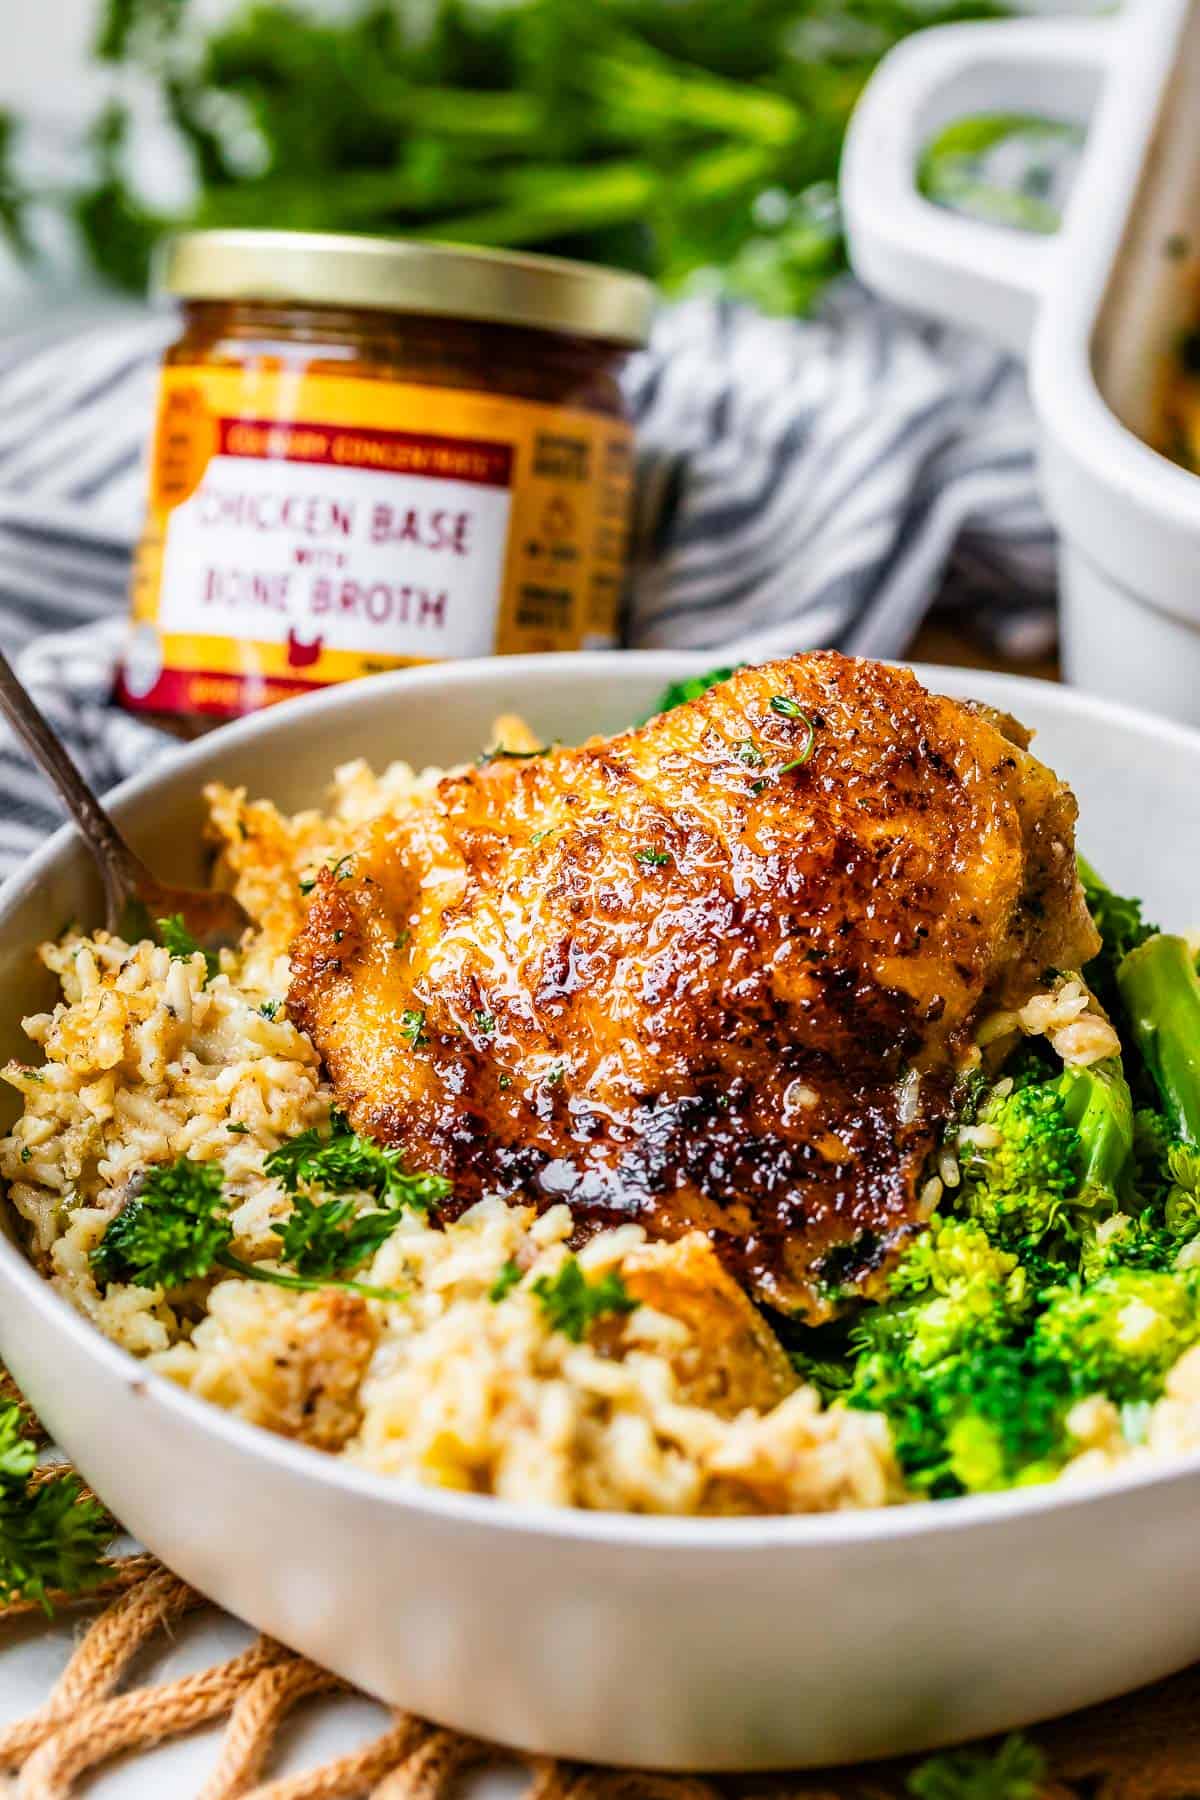
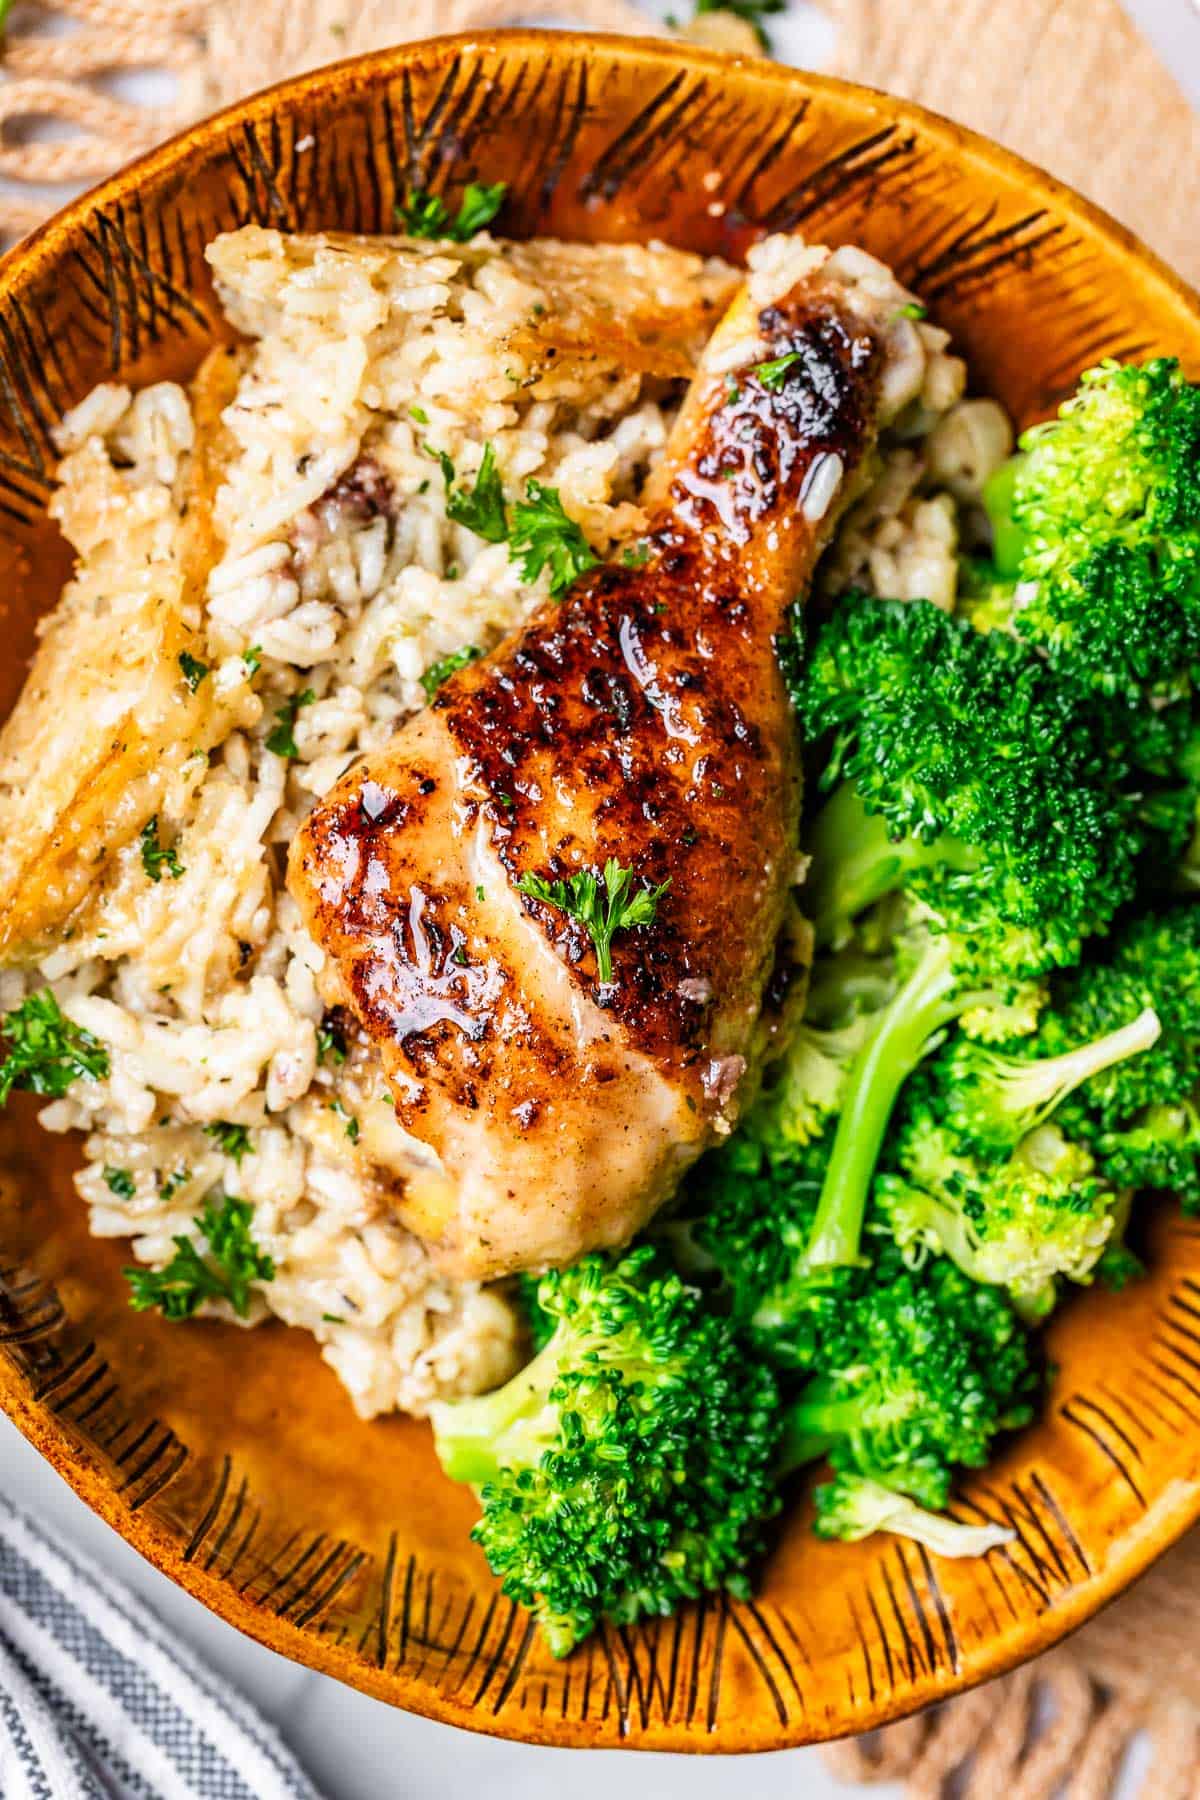
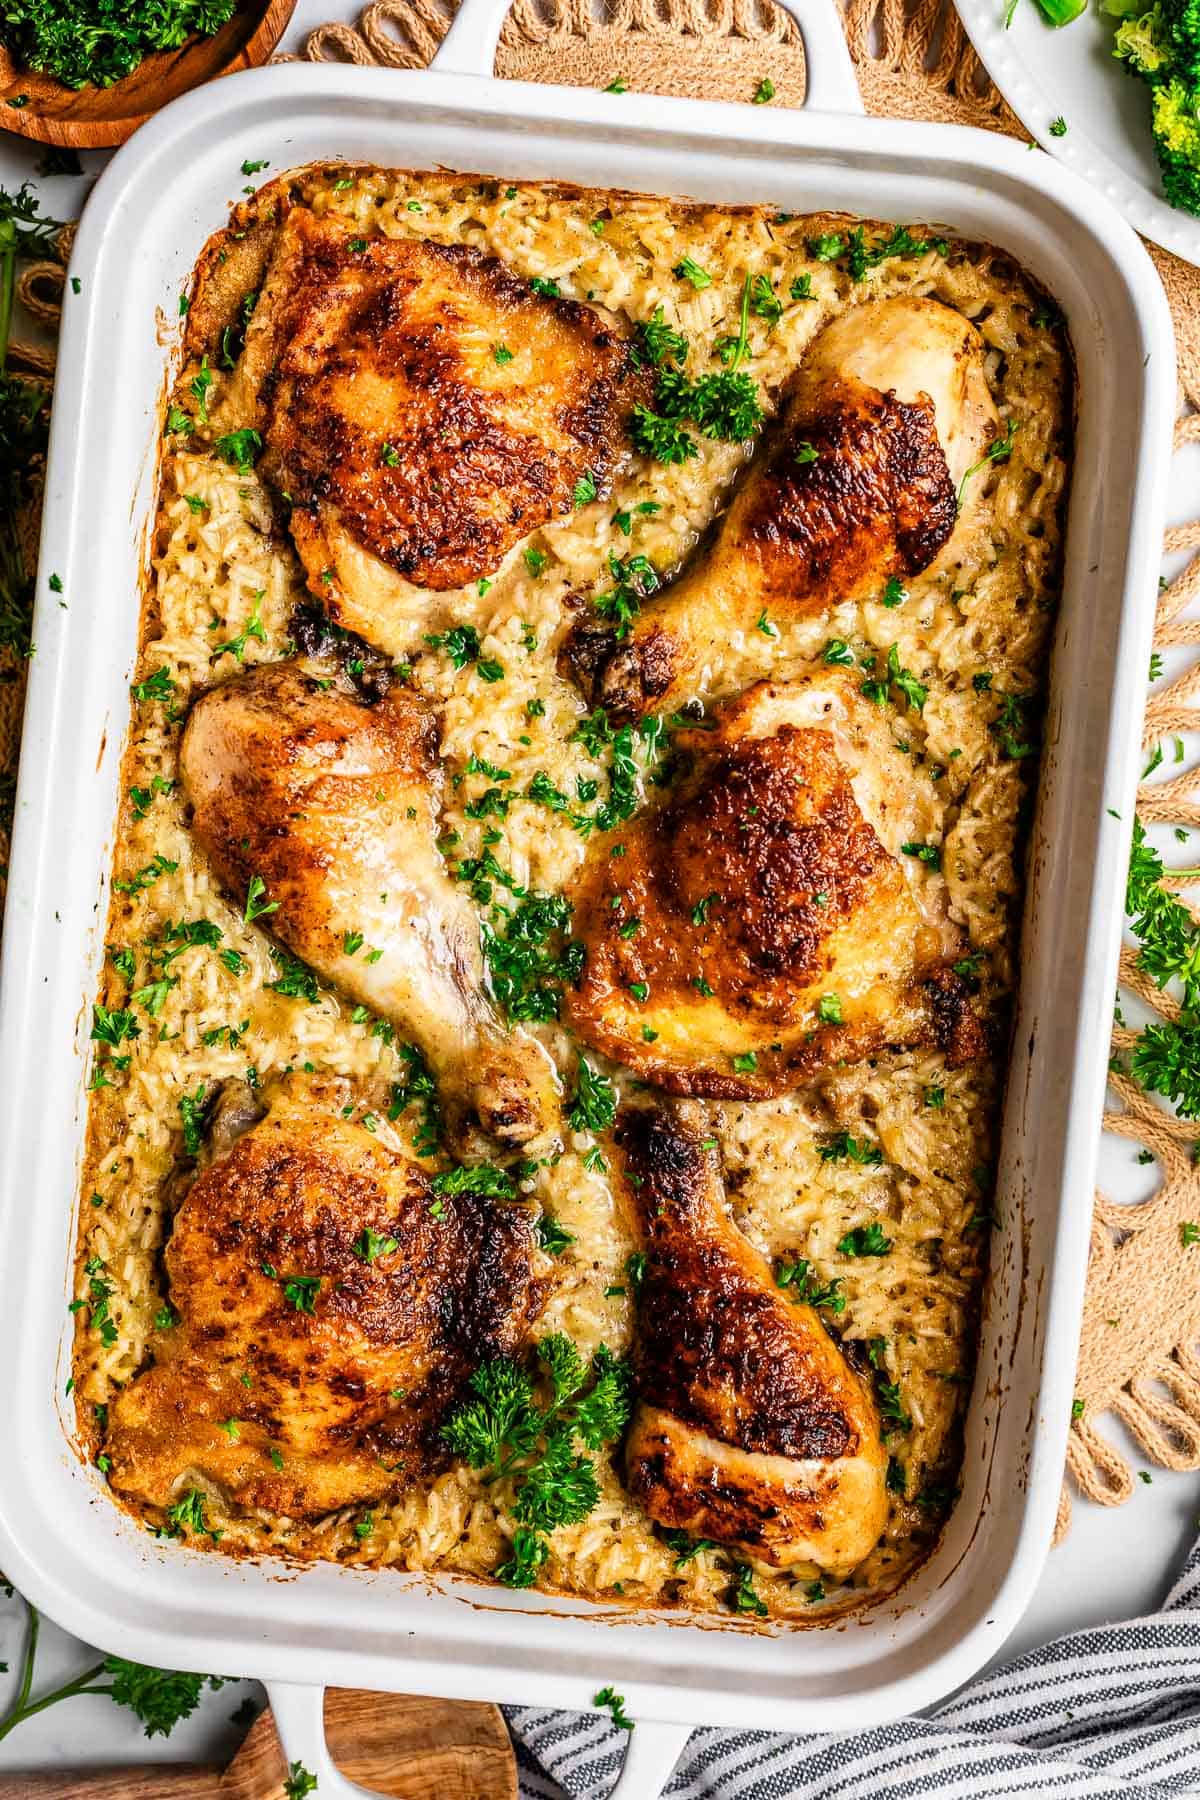
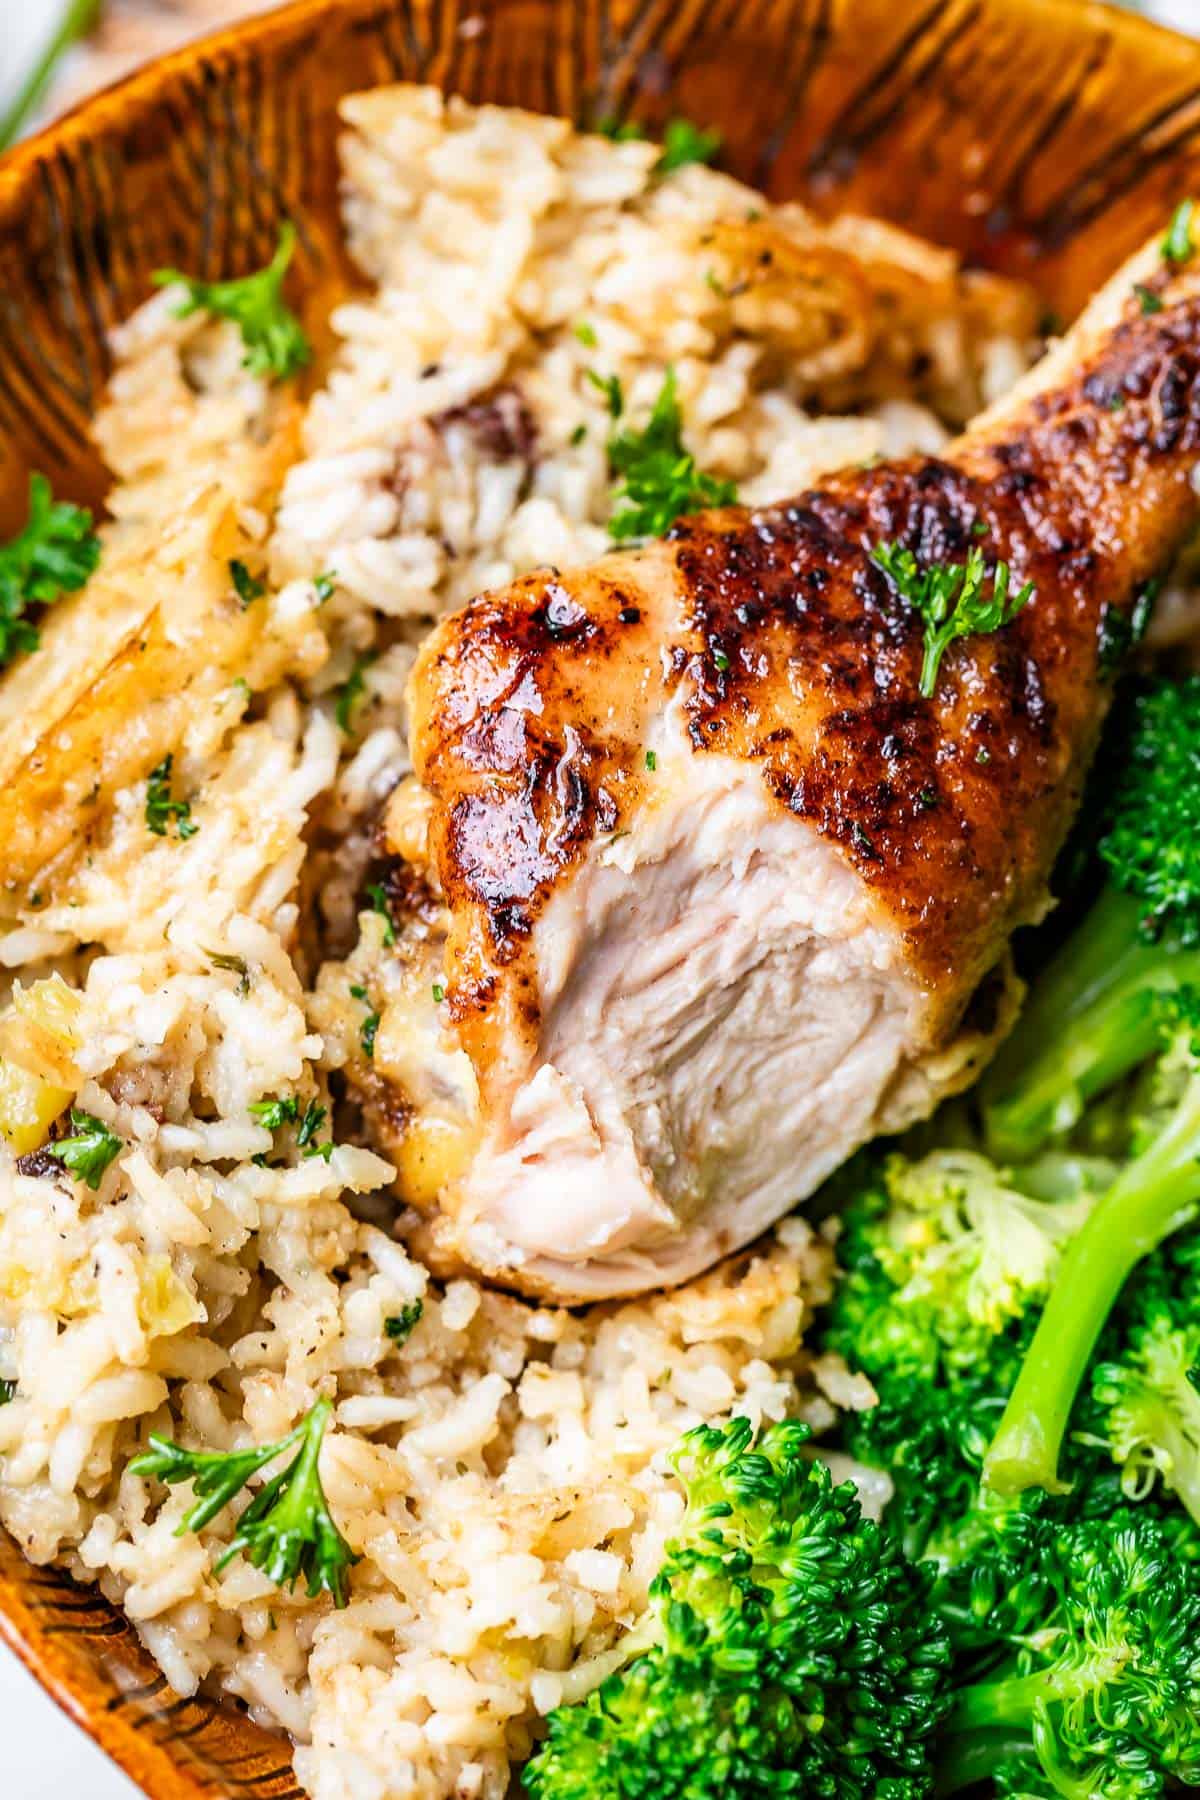
We are not cooking the rice before it goes in the oven! Add the remaining water and rinsed rice straight to the casserole dish. Add the white sauce to the casserole dish with the rice and water, then top with the seared chicken. Doesn’t it look so good already?? Don’t forget to tightly cover the dish with aluminum foil before putting it in the oven. This is really important! You must cover a pot of rice when you cook it on the stove, to lock in the steam, and the same thing applies here. Then, cook in the oven for a good long while. Usually we wouldn’t bake chicken this long, but this is a special case. With all the moisture and steam, plus using only dark meat, the chicken comes out tender and flavorful, not dry at all. The casserole does take a while to bake, so plan ahead. But from this point on you can just sit back and relax, the work is done! Make some broccoli as a side dish, sprinkle on some parsley garnish, and bon appetit! I wish you could see my dad’s face when I make this for him. Grandma Georgia was his mom. There is NOTHING that brings you back like the smells and tastes of your mama’s kitchen!
Easy Roasted Broccoli Recipe » definitely one of my family’s favorite veggie sides (and you can use frozen, huge win) Strawberry Spinach Salad » this salad is a classic, and super easy to make too Easy Broccoli and Bacon Salad » stuffed with bacon, cranberry, cheese, and with the best dressing Raspberry Avocado Salad with Poppyseed Dressing » simple, refreshing, and RASPBERRIES, people Green Salad with Feta and Beets (The Fanciest No-Chop Salad Ever) » no chopping at all in this salad, which makes it a perfect side for more involved entrees Baked Parmesan Zucchini and Squash » done in 10 minutes and has cheese, yes please Lemon Asparagus with Pistachios » light and bright, a great choice alongside comfort dishes Cauliflower Salad from Beauty Bites
If you really want to get ahead in life, you can prepare this meal in disposable foil casserole trays and freeze directly in the tray after cooking. Put the cooled pan in the freezer for about 30 minutes to flash freeze. Take out, wrap well in plastic wrap, then wrap in aluminum foil. Label the top in sharpie so you don’t forget what it is! It will last in the freezer for 3-4 months. Thaw in the refrigerator overnight and place individual portions in the microwave, cover, and heat at 50% power for 2-3 minutes. To reheat an entire frozen pan, first be sure to remove the plastic wrap. Put the foil back on and put the pan into a cold oven. Set the temperature to 350 degrees. The casserole should be ready in about 2 hours. You can remove the foil the last 10-15 minutes if you’d like to get it browned. You can also thaw the casserole in the fridge overnight and bake at 350 degrees for 45-60 minutes.
Grandma Georgia’s CrockPot Chicken and Dumplings » another recipe from my Grandma that is AMAZING and so homey. This dish makes me effortlessly teary. Crockpot Beef Barley Soup » a recipe from my husband’s family and perfect for any chilly day Easy Fall-Apart Crock Pot Roast with Carrots (Slow Cooker) » is there anything better than a tender Sunday pot roast and mashed potatoes? Homemade Chicken Noodle Soup with Egg Noodles » the ultimate feel better food The BEST Mac and Cheese Ever! » so creamy, so cheesy, so worth making! Grandma Prudy’s Swedish Meatballs » my husband’s grandma’s recipe, full of flavor and nostalgia Crispy Southern Fried Chicken Recipe from This Silly Girl’s Kitchen Chicken Marsala from Ahead of Thyme


![]()
