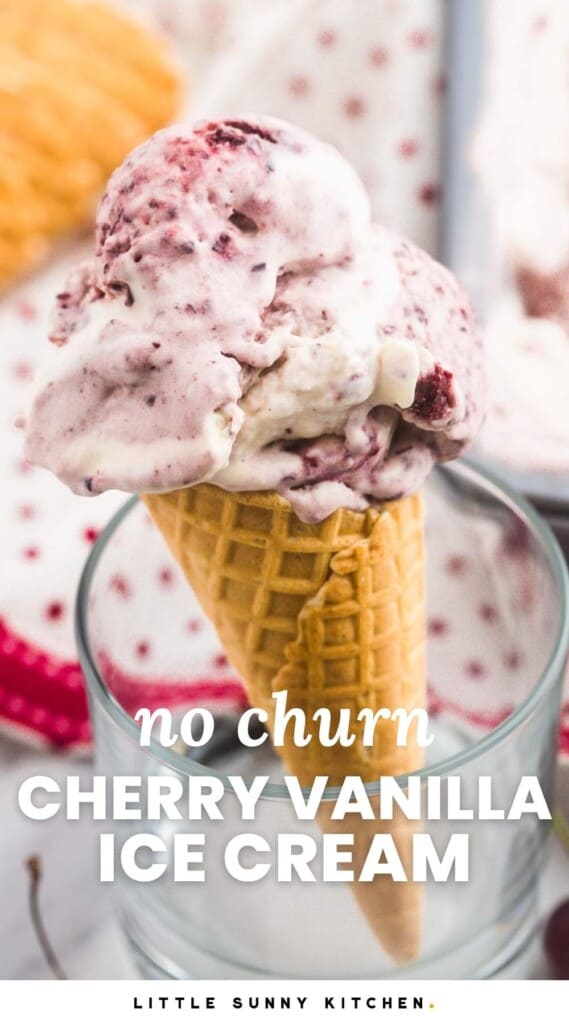
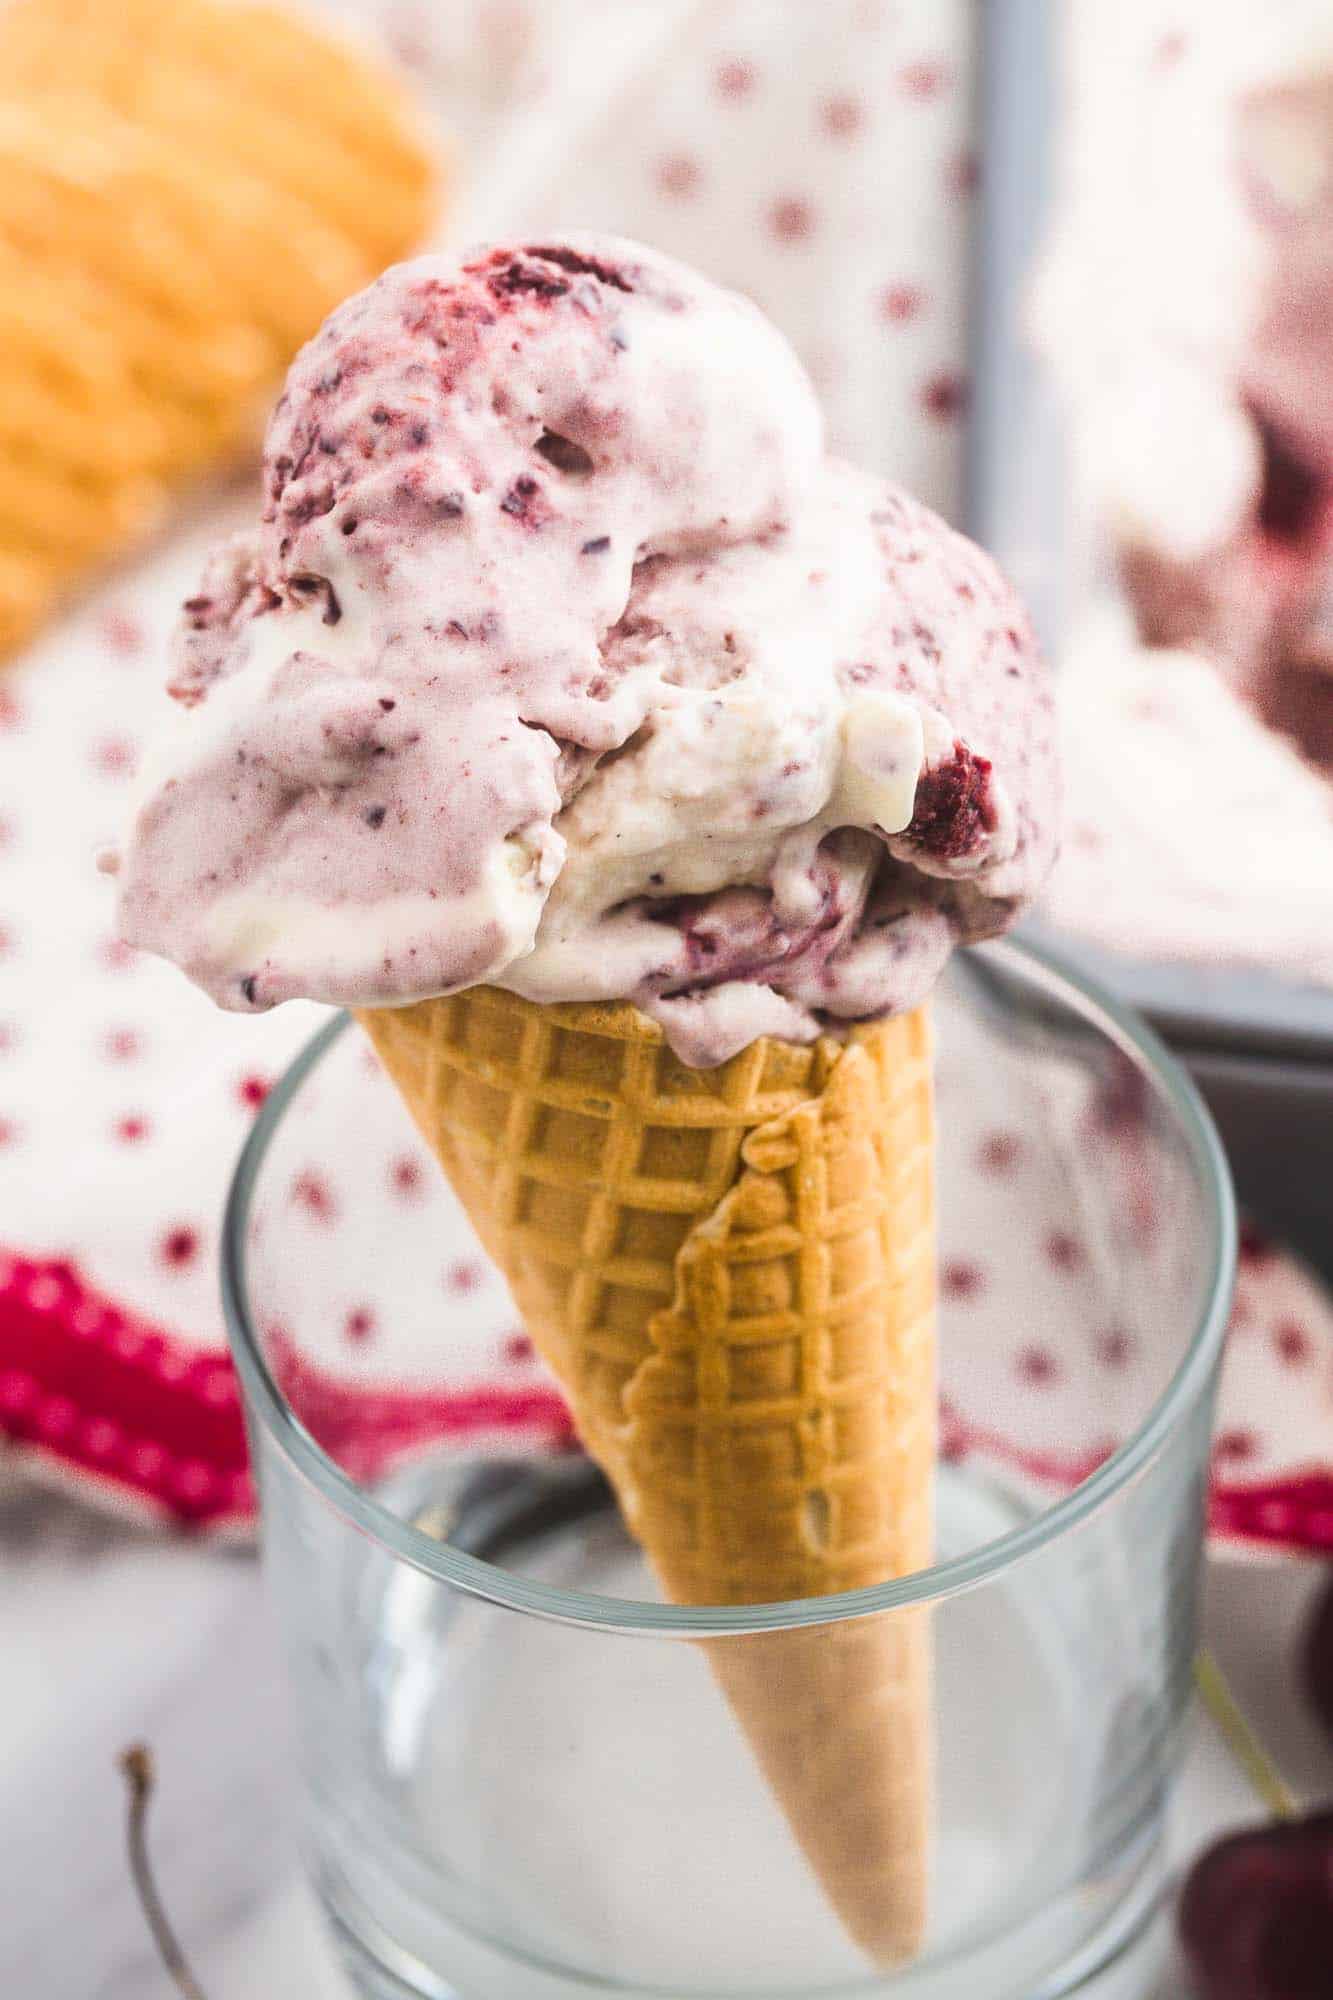
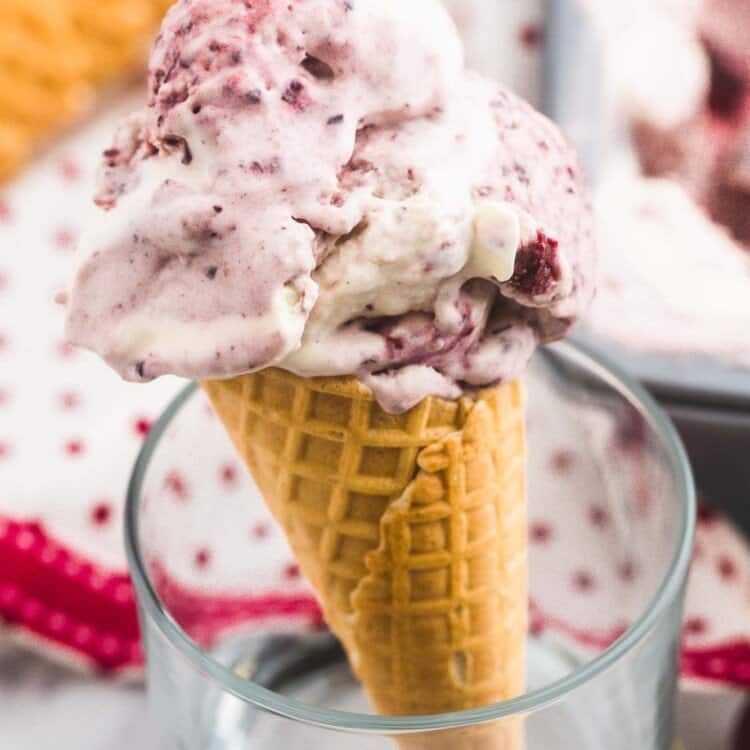
Whether you’re hosting a summer barbecue or simply looking for a refreshing dessert, this quick and easy homemade Cherry Vanilla Ice Cream is sure to please. So, give it a try and let us know what you think! This ice cream is sweet (but not overly sweet), tart, and has the perfect creamy texture. You will love that it’s made with natural ingredients, and contains no preservatives. Once you try it, you will never want to buy store-bought ice cream again. Plus, you don’t need an ice cream maker or any fancy appliances to make this.
Why You’ll Love This Recipe
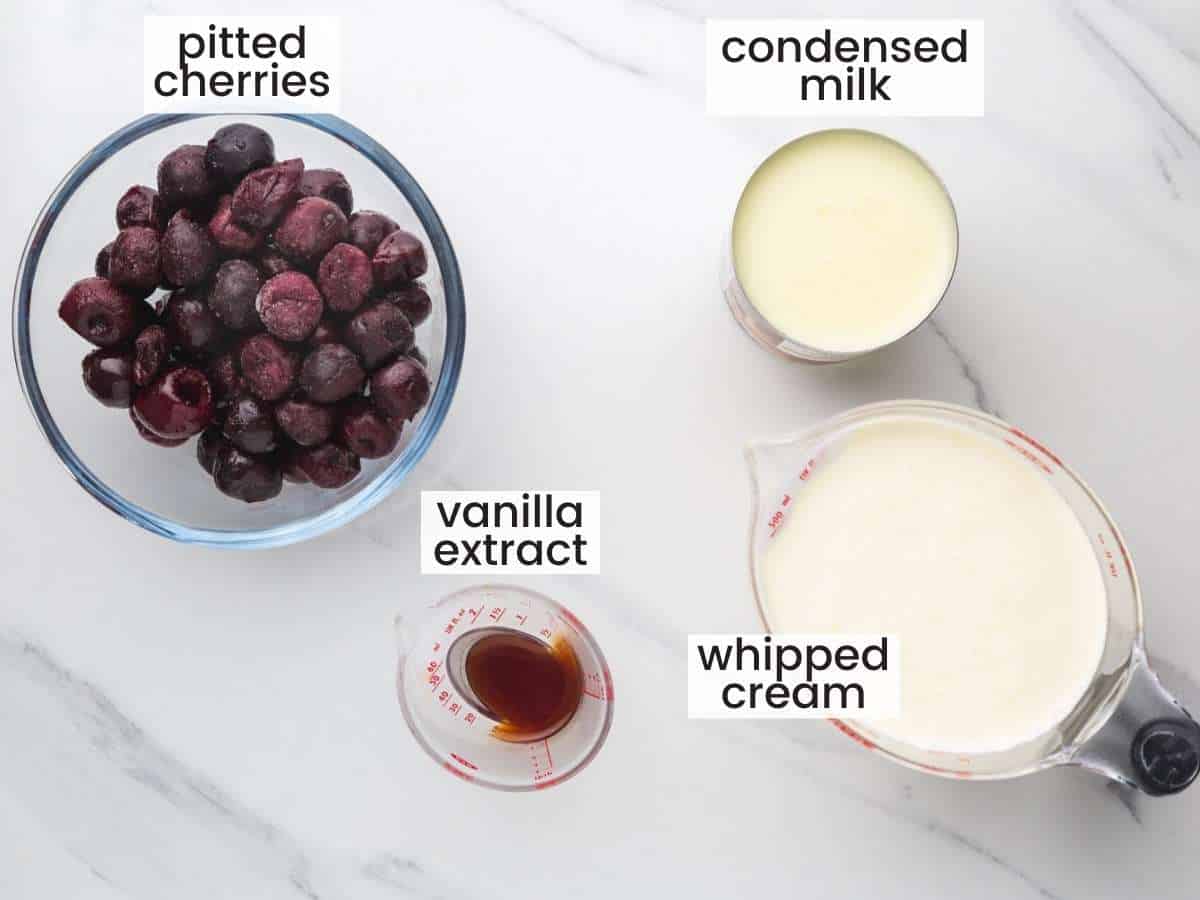
The Ingredients
Here’s what you need to make this easy cherry vanilla ice cream: Complete list of ingredients and amounts can be found in the recipe card below.
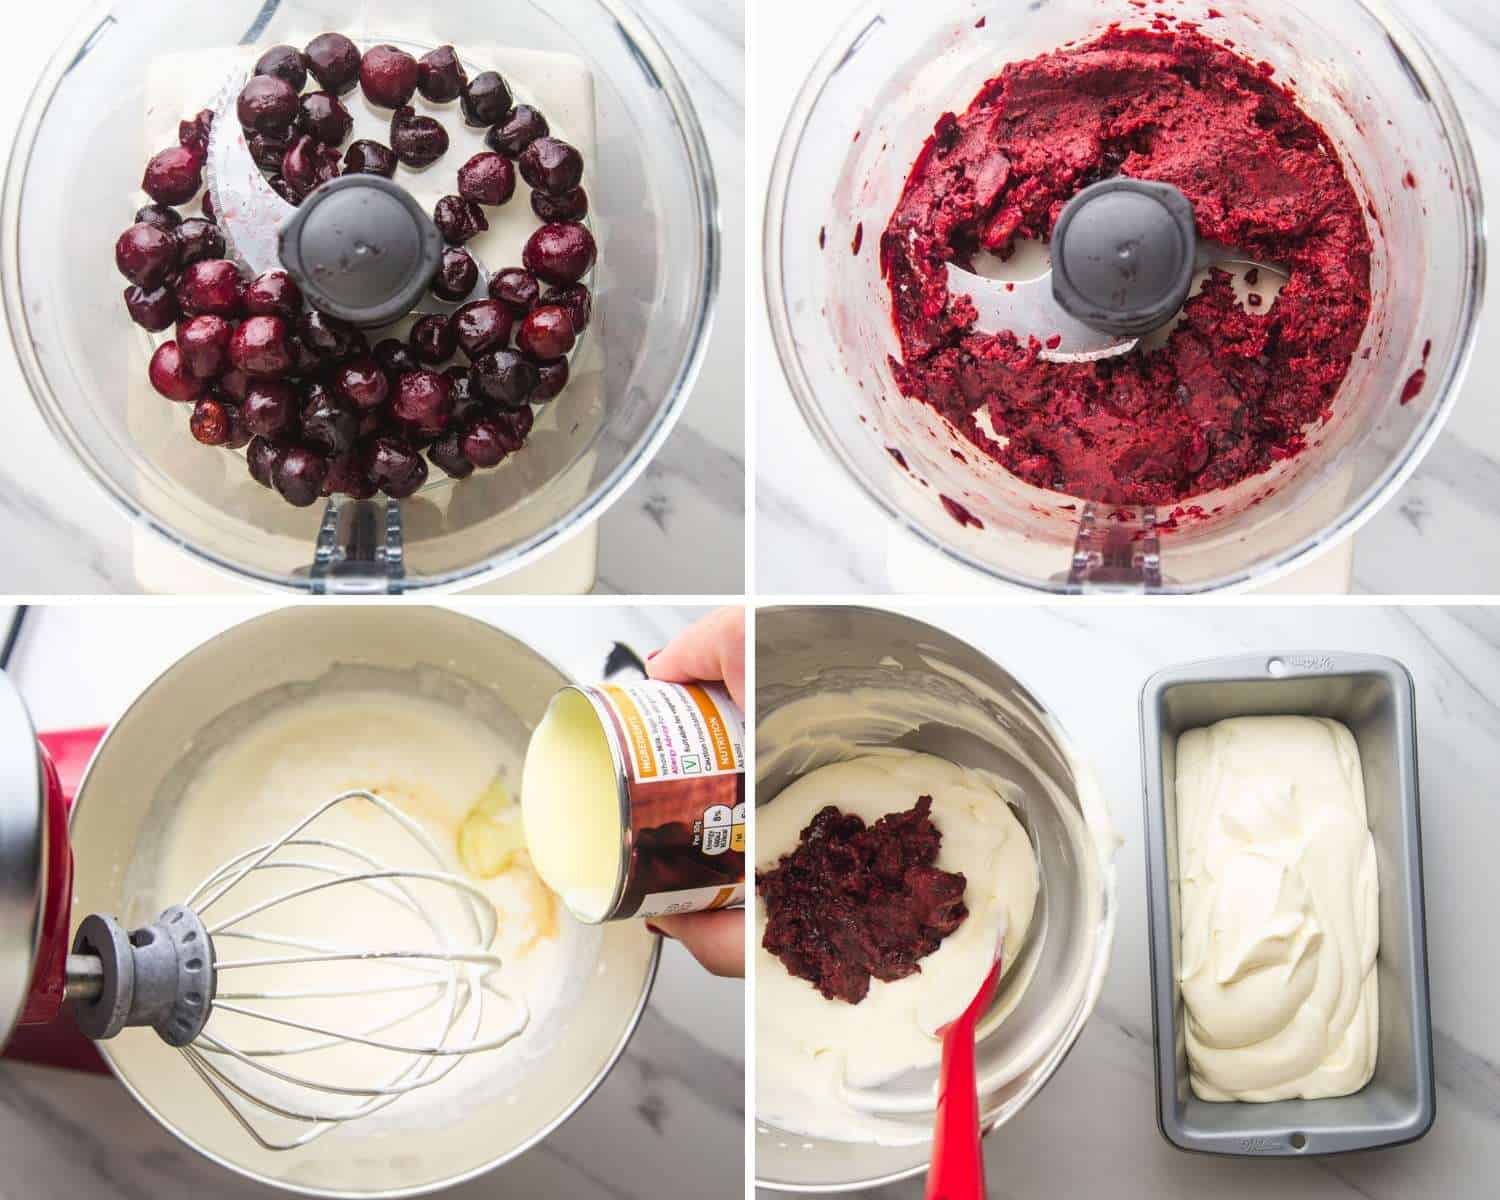
Cherries: I used frozen pitted cherries, they’re easy to find and much easier to use than fresh cherries (no pitting required!). Plus, they’re cheaper. You can substitute with canned drained cherries if you prefer.Heavy Cream: Use chilled heavy whipping cream (it’s labeled as double cream in the UK). Do not try and substitute with milk or half and half as it won’t work.Condensed Milk: One 14-ounce (400g) can of sweetened condensed milk is what you need here. I use Nestle or Eagle brand.Vanilla: Avoid imitation vanilla, and use the best pure vanilla extract that you can find. It makes a big difference!Lemon Juice (optional): Use 1 tablespoon of fresh lemon juice, this will help bring out the flavor of the cherries.
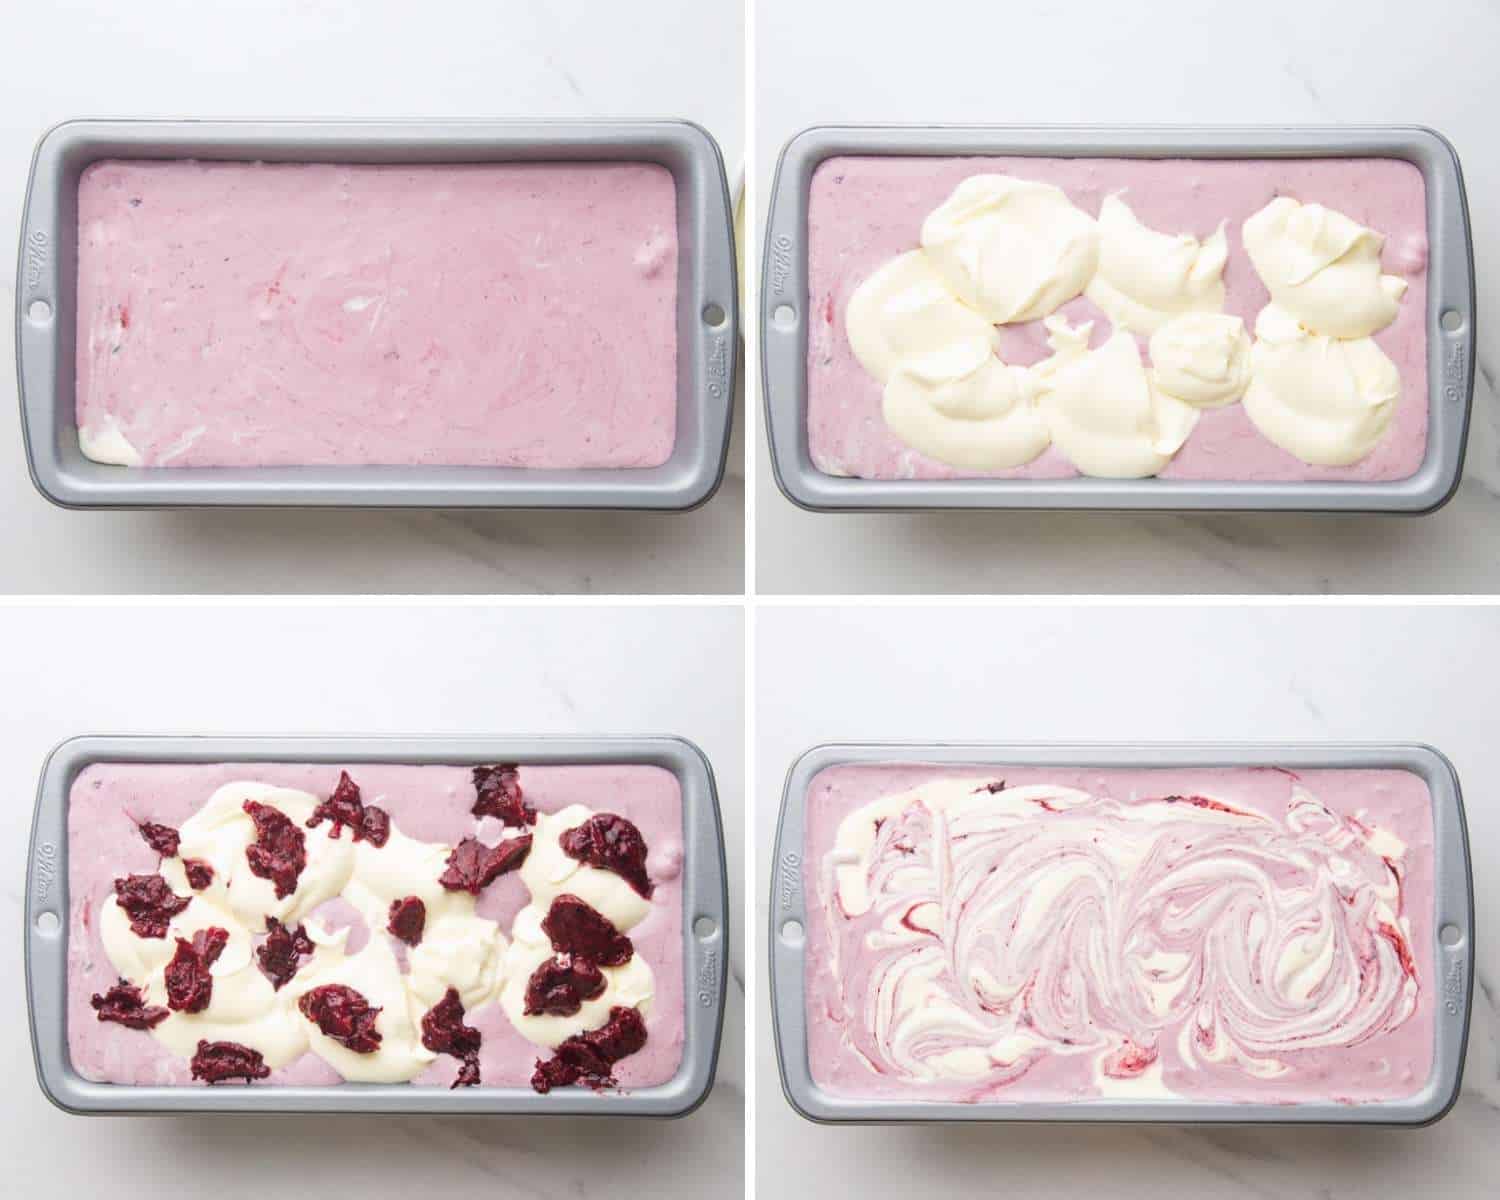
How To Make Cherry Vanilla Ice Cream
Recipe Tips
Have Fun with Flavorings! You can add crushed cookies, chocolate shavings, or chocolate chips to your ice cream before freezing. Swirls of cherry jam is also a great idea.You Can Use Canned Cherries. I used frozen cherries here, but canned cherries are also great. They are easy to find, cheap, and taste great. Do not mix up canned cherries with canned cherry pie filling though!
Storing Tips
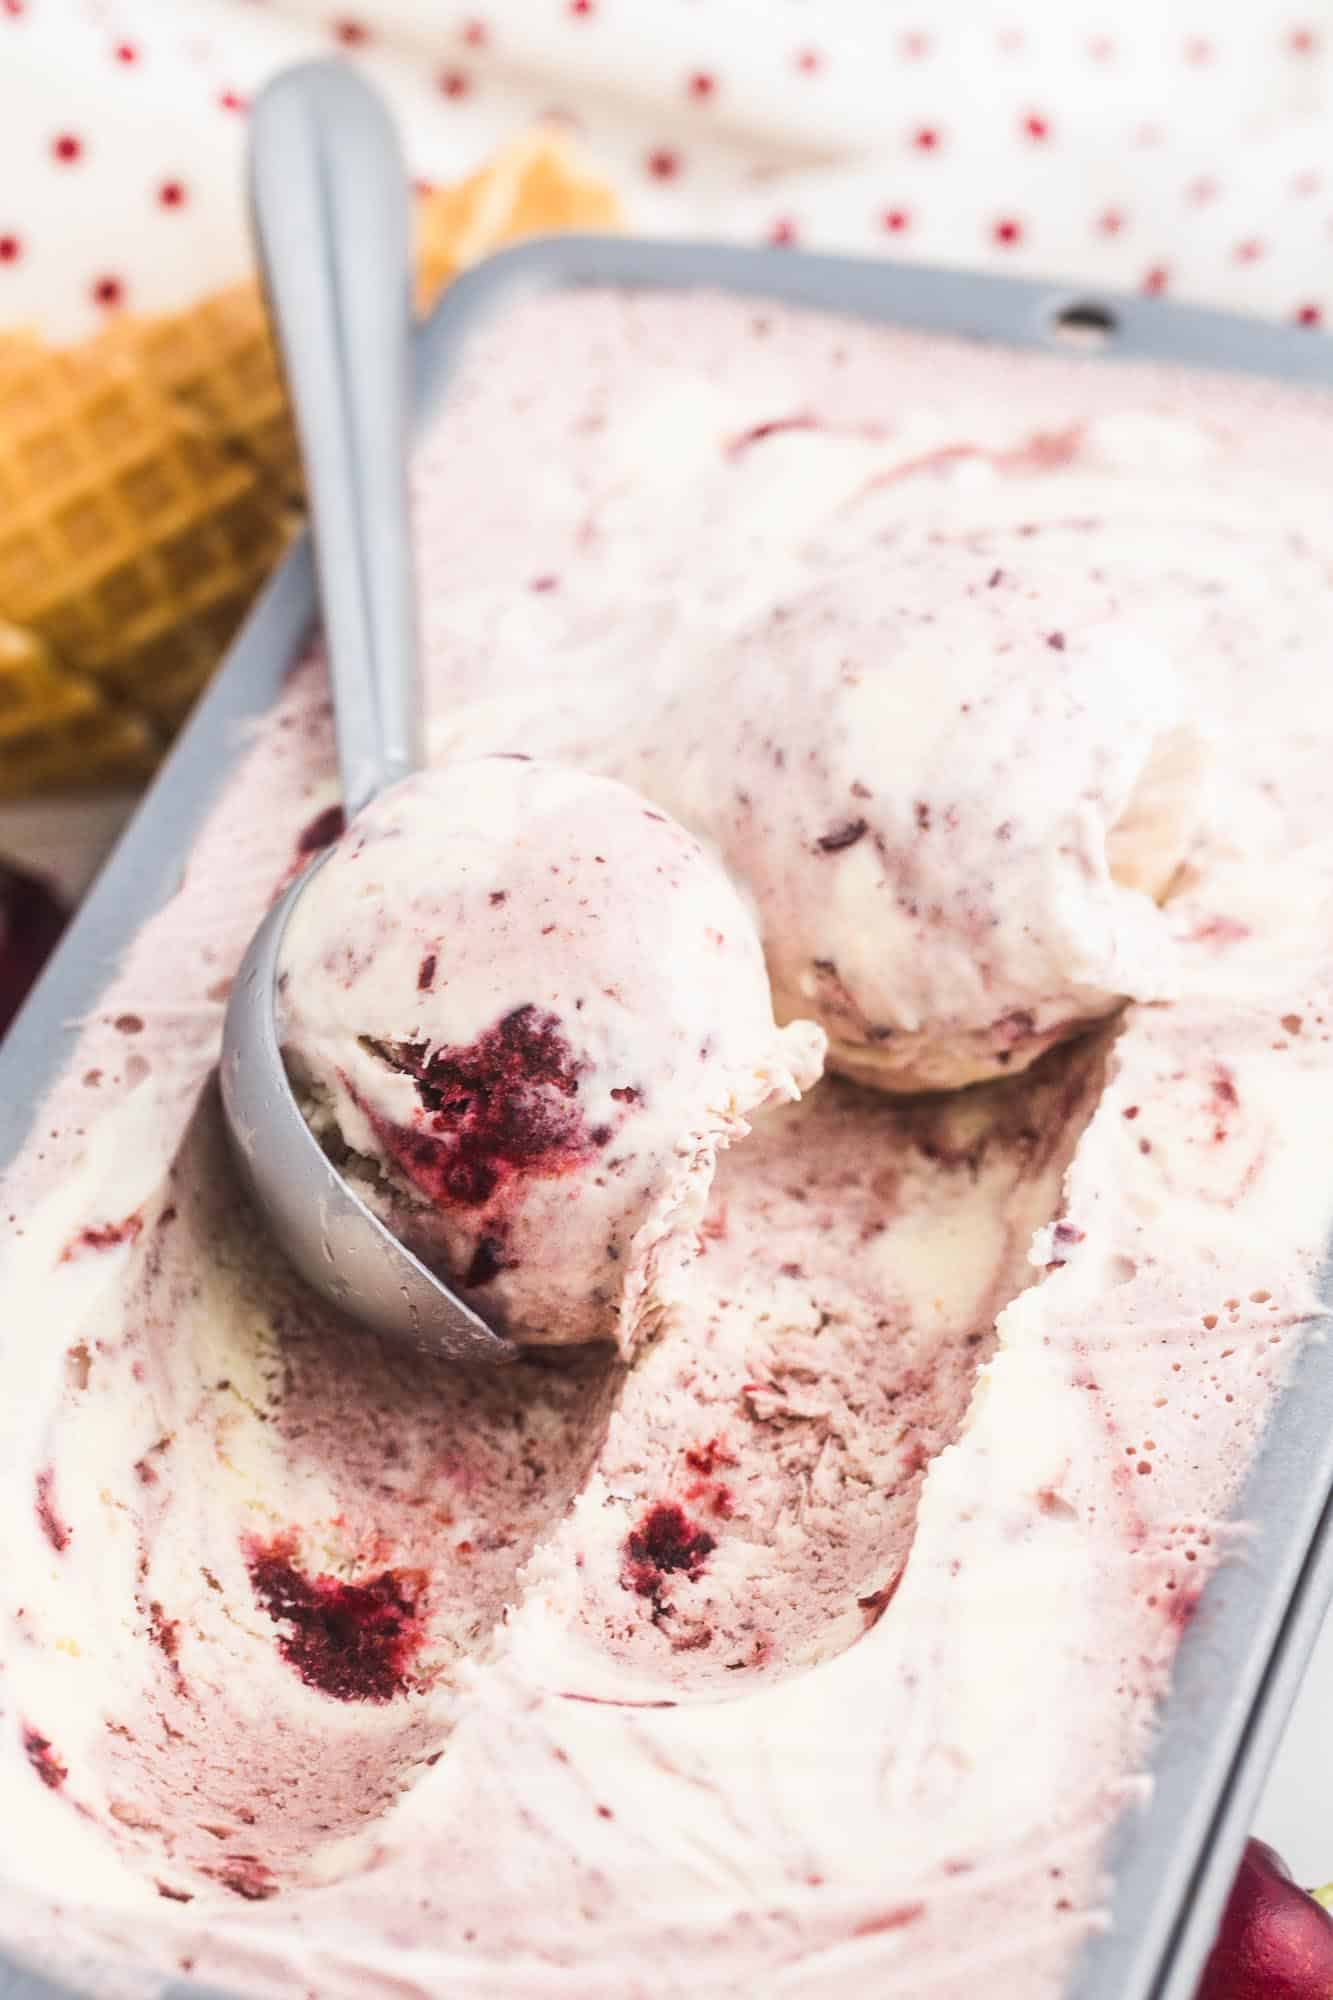
Store the ice cream in the freezer right in a loaf pan for up to 2 months for maximum freshness. To prevent ice from forming, tightly wrap the top of the ice cream with plastic wrap so it adheres to the top. Your friends and family will love this ice cream! Come back and let me know how yours came out, and be sure to Pin this recipe to make again. © Little Sunny Kitchen