I would love to hear if you try out this pie! Especially if you’ve already made my original Apple Pie. Let’s hear how you think they compare!! It’s like choosing a favorite child, kind of. Happy pie baking! (Eric tried to convince me that it was big enough that it didn’t need to be wrapped. Just slap a bow on and call it good. But I mean come on, what could a 5-year-old love more than ripping a ridiculous amount of paper from a present the size of her body??) So anyway, I wrapped it all up and tied on the ribbon. On Val’s birthday, we face timed grandma to let her in on the fun. She took one look at the wrapped present and said, that’s not what I sent. Utterly confused, we opened the box to find a beautiful baby play mat. And we even had a moment looking at each other with blank faces, asking, who would think a 5-year-old would be into this baby toy?? And ONLY THEN did I remember that just days previously, I had bought the play mat for my cousin, whose baby shower is coming up. And I had even commented to Eric about it. “That present for my cousin hasn’t arrived yet, I’d better check the order.” You guys! What is it with me! I guess I’ll have to wrap it back up again, for the second time. (There’s no “slapping a bow on it” for a baby shower either, Eric. This is your etiquette tip for the day. There will be a test. Just kidding.) Raise your hand if you’ve made my Best Homemade Apple Pie? I posted this recipe in fall 2020, and all you Covid hermits went INSANE. I’ve never seen traffic on a recipe like that before. Thousands of people have since made that pie and fallen in love. I’ve had so many requests over the last year to create a Dutch Apple Pie version of that recipe, and today is the day my friends! The best homemade apple pie, Dutch-ified! But what does that even mean, you ask??
Apple pie vs dutch apple pie
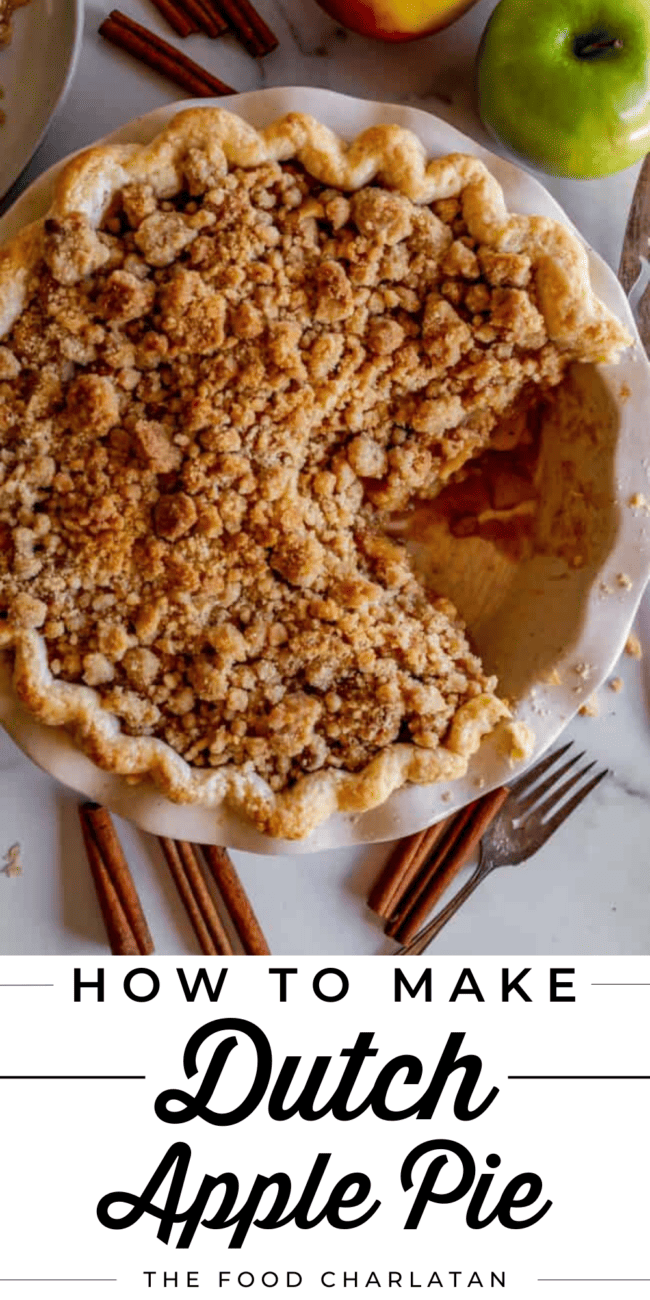
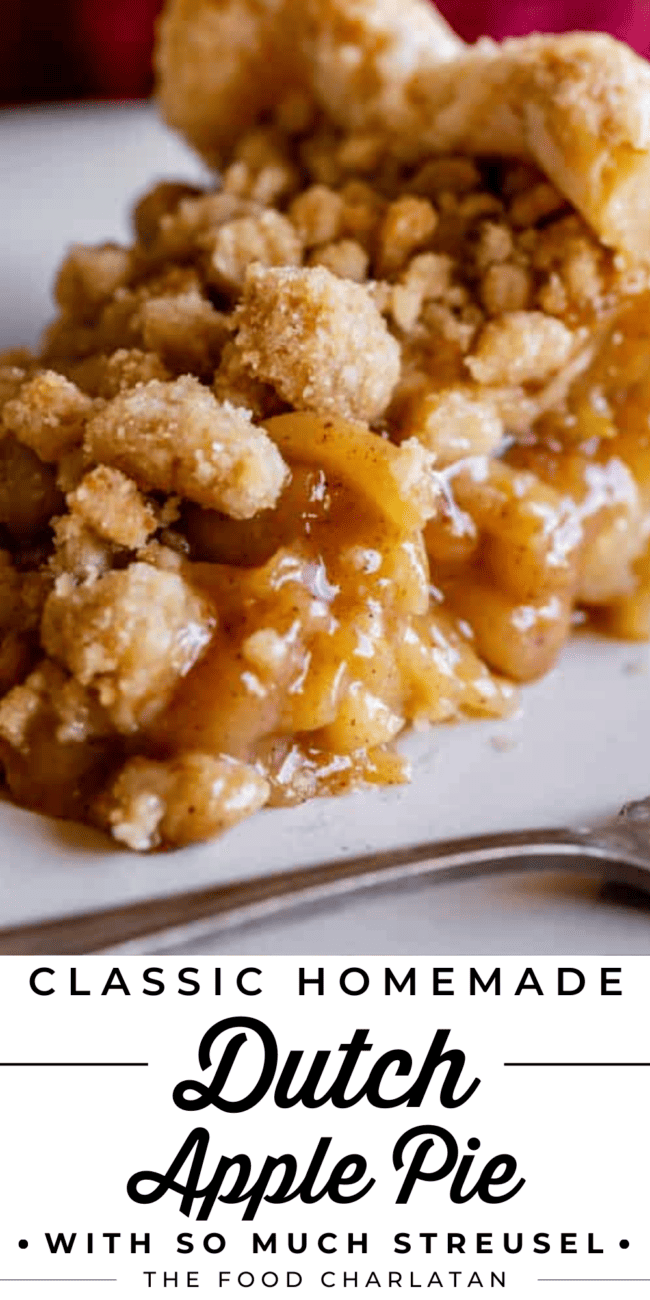
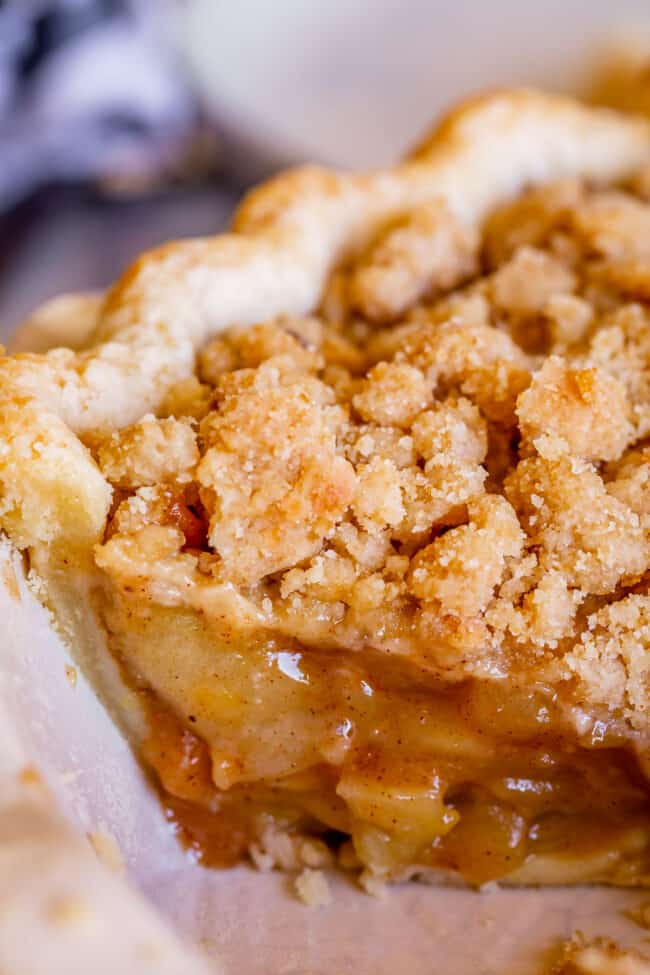
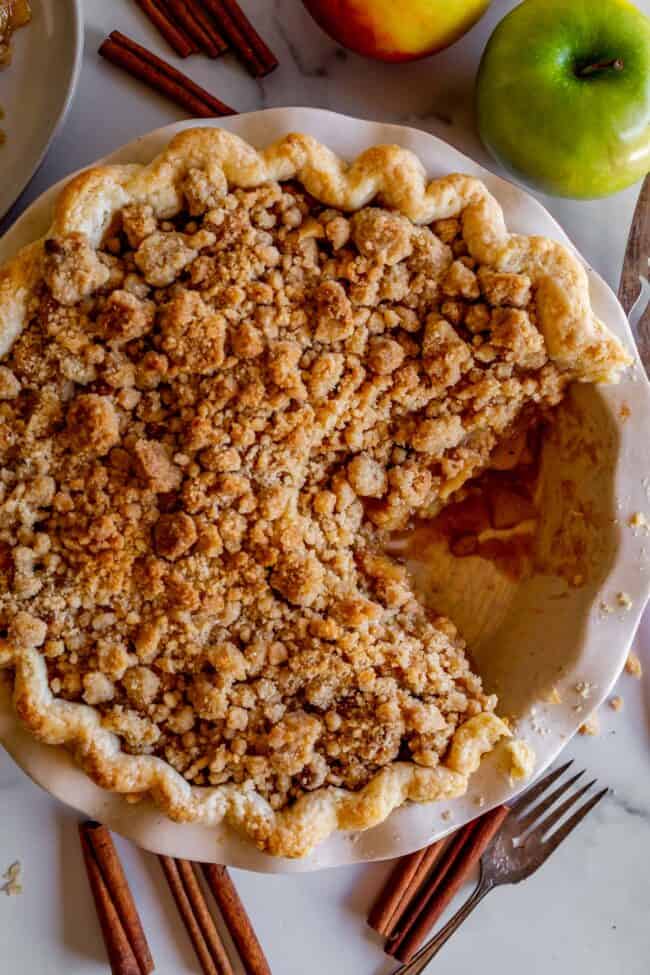
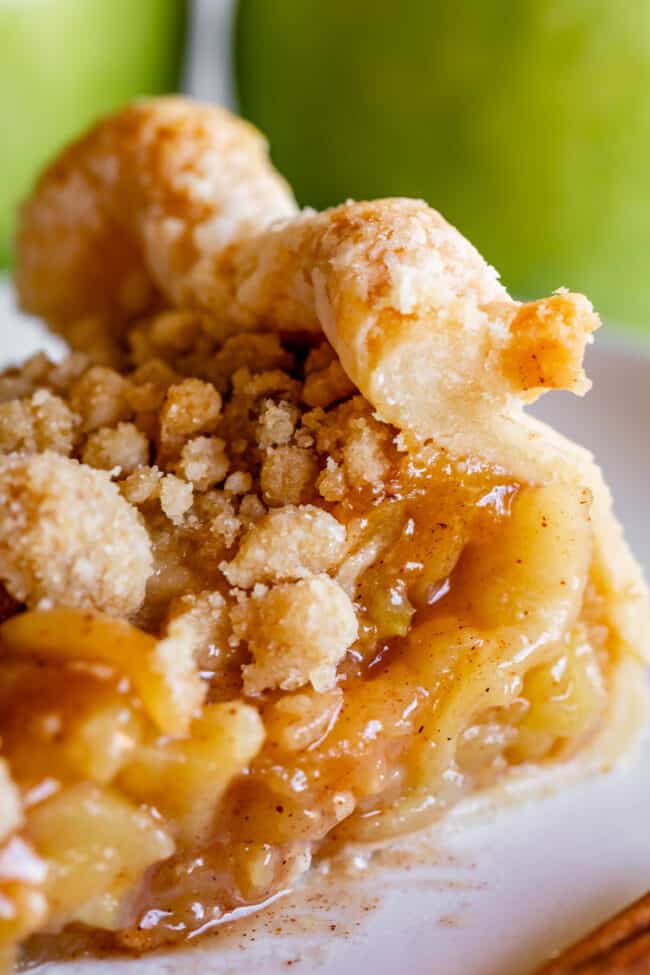
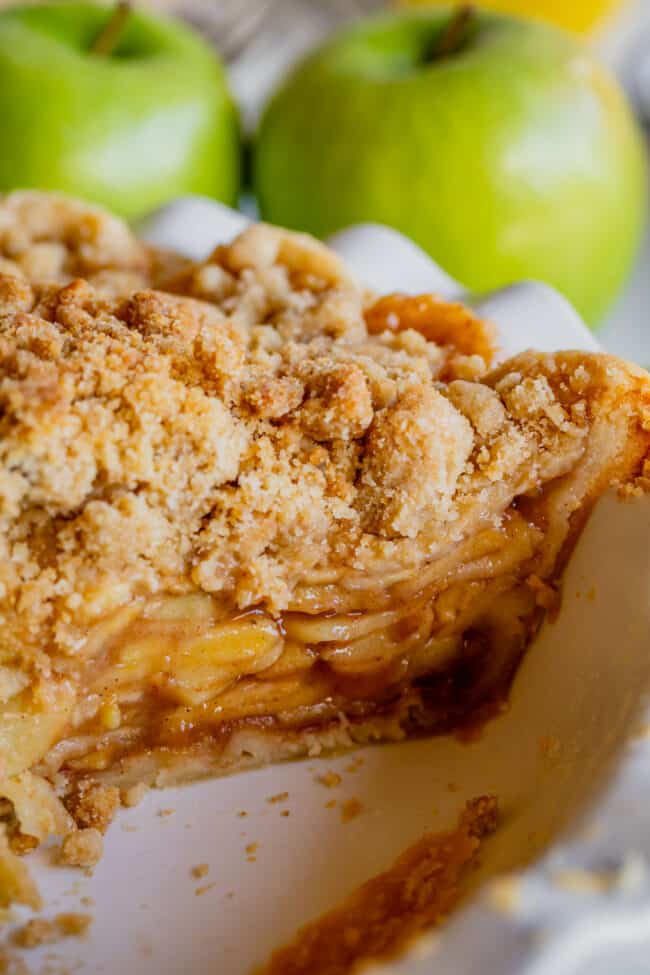
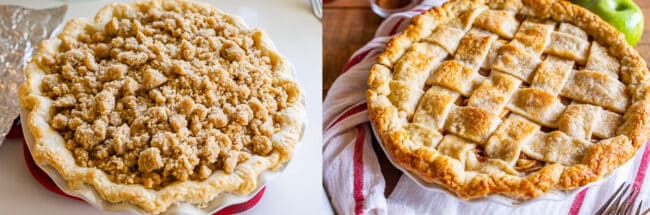
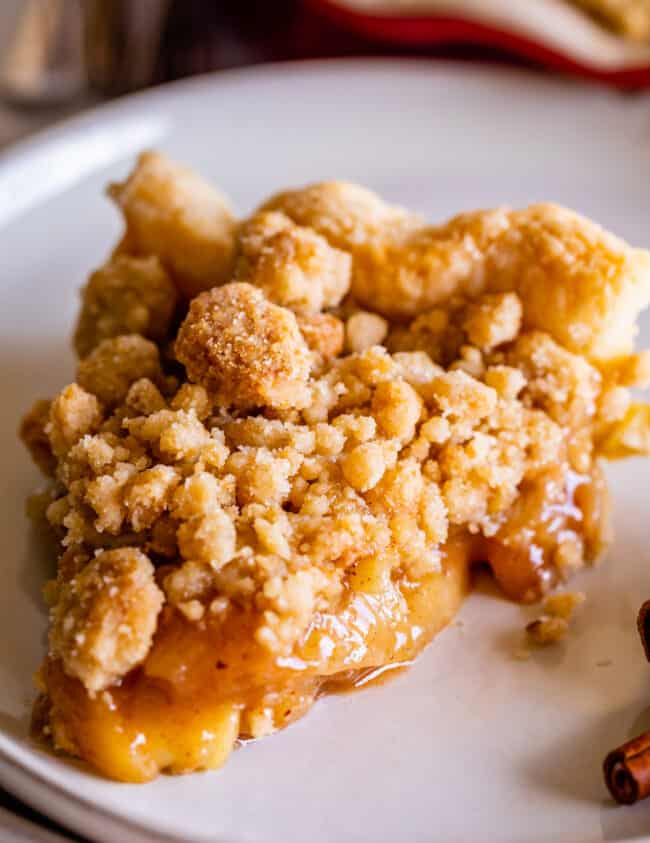
Traditional Apple Pie has pie crust on the top and bottom, with apples and sugar in the middle. Dutch apple pie, like so many other American traditions, is a combining of cultures. Basically, it’s like traditional Apple Pie (which is French, using pie crust) and Apple Crisp (which is German/Dutch, using streusel on top) got busy and had a pastry-bottomed, crumb streusel-topped baby. A delicious, glorious baby. Business on the bottom, party on the top. Best of both worlds!
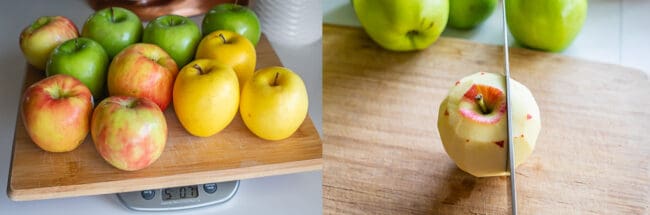
Use a ton of apples! The best way to get the MOST apple-y flavor in your pie is to utilize the apples themselves! Most apple pies call for 2-3 pounds of apples. We are using 5 pounds! Like 11 or 12 big apples. Use a variety of apples. I used Granny Smith (very tart), Honeycrisp (middle), and Golden Delicious (on the sweet side). Using only one type of apple gives you only one flavor profile. Using a blend means your pie will land somewhere perfectly in the middle of tart and sweet. Here is a list of common apple varieties, listed from most tart (Granny Smith) to sweetest (Fuji).
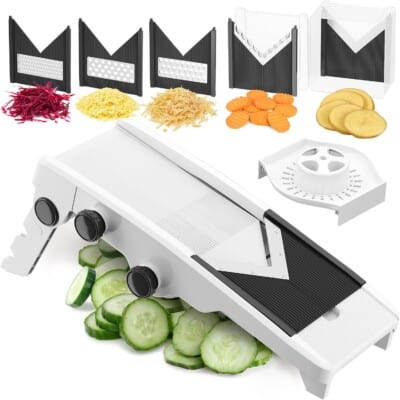
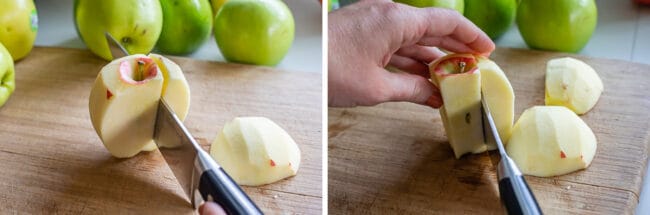
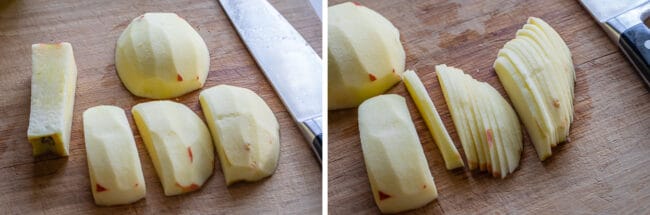
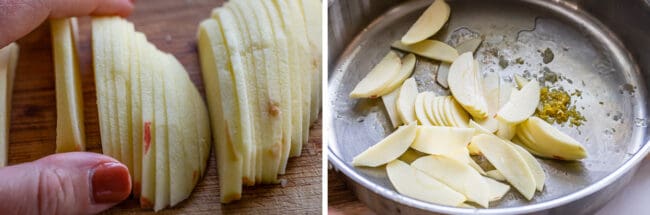
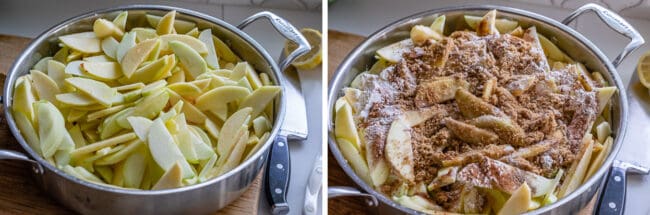
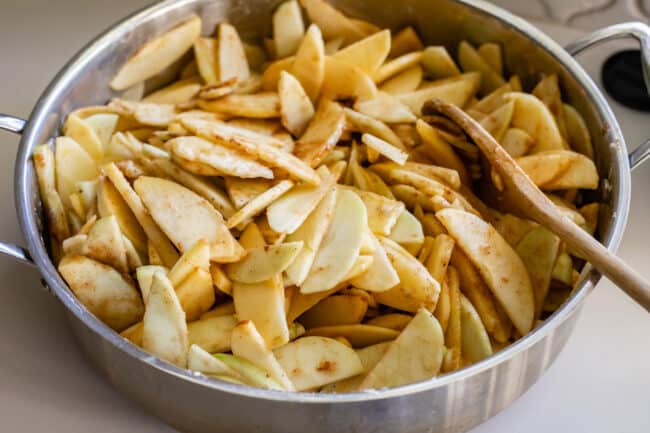
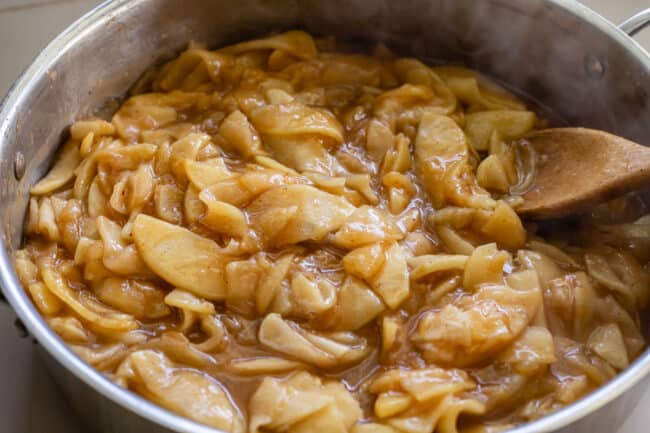
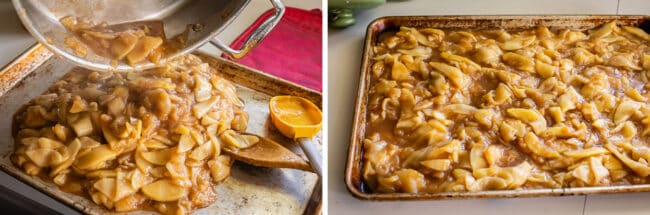
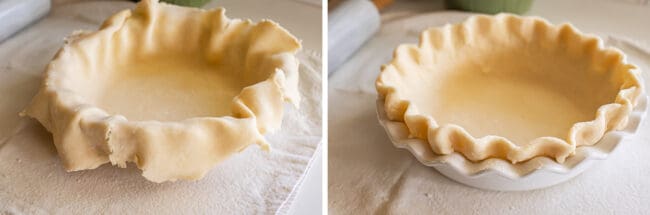
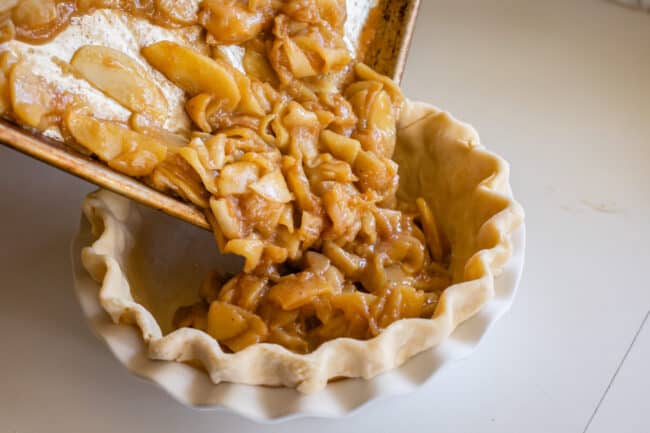
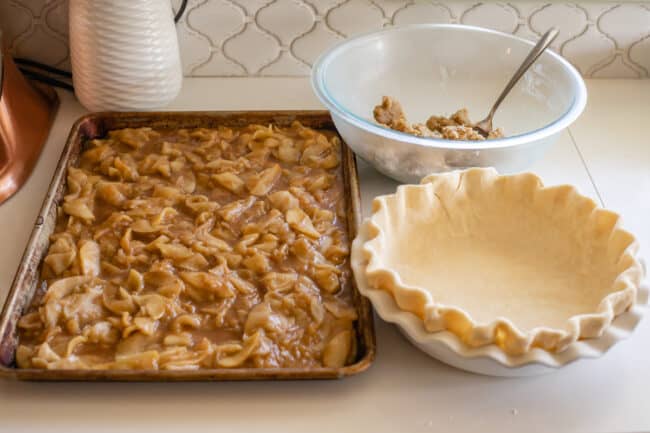
▪️Granny Smith▪️Braeburn▪️Macintosh▪️Honeycrisp▪️Red Delicious▪️Golden Delicious▪️Ambrosia▪️Gala▪️Fuji If you like pies a bit more on the tart side, grab a few more Granny Smith. If you like them a bit more sweet, go heavier on the Gala or Golden Delicious. I would avoid Red Delicious (too mushy, and honestly if you don’t like to eat it plain why would you want it in a pie? Are there people who actually still eat Red Delicious??) Secondly, apples have a lot of water, and all that water ends up in your pie if you don’t cook some of it off first. This means your apple pie is not as flavorful. I tested this pie twice: the first one with uncooked apples and the second one with cooked apples. The raw apple pie definitely had less flavor. It was bland guys. I mean, still a passable apple pie, just nothing to write home about. I know it’s inconvenient to cook the filling (even more inconvenient when I tell you that you’re going to have to cool that filling before adding it to the pie) but hey, you didn’t sign up to make an apple pie because you needed a quick dessert, did you? Take the extra 20 minutes to cook the filling. You won’t regret it! You need 5 pounds before coring and peeling. That’s about 11-12 large apples to make 5 pounds. Here’s how I slice my apples. You can use a mandolin if you want, but be sure to use a metal glove. Those suckers are sharp! Keep slicing around the core until you have these segments. Then slice to about 1/8 inch. You can slice thicker than that if you like (you may have to cook longer), but I love thin apples in my pie. As you are slicing up the apples, toss them in a 12 inch high sided skillet (heat should be off) with the lemon juice and zest. Give it a stir to coat the apples with lemon. Time to cook it down. Add some sugar, brown sugar, flour, salt, and spices. NO extra liquid, the apples will release plenty! Place it over medium heat and let cook for about 20 minutes. Cover the pan, but stay nearby because you’re going to have to stir the mixture every couple minutes, replacing the lid each time. This keeps the steam in and helps cook the apples. You are going to get this glorious caramel-y sauce going. Something magical happens when you gently cook the apple pie filling over a longer period of time like this. The pectin in the apples is converted to a heat-stable form. (Thanks Cooks Illustrated!) That means when you cook the apples again in your pie in the oven, the apples won’t become mushy. Whatever level of “al dente” they are at when you finish cooking them on the stove, that’s how it will taste in your pie. So you can adjust the cooking time a bit to reach your level of apple perfection. Cook longer if you like softer apples; shorter if you like them more firm. You don’t have to calculate for further cooking in the oven. Crazy, right? Science! If you added this hot filling into a pie crust right now, it would melt your crust into a sad heap of butter. Your crust will be soggy sad. So we are taking that hot apple, caramel-y goodness and giving it a chill. Pour the mixture onto a half sheet pan (any cookie sheet, one with a lip) and spread it out evenly. I stuck mine in the freezer to chill for about 20 minutes. You can put it in the fridge, or just leave it in the pan you cooked it in and wait for it to come to room temperature (a couple hours), if you are not in a hurry. Now for the crust. I have an entire post about How to Make Flaky Pie Crust, you are definitely going to want to check it out! The most important thing to remember is to keep your pie crust super cold before putting it in the oven, so after crimping the edges to look nice, toss it in the freezer for a half hour. Dozens of people have sent me pictures of their apple pie crusts literally melting off because they went in the oven too warm. It’s about the saddest thing to happen to a pie. Don’t skip chilling! The other important step you need to take to avoid a soggy crust is to blast the heat in the beginning of your cook time. Turn your oven up all the way to 425 degrees and stick a pizza stone (or sheet pan if you don’t have one) on the center rack in your oven. Let it preheat while everything is chilling, about 20-30 minutes. Having direct contact with that really hot surface distributes heat evenly to the bottom of the crust, which results in a firmer, crispier crust. Nobody wants a soggy bottom!
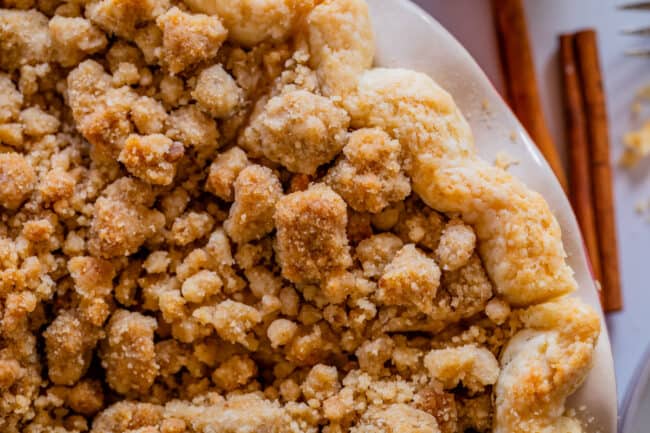
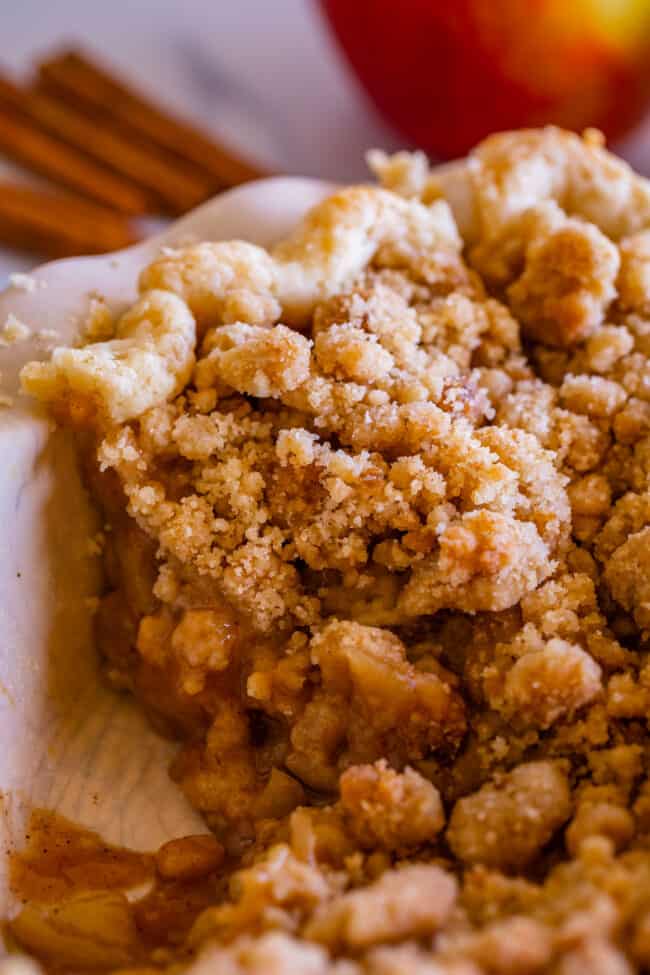
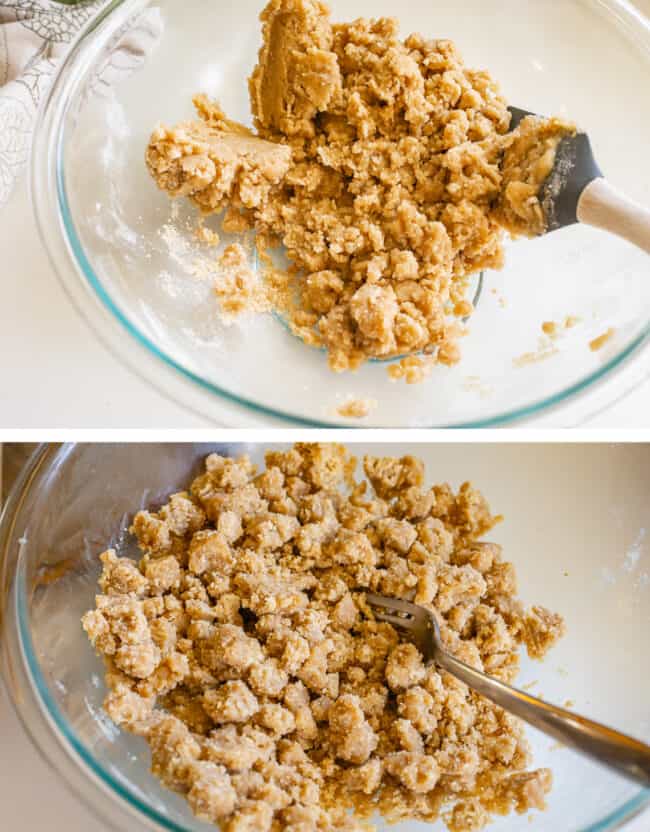
What is the crumble on apple pie made of?
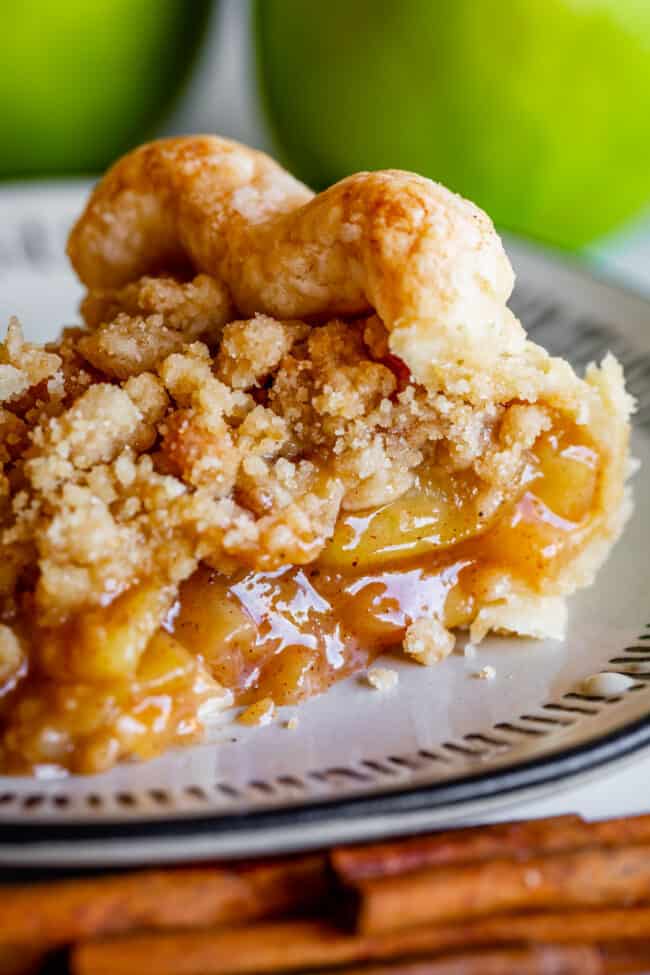
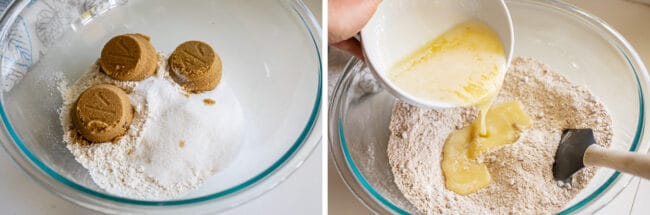
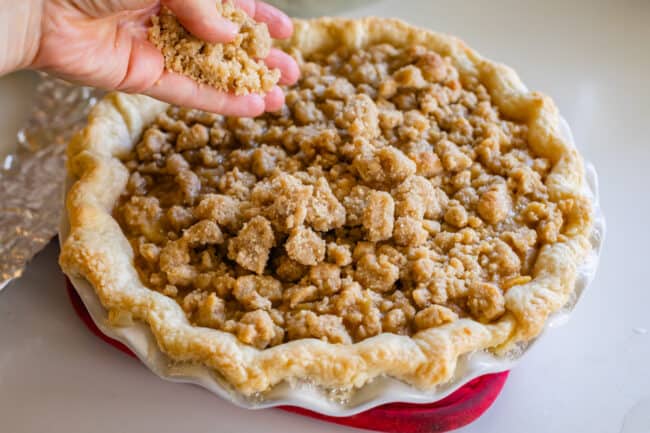
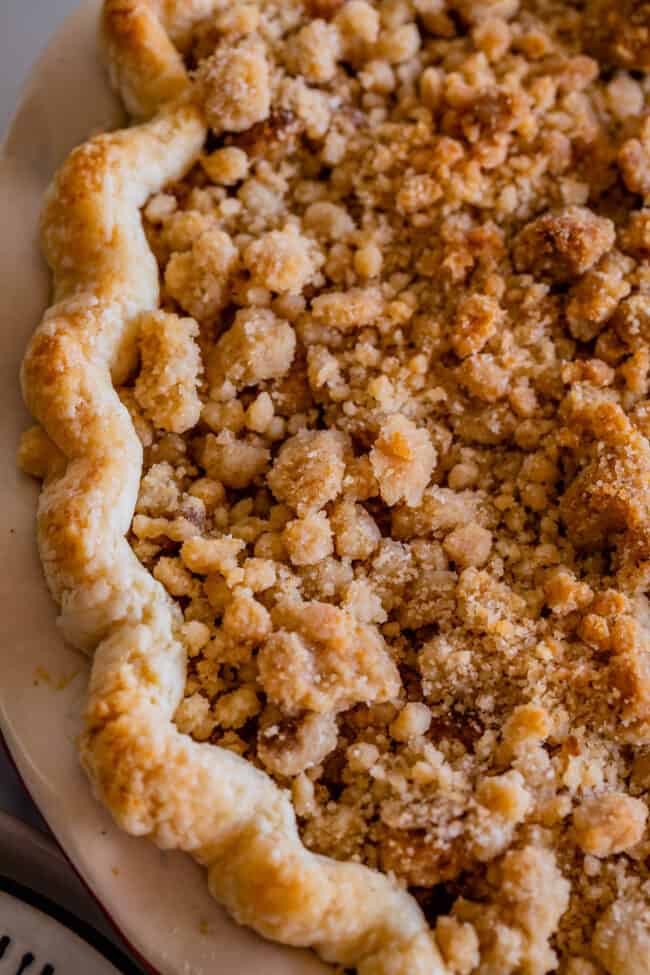
Flour White and Brown Sugar Salt Butter
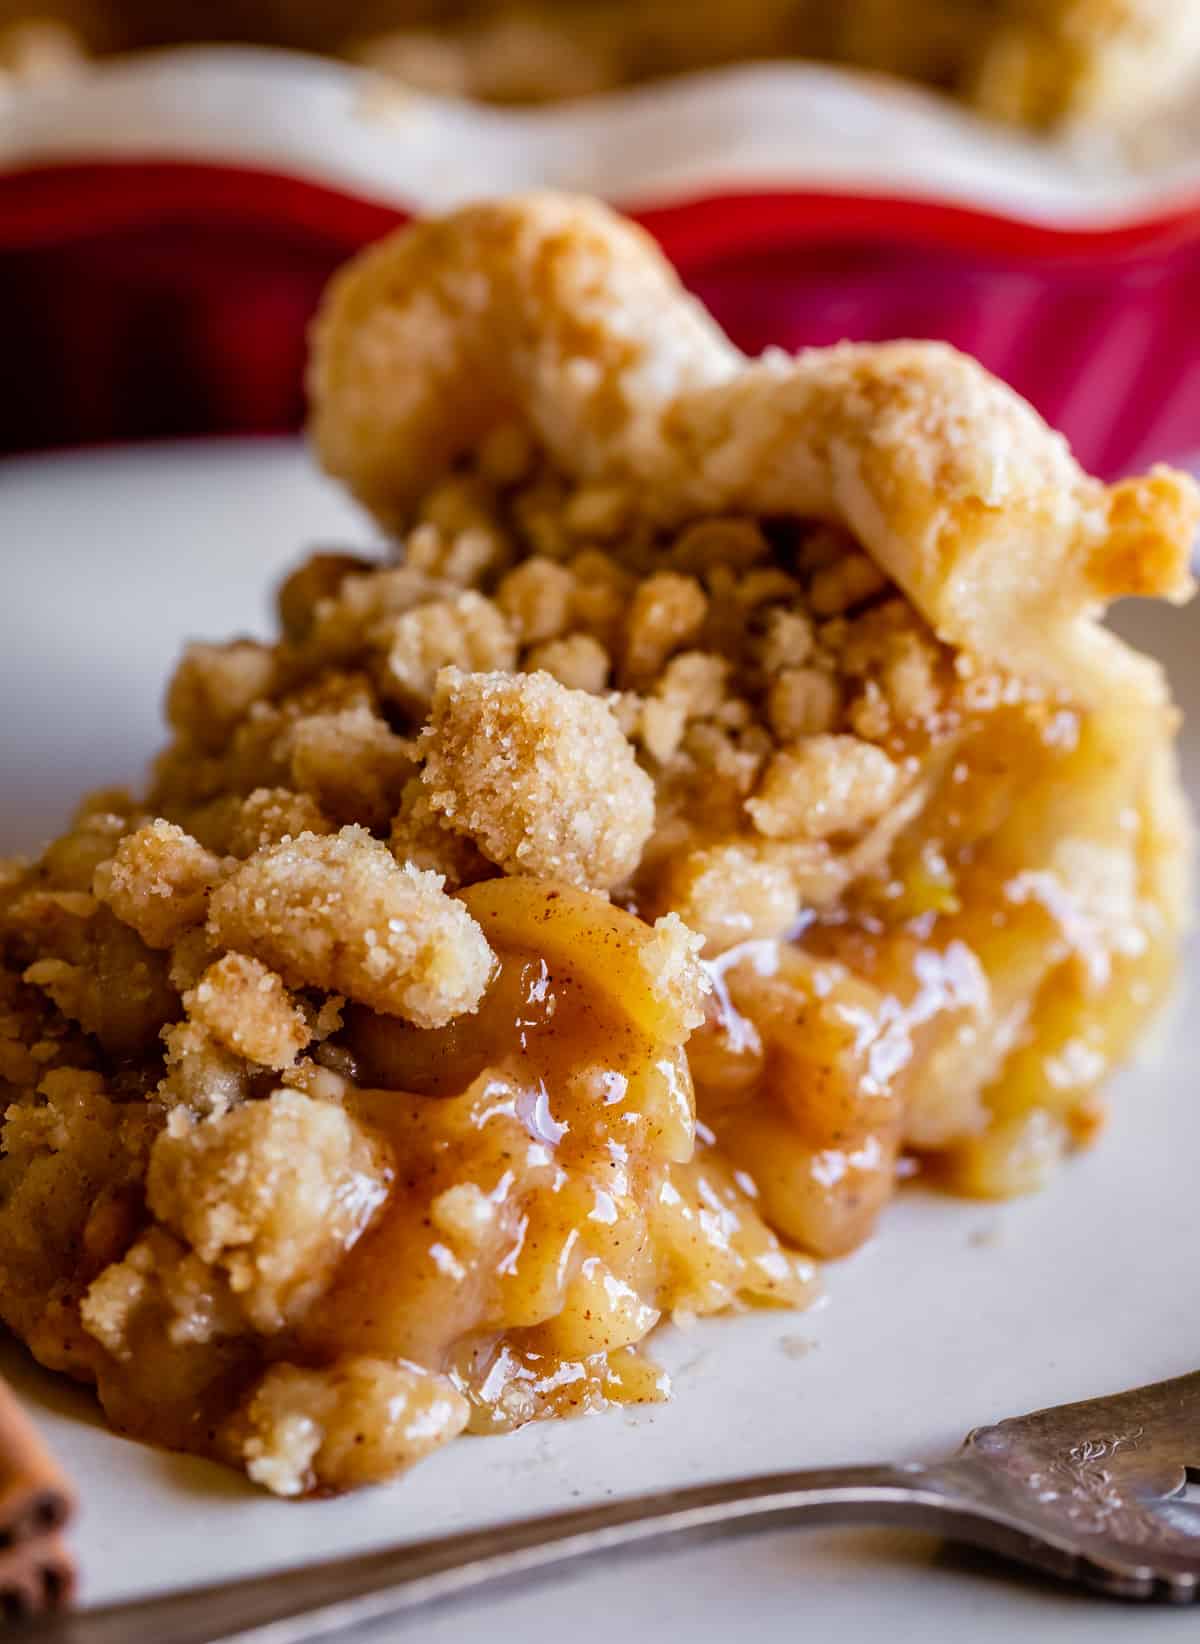
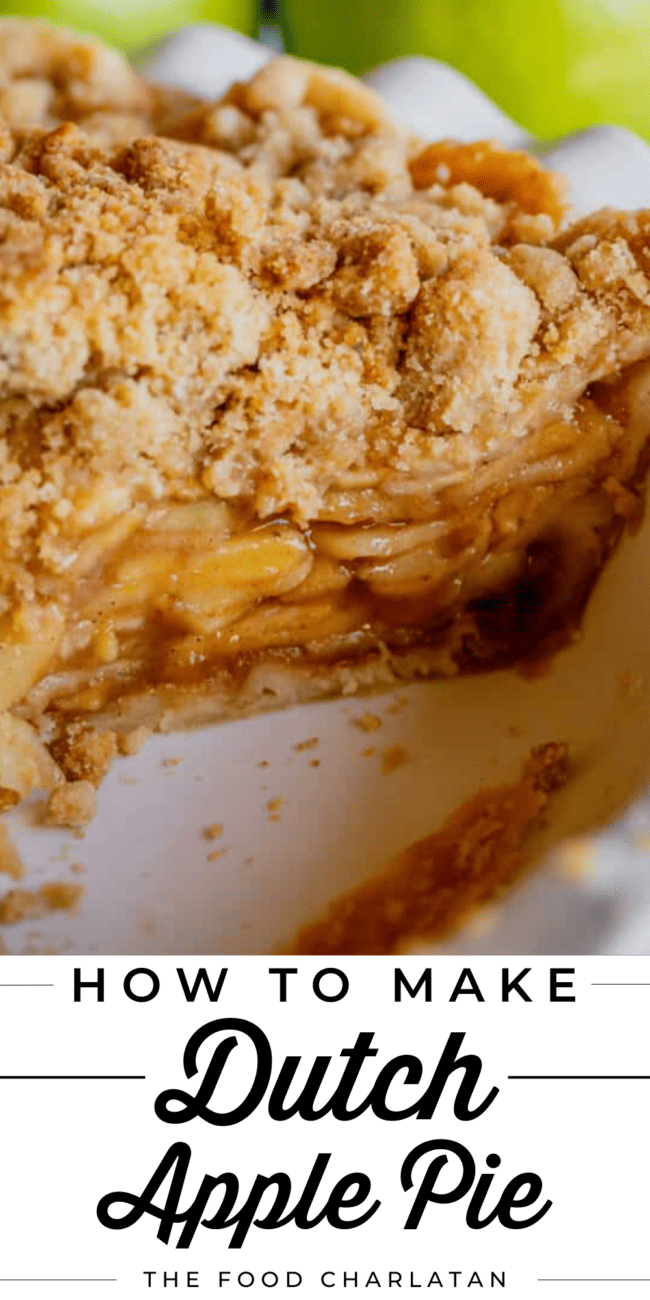
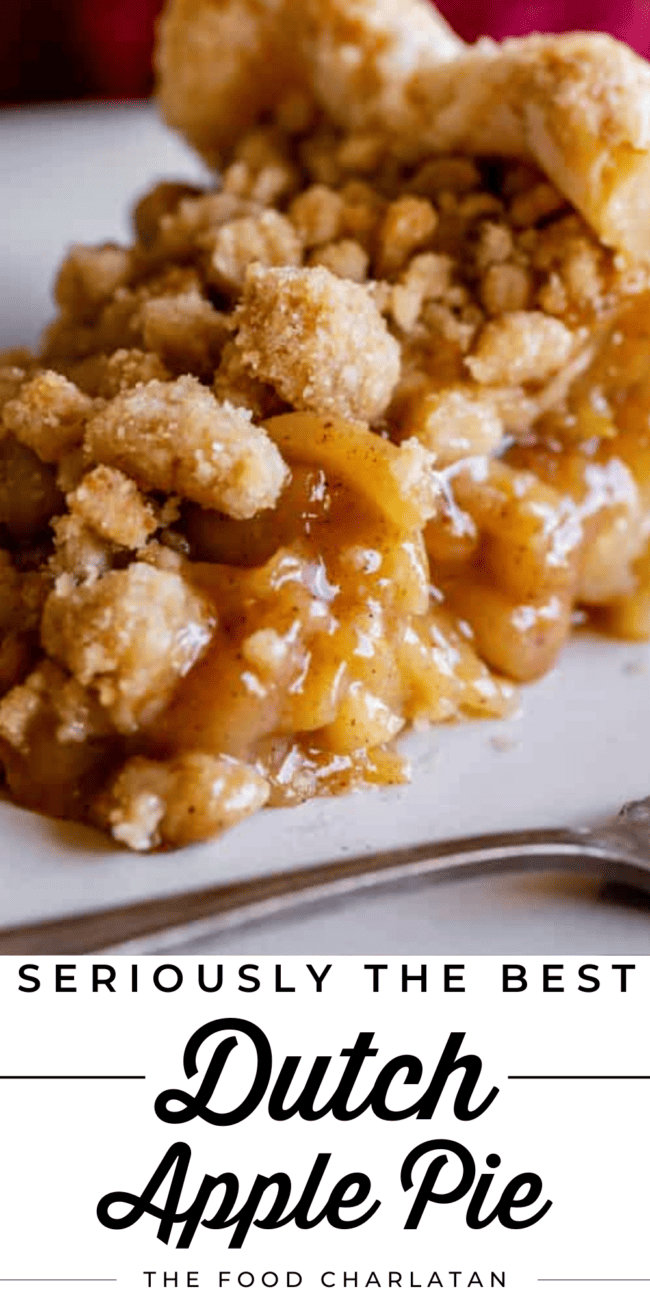
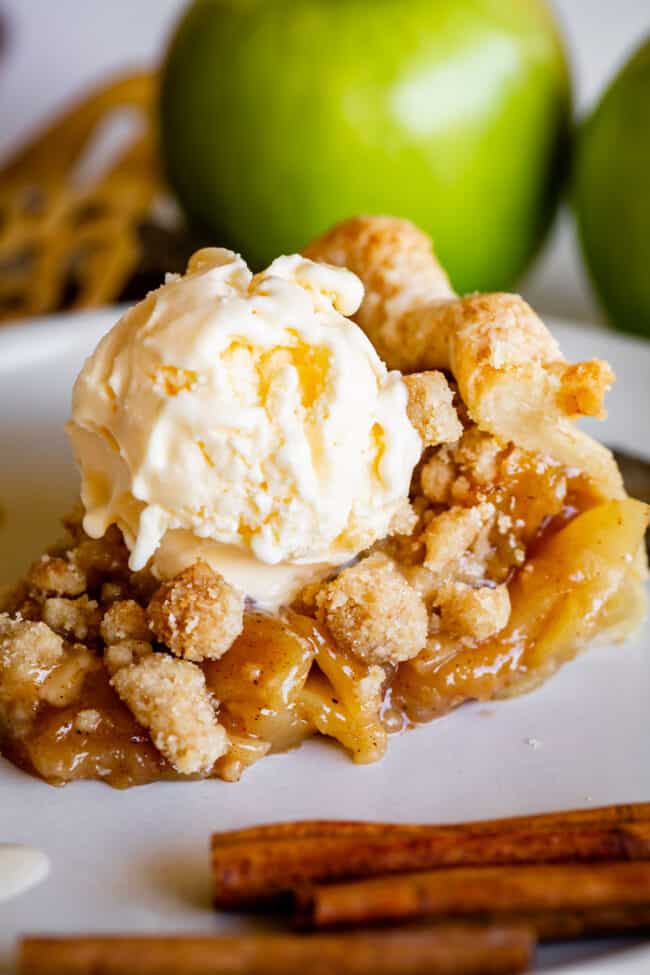
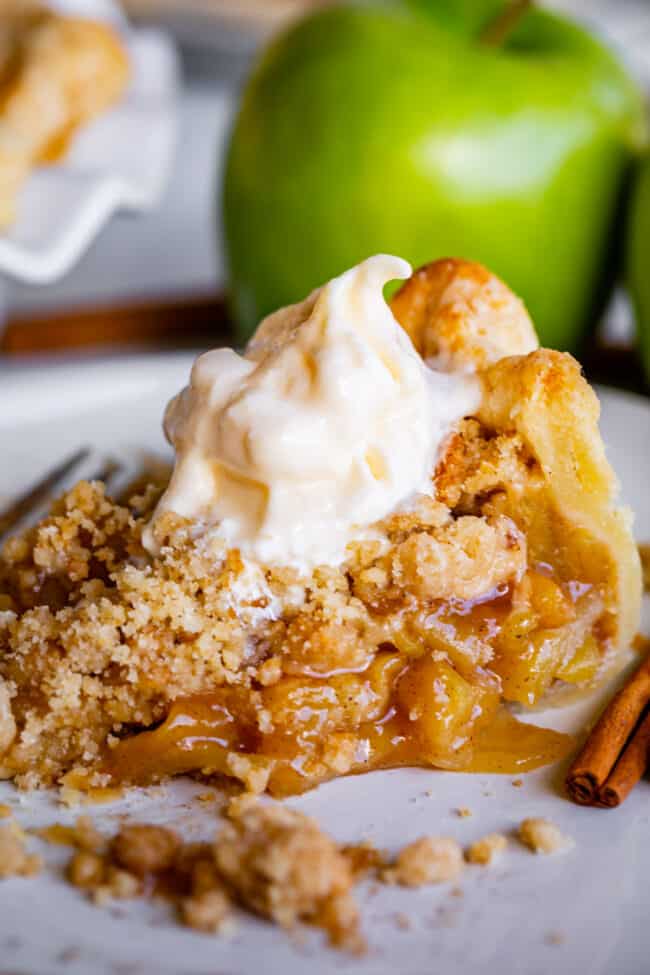
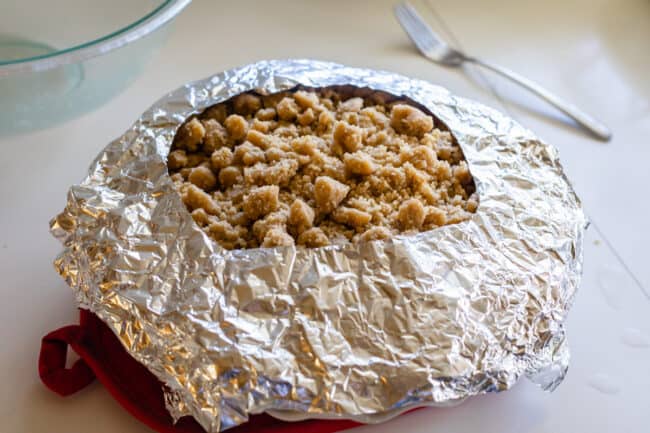
Let the pie cool on a rack for at least 4 hours before digging in. I know, this is killer! But if you cut into it now it won’t really be pie, it will be soup. The juices need time to return to room temperature to be the right consistency. Don’t forget to serve it with some delicious Salted Caramel Sauce! You’ll know your pie is ready to come out when the crumble is a nice, light golden brown and the edges are brown. This is a great pie for making ahead (see more below), but once you cut into it, it needs to be eaten very soon afterward. The problem is that once the moisture inside the pie touches the dry crumble on top, the wetness spreads and makes your whole crumble wet. So it’s a great pie to make the day before your event, just make sure not to sneak a slice, or your crumble won’t be crumbly. You must resist! Your pie is best served the day after making it, without any early cuts made. (This is why it’s perfect for Thanksgiving!) Store leftovers on the counter loosely covered with plastic wrap or foil for about 2 days. After that stick in in the fridge. There are 3 ways to make your pie ahead of time. Facebook | Pinterest | Instagram


![]()