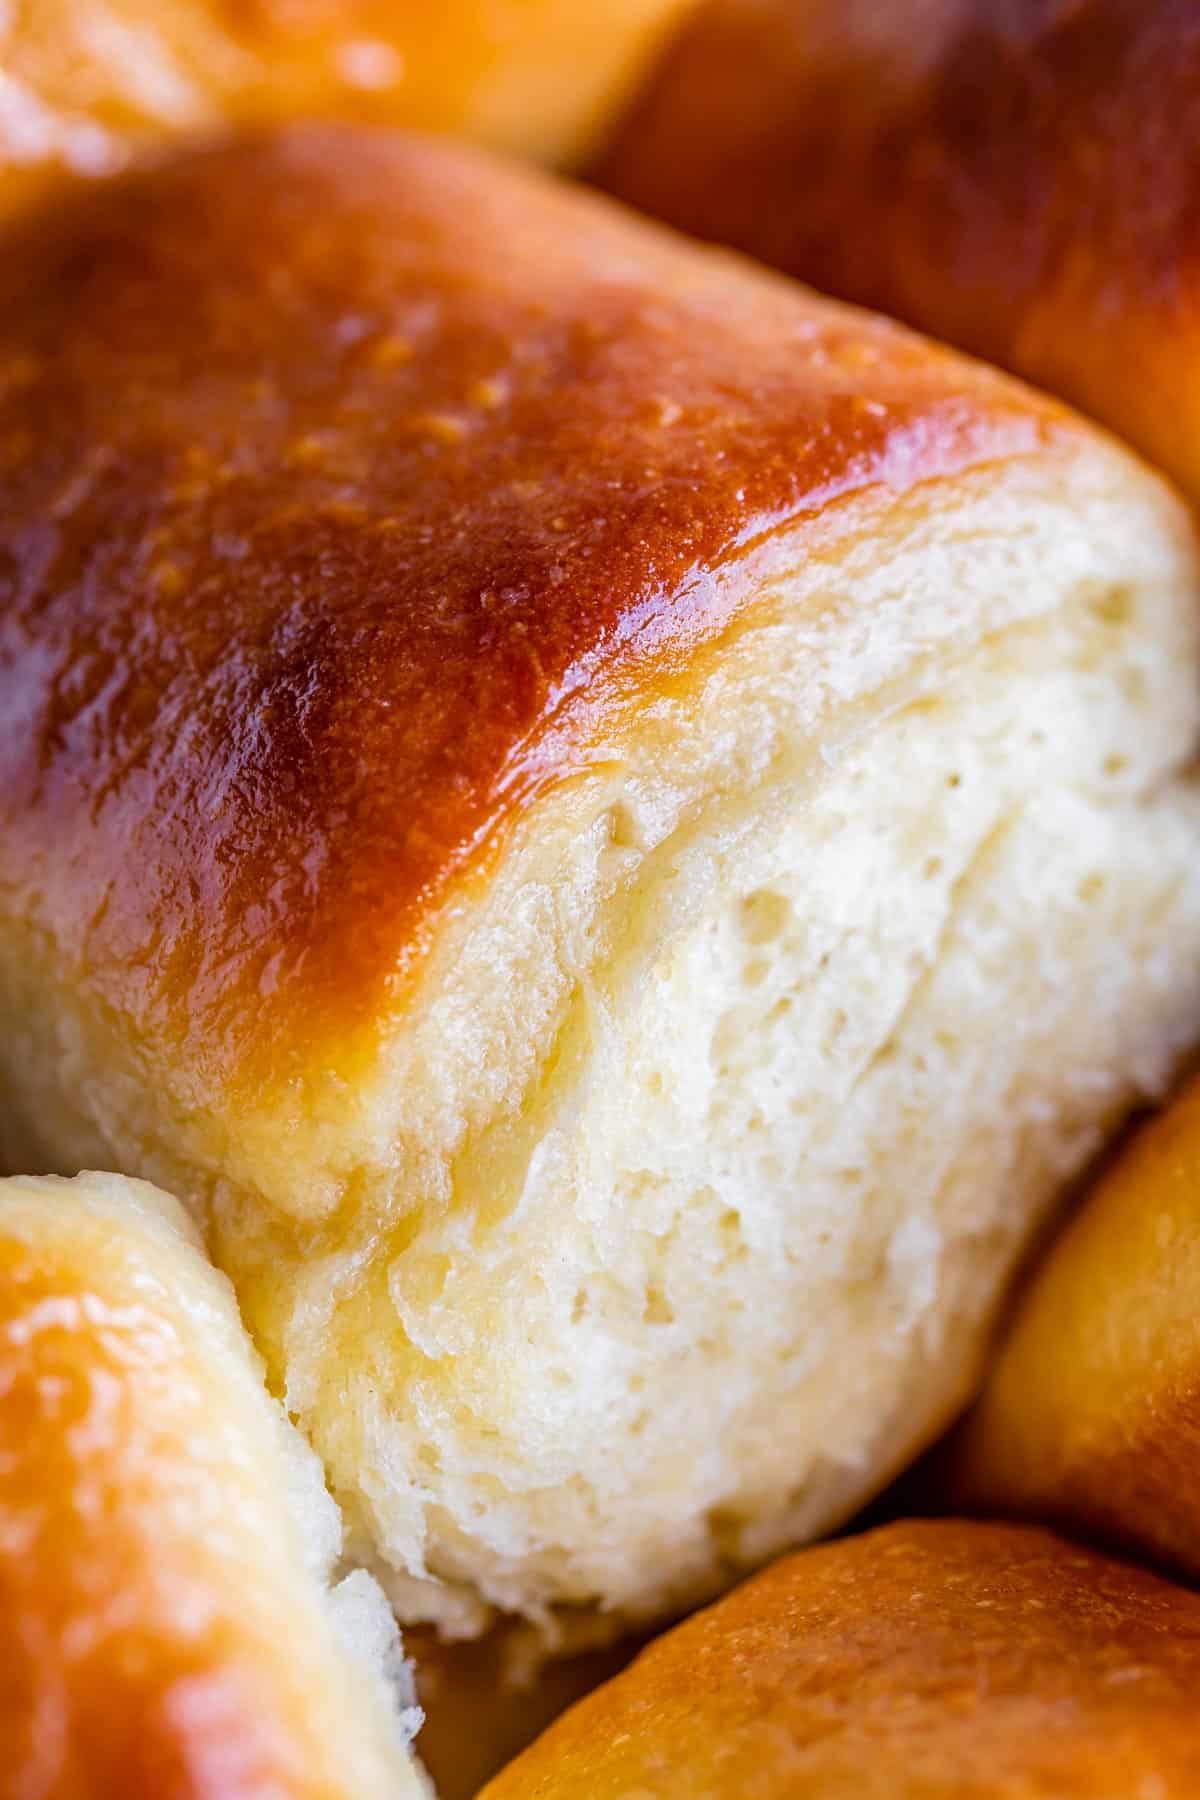
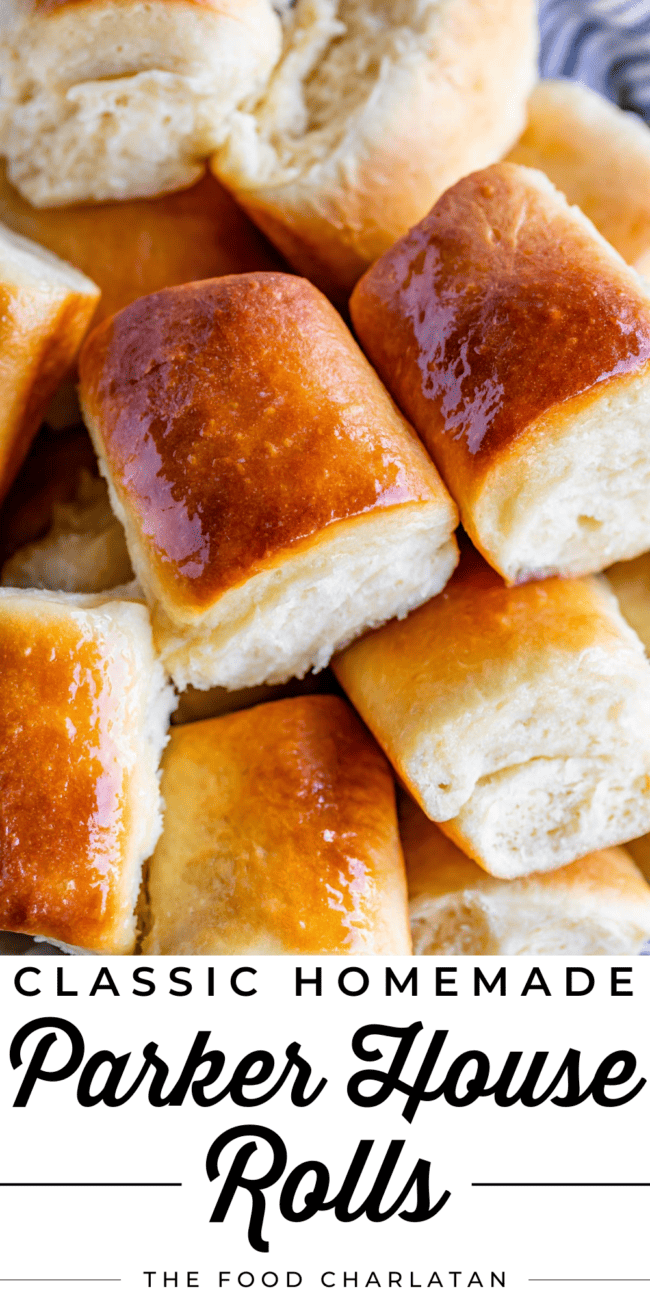
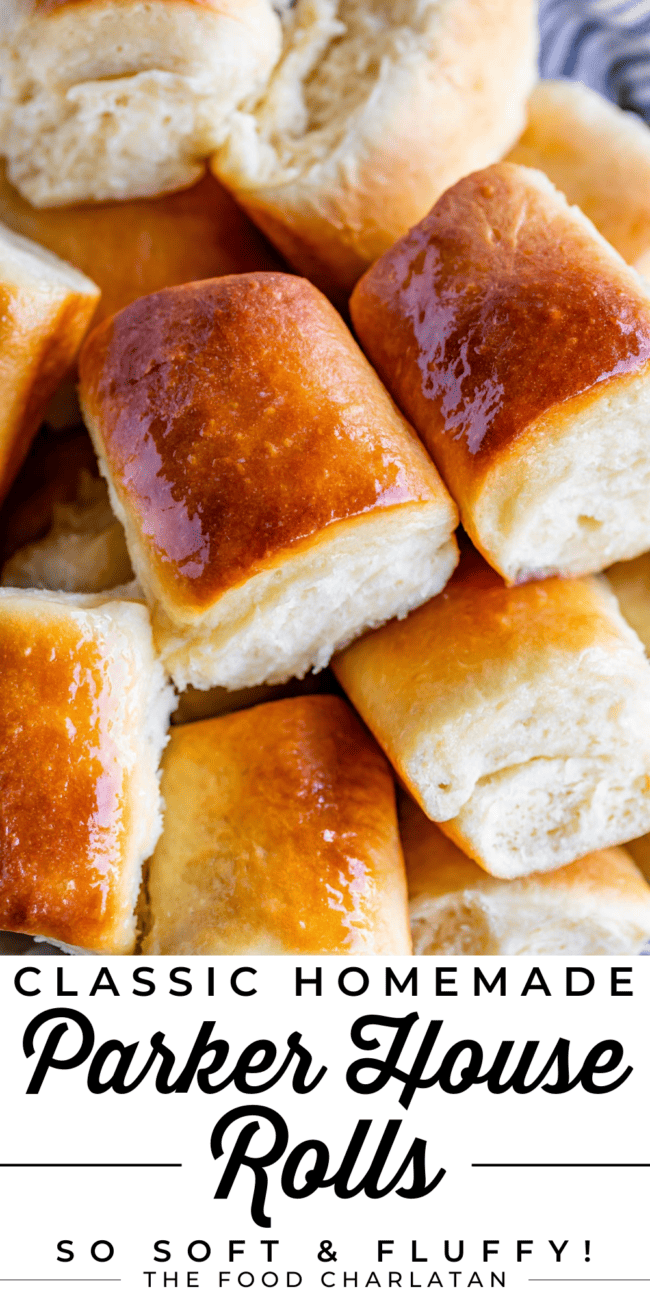
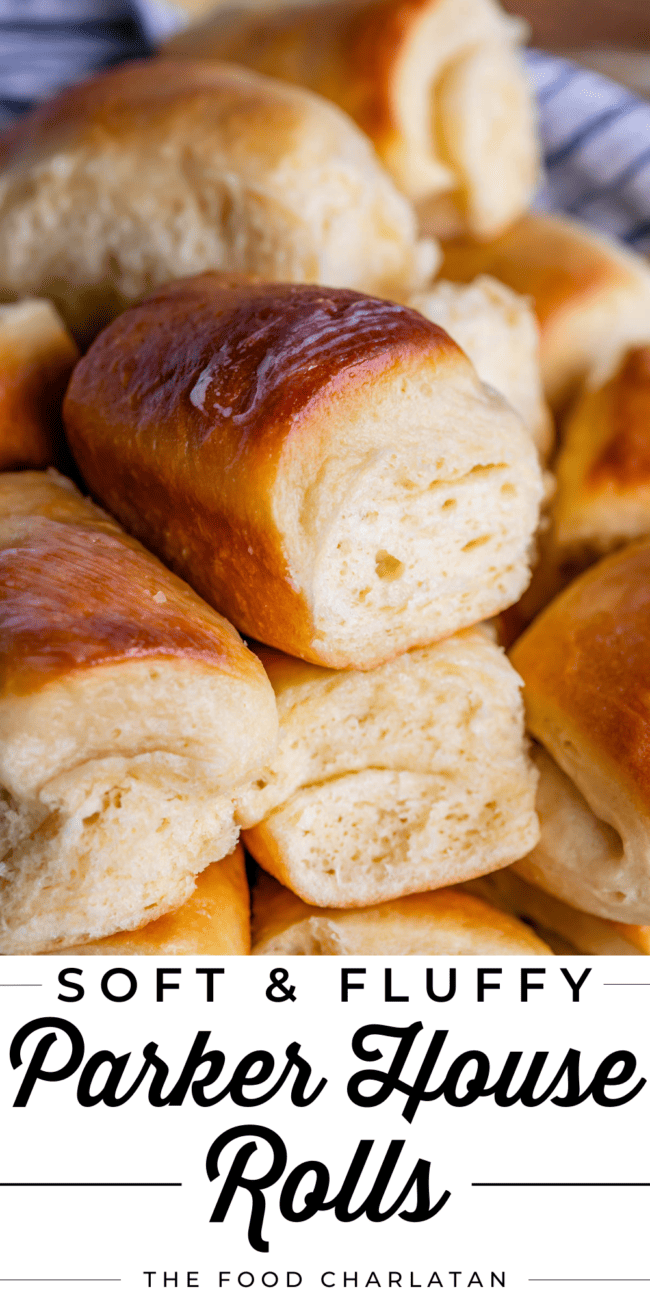
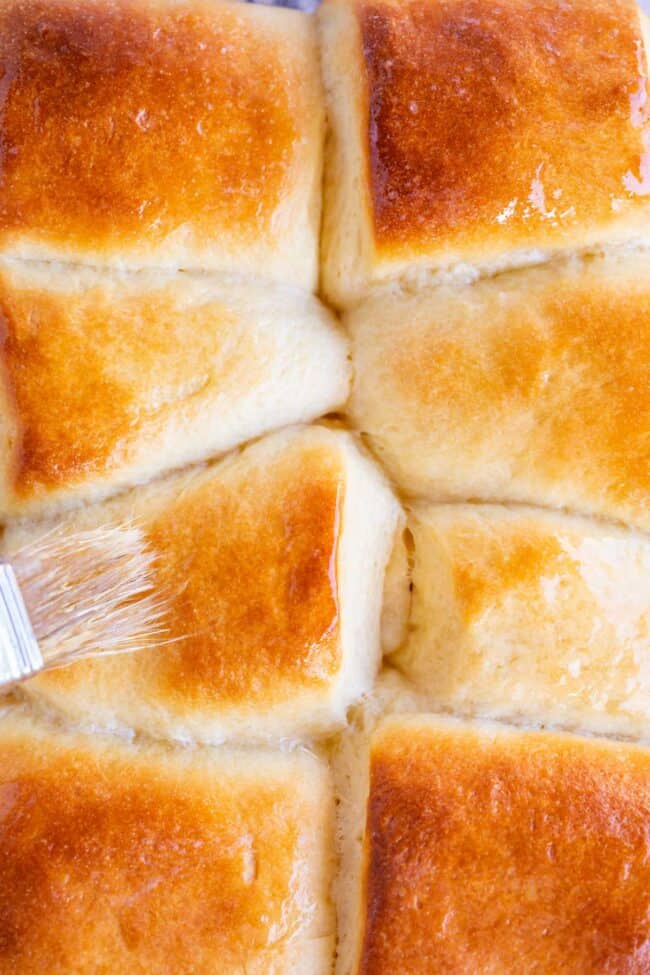
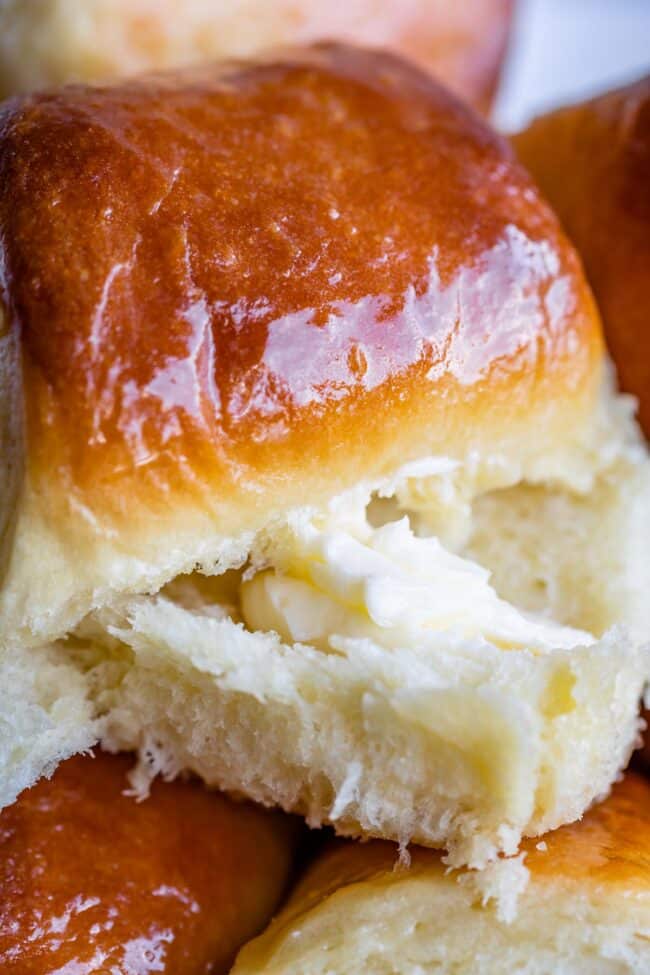
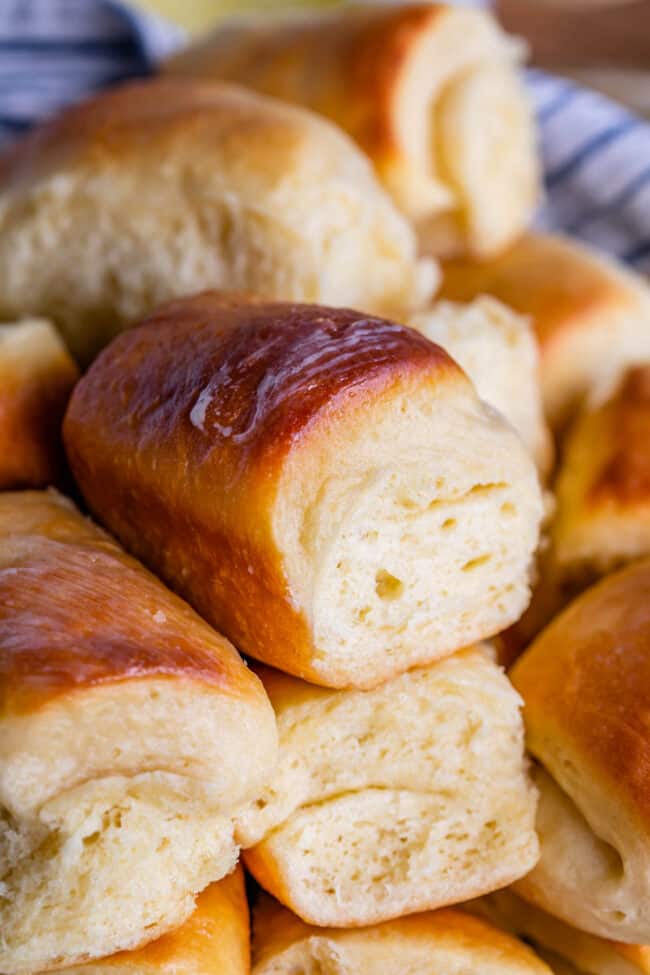
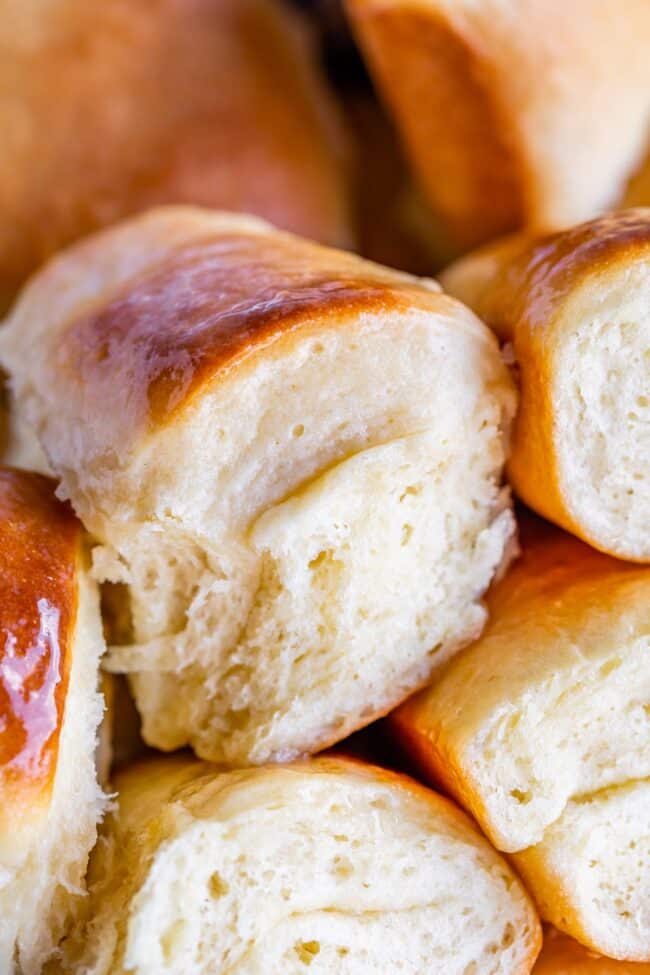
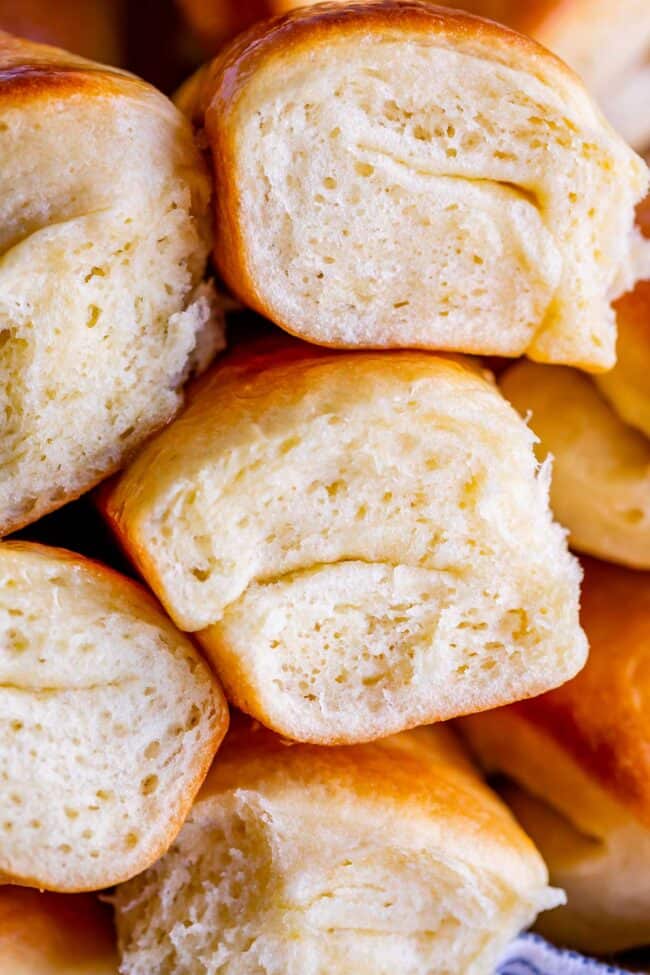
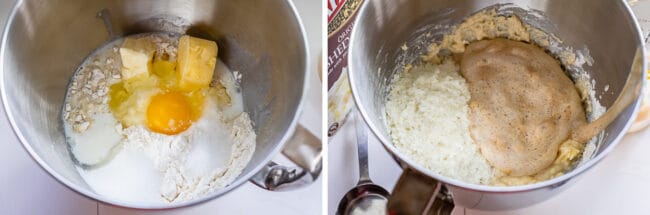
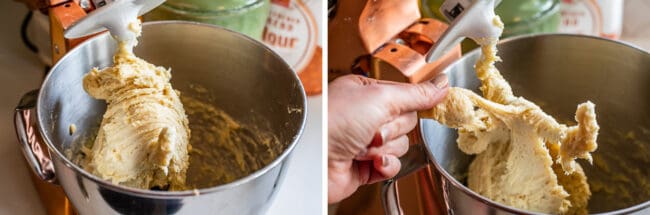
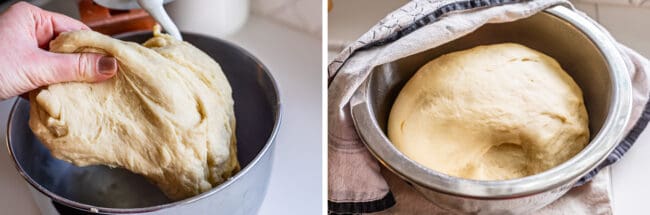
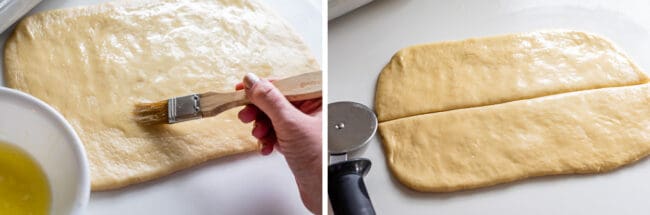
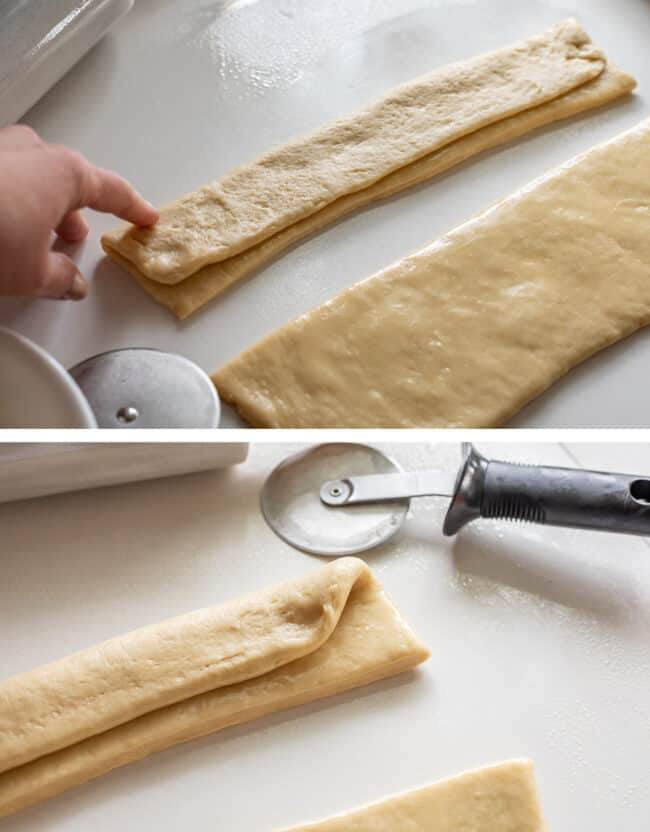
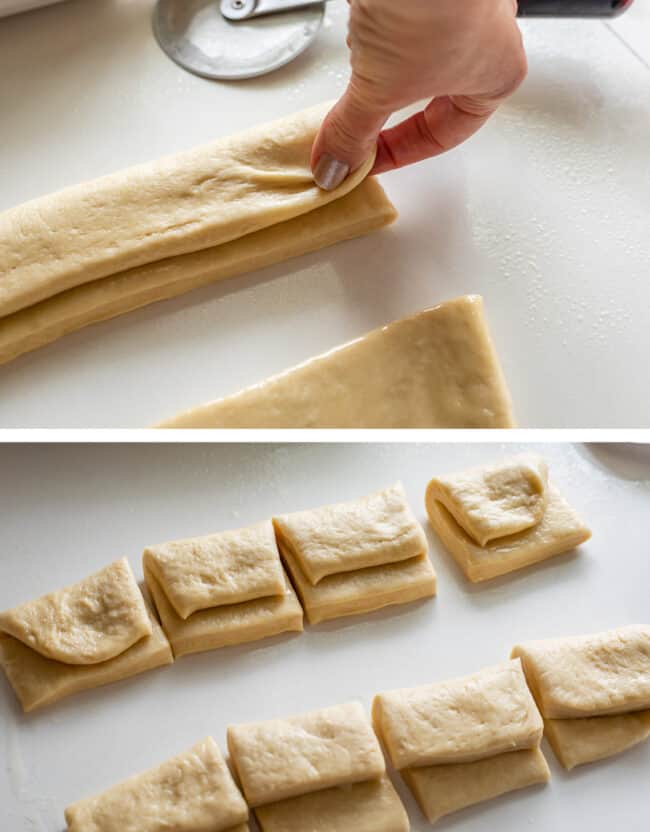
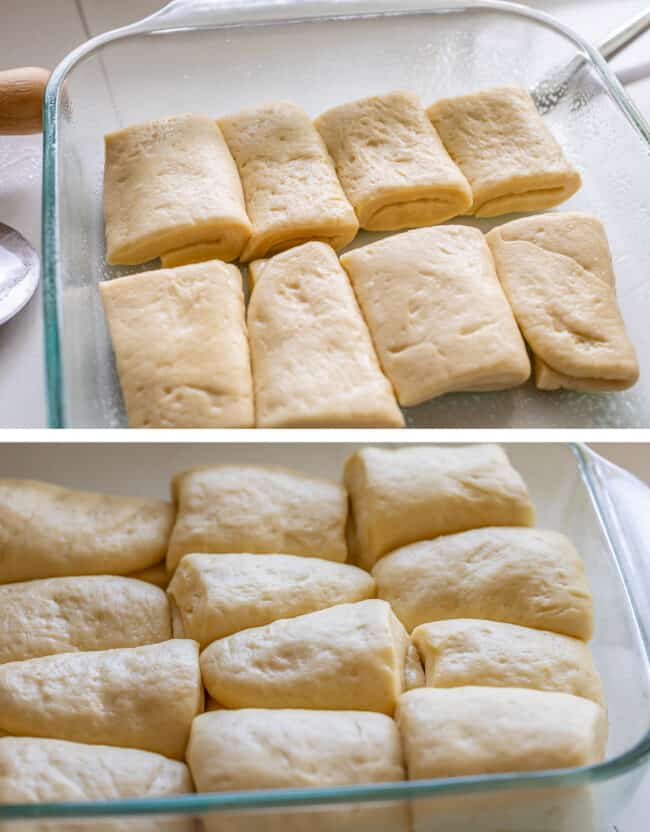
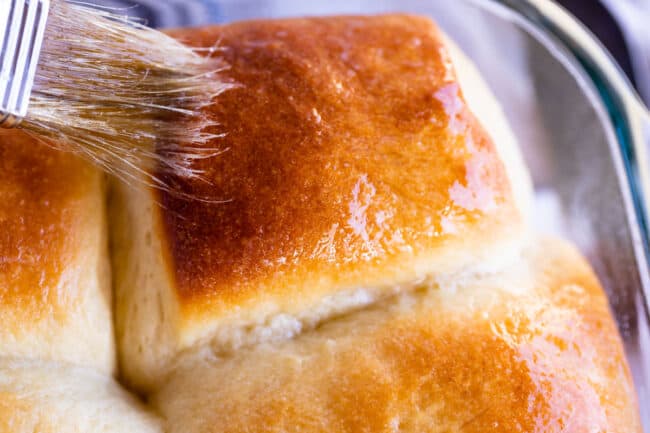
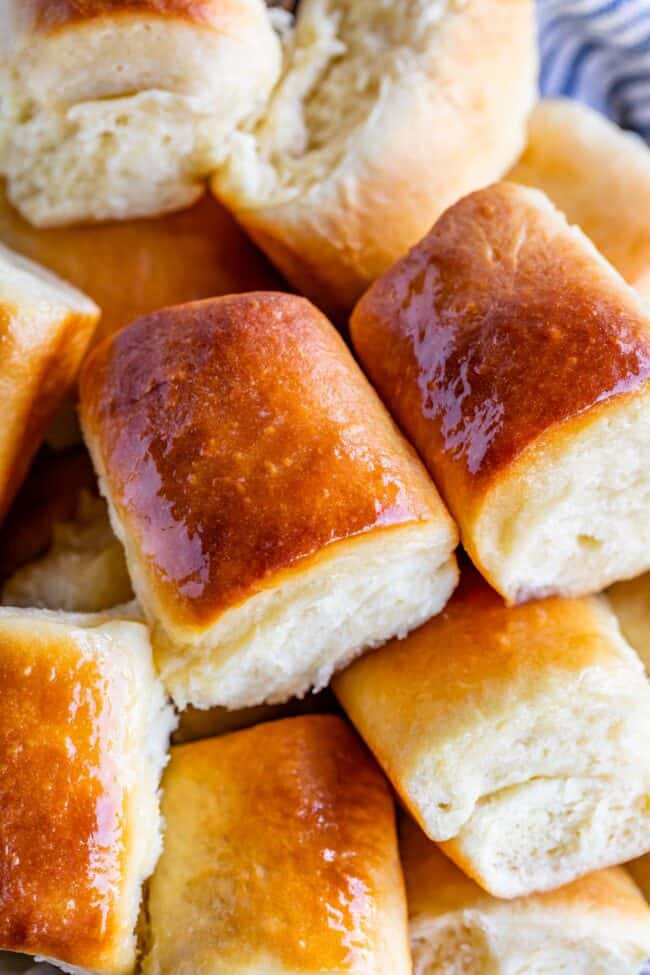
Who’s ready for Thanksgiving recipes?? Have you started planning your menu yet? (Over the next two weeks I’m sending out emails with ALL my Thanksgiving recipes, be sure to subscribe to receive them!) Let’s get started with these Parker House Rolls! What he didn’t count on was the epic melt down from one of the kids who decided they didn’t WANT to go on a bike ride. This, after loading all the bikes in the car and driving to a pretty bike trail that’s right by the river here in Sacramento. Don’t worry, Christmas movies notwithstanding, I was on standby to come rescue the tantrum-thrower from death-by-parent. (Hey, we’ve all been there.) Good news, they kissed and made up in the end, and we finished the day with hot chocolate and Christmas cookies. File this one under “Super fun family activities that nearly ended in murder.” You could make these rolls TODAY if you wanted. Eat 5 of them over your kitchen sink with copious amounts of butter and jam, and then freeze the rest for your Thanksgiving meal! They freeze very well and you can reheat and brush with butter on Thanksgiving Day. Make them with this Cinnamon Honey Butter for a decadent treat. Yum! The magic of the Parker House Roll lies in the delicious butter-filled fold in the center. But we’ve improved on the original method over the years. The folded circle often results in a roll that is not super puffy and a bit too crispy on the edges (and that tends to unroll in the oven). Let me show you the modern way to make them that gives you that super tall, puffy roll, with a golden shiny top, and the perfect buttery swirl in the center. 1 – First we’re starting out with some warm water, sugar, and active dry yeast. Let it get nice and bubbly! 2 – Then add some warm milk, flour, both butter and shortening, more sugar, potato flakes, and an egg. I love using butter in my rolls because it adds tons of flavor. But I also love using shortening, because it makes your rolls SUPER soft and cloud-like and puffy. Butter has water in it and shortening is pure fat. Your rolls WILL be softer if you use shortening. Don’t get me wrong, if you want to use all butter they will turn out totally fine! I love using both! This recipe has potato flakes in it, which makes the dough a little shaggy at first (you can see on the left) before it starts to come together. I LOVE adding potato flakes to these Parker House rolls! It makes them so soft and puffy. You know how incredibly soft that sliced potato bread from the store is? It adds the same softness here. Just buy a box of instant potatoes, that’s what I mean by potato flakes. 3 – This dough gets thick REALLY fast. It’s easy to add too much flour, so be very careful! For this recipe you want to add the LEAST amount of flour that you possibly can. We are using bread flour for this recipe. It has more protein than regular all-purpose flour, which gives you a nice chewy texture for your dinner roll. If you don’t have bread flour, all purpose flour is a fine substitute. 4 – Here it is after rising for an hour and punching down. Depending on the temperature in your house, you may need to let it rise more like 90 minutes. 5 – Then roll it out HALF the dough into an 8×12 inch rectangle. Use nonstick spray on your work surface, not flour! We don’t want to add any extra flour to the dough! 6 – Brush generously with butter. Generously I say! Then cut it in half the long way. 7 – Fold each rectangle in half the long way, but leave about a half inch of the bottom layer hanging out. Stretch the dough as needed to make it line up. 8 – Then cut each folded strip into 4 pieces, for a total of 8 pieces. Each roll should be about 2 and 1/4 by 3 inches. Continue the process with the other half of the dough, for a total of 16 rolls. 9 – Flip each roll over so that the short side of the fold is DOWN. Line them up in a greased pan. The longer edge of the shaped roll (which should be about 3 inches) should line up with the long side of the pan. 10 – And here they are all risen! The second rise should take about 45 minutes to an hour. You want them to be puffy but it’s okay if they are not quite doubled. I love to rise bread and rolls in an oven that has been just slightly warmed. See recipe notes for details! 11 – When the rolls come out of the oven, be sure to brush them with more melted butter! And for a really nice savory touch, sprinkle each roll with a bit of flaky sea salt. I forgot to do it but will definitely try it next time! If you want to make these ahead, you can start them an entire month before you want to bake them. Shape the rolls and place them on a baking sheet instead of in a 9×13 pan. Don’t let them rise–instead, put them in the freezer for an hour. After that you can put them in a ziploc. When you’re ready to bake them, place the frozen rolls in a 13×9 pan and let them rise on the counter, lightly covered, as you usually would. Freezing baked Parker House rolls for later is even easier. Just pop them in a freezer bag and BAM, now you’ve got rolls to pull out whenever you like. Facebook | Pinterest | Instagram


![]()