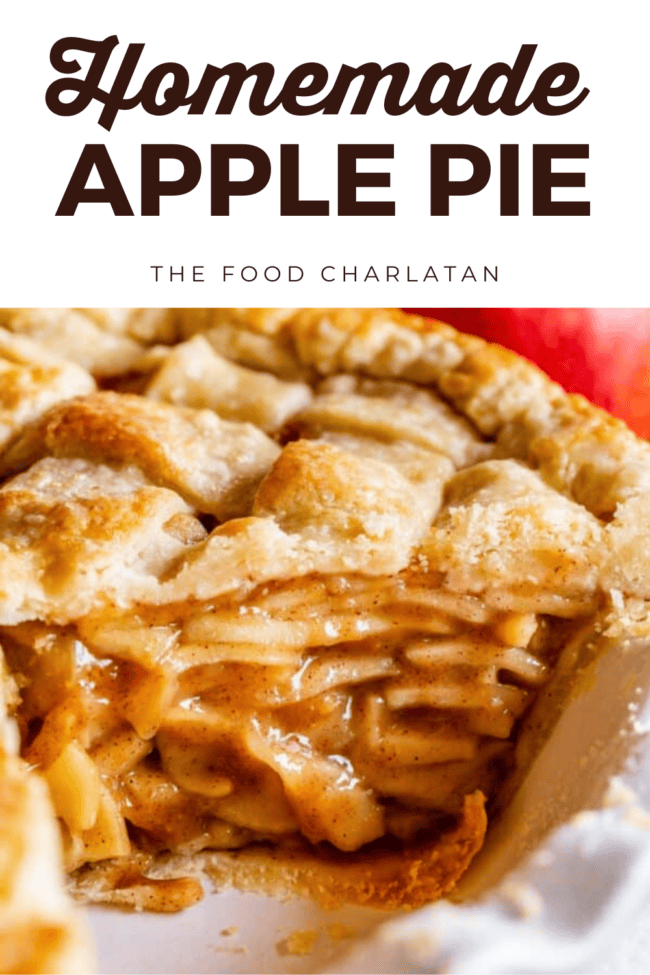
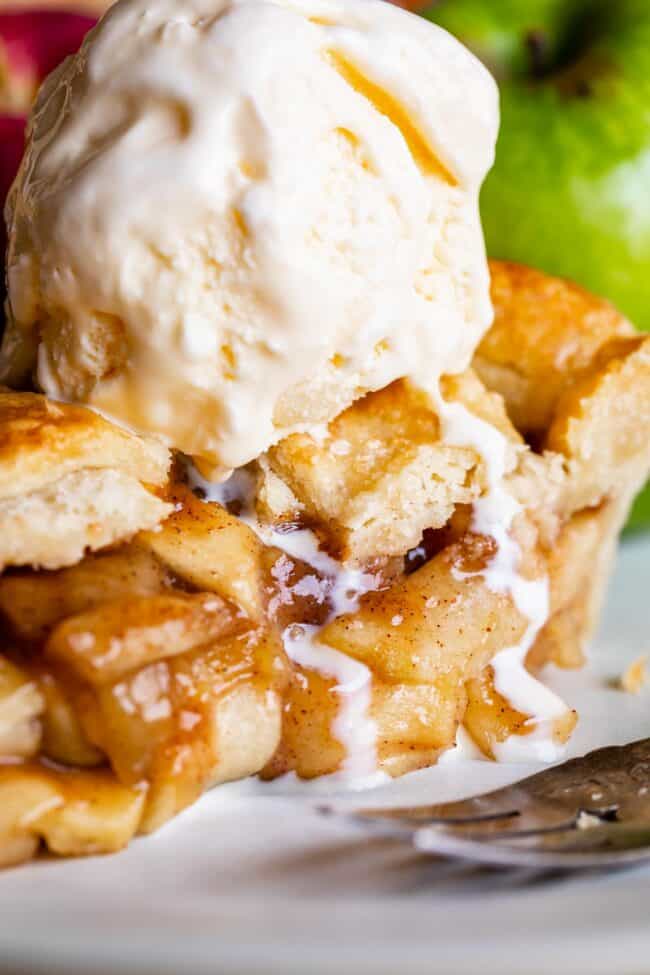
How’s everyone’s October coming along? It’s finally cooling down here. We finished summer off strong just last week with a steak of 97 degree days, of course. Totally normal here in Sacramento, but it seems to surprise us every year anyway. “The Target dollar section is telling me that it’s fall! What even is this 100 degree day??” My brother sent me this tweet yesterday that said, “Why would I spend $5 on a bag of apples at the store when I can wear warm fall clothes in 88 degrees weather and pay $36 for our family to pick them ourselves.” Ha! That one got me. (Because it’s not as Instagrammable to take your family photos in the produce section at the grocery store??) We did indeed head up to Apple Hill a couple weeks ago. It’s a bunch of apple farms all next to each other, where you can pick your own apples and eat doughnuts and pretend it’s not hot. We always buy a ridiculous amount of apple cider so that we can boil it down to make these Caramel Apple Cider-Reduction Milkshakes. (We added a slice of today’s Apple Pie to the shake this time, too. HEAVEN.) That said, Red Delicious Apples and McIntosh apples tend to be rather mealy and mushy when cooked, and you definitely wouldn’t want to make a pie out of JUST Red Delicious, for example. But if you toss a couple Reds in with a majority Fuji and Granny Smith (for example), then your pie is going to turn out fine. Try to get a few tart apples, a few sweet apples, and a few in between apples. You can bake it straight from frozen. Brush with egg/milk, sprinkle with sugar, and pop it in the oven according to the recipe. Add about 20 minutes to the total bake time, and remember to cover your pie toward the end so it doesn’t burn.
For the filling:
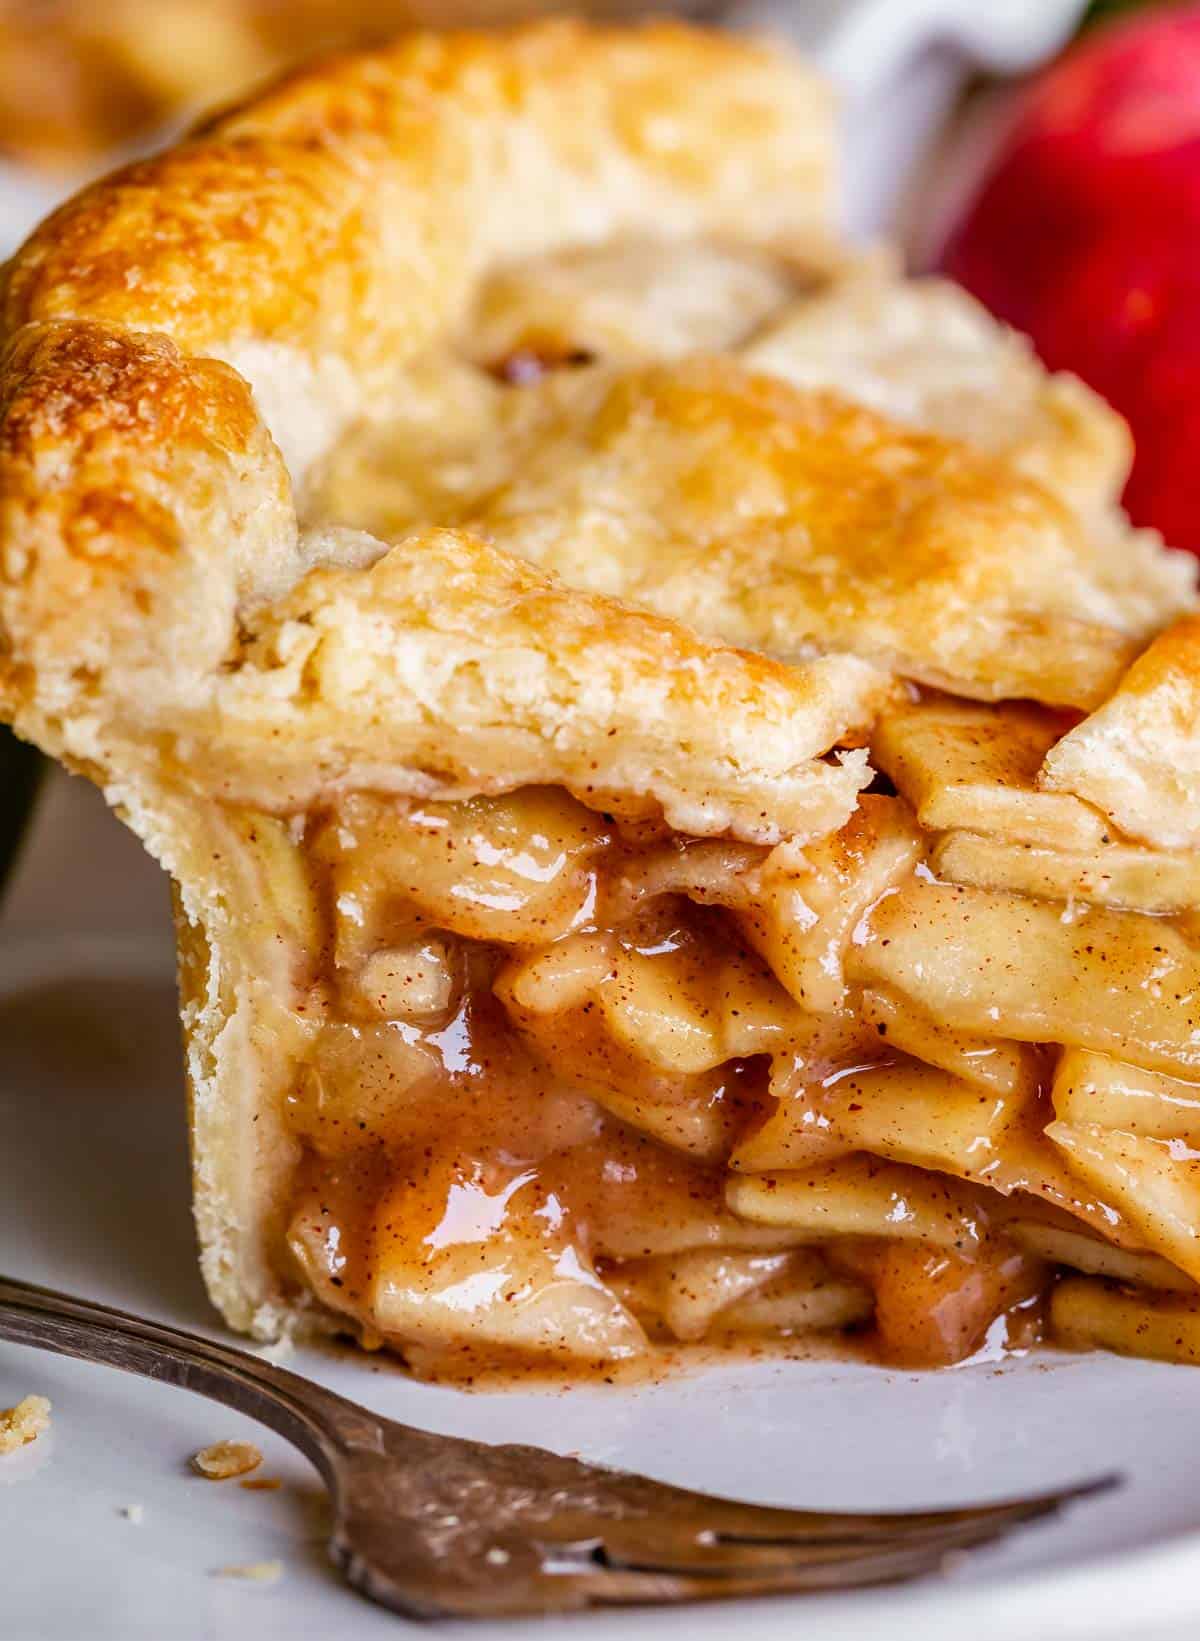
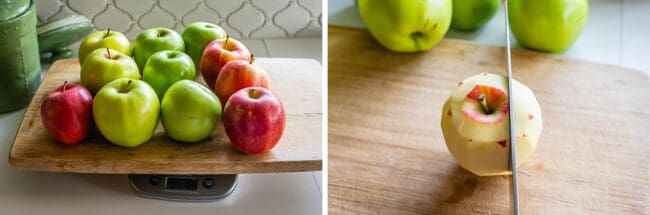
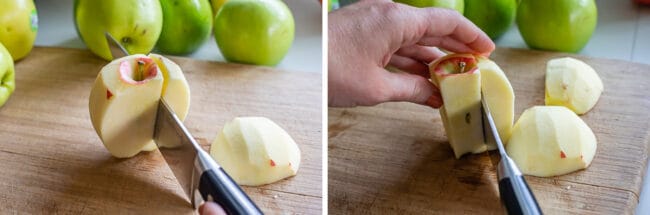
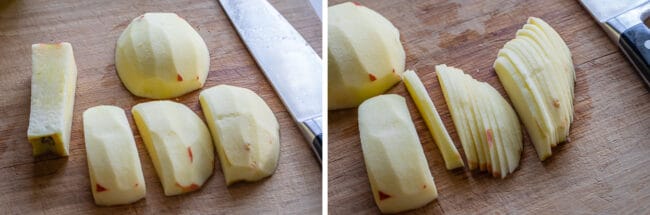
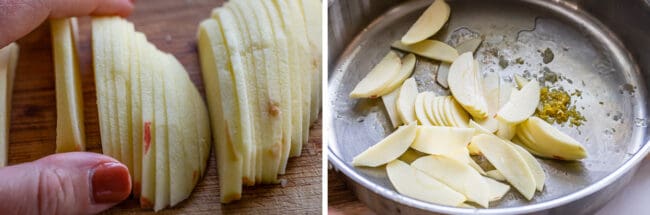
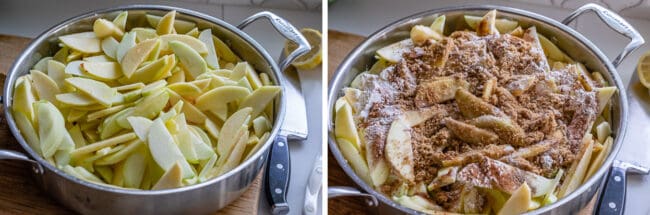
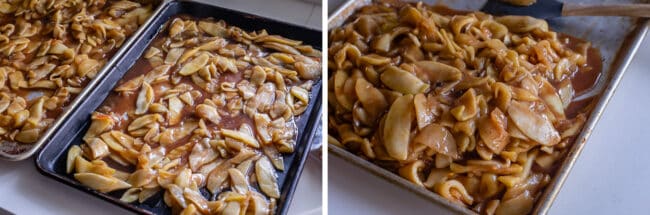
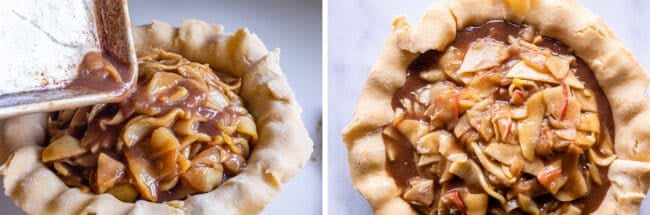
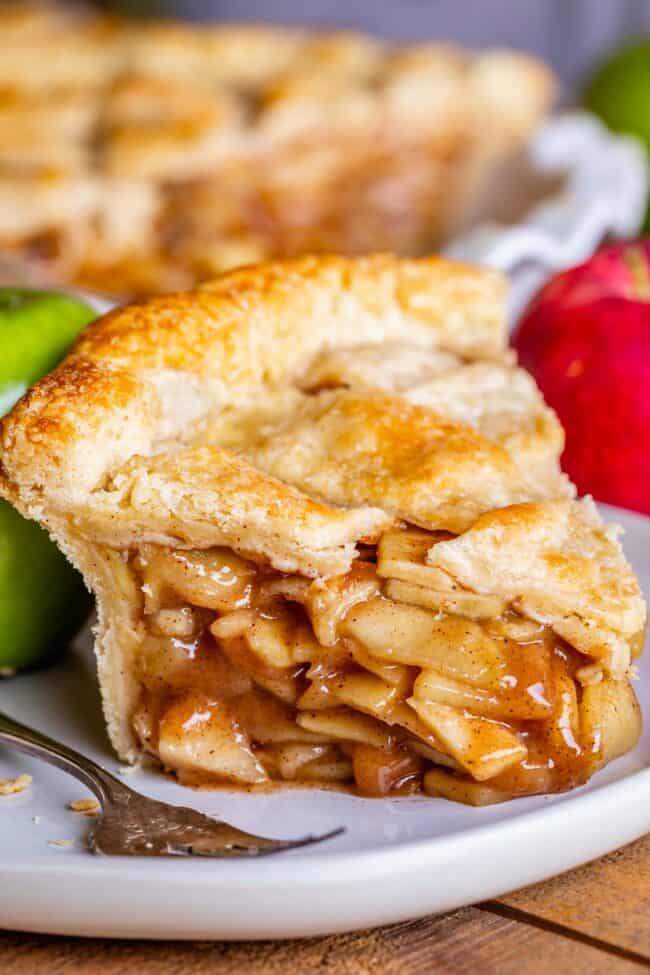
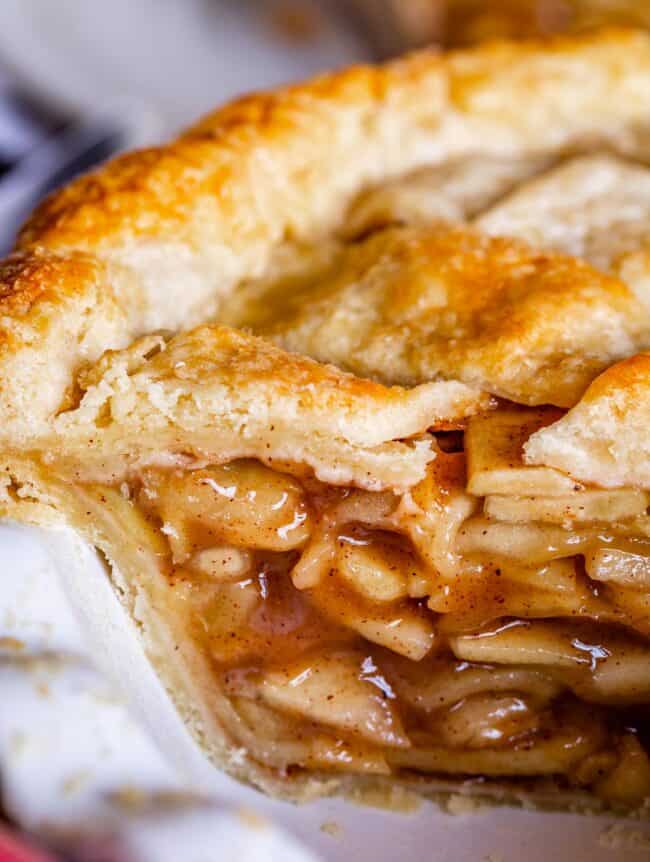
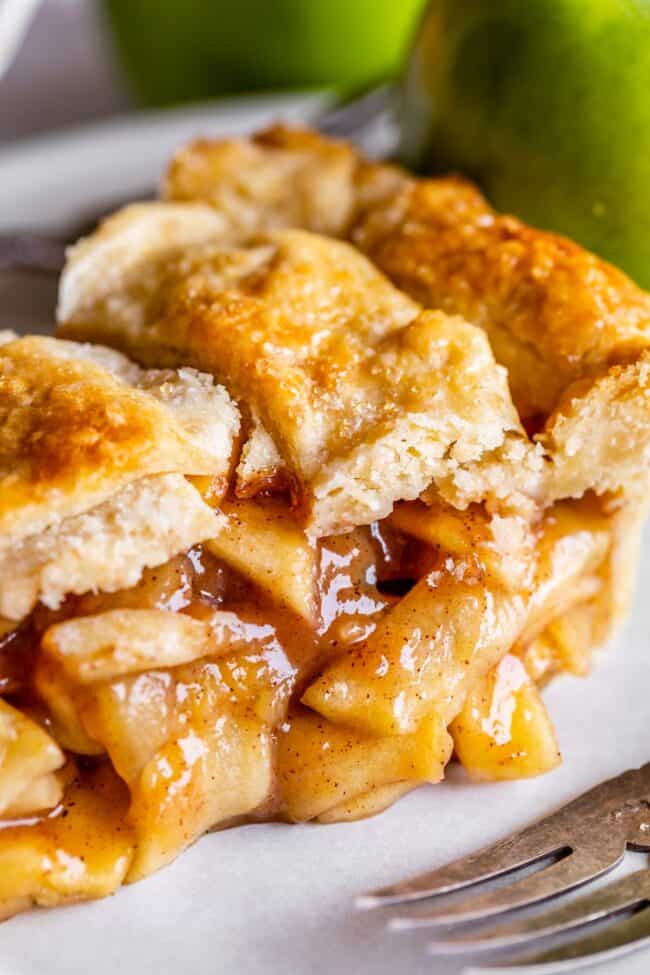
First gather up all your apples. You need 5 pounds before coring and peeling. That’s about 11 large apples to make 5 pounds. Here’s how I slice my apples. You can use a mandolin if you want, but be sure to use a metal glove. Those suckers are sharp! Keep slicing around the core until you have these segments. Then slice to about 1/8 inch. You can slice thicker than that if you like (you may have to cook longer), but I love thin apples in my pie. As you are slicing up the apples, toss them in a 12-inch high sided skillet (heat should be off) with the lemon juice and zest. Give it a stir to coat the apples with lemon. See, 5 pounds is a ton of apples! You could never fit this many raw apples into a pie crust. Time to cook it down. Add some sugar, brown sugar, flour, salt, and spices. NO extra liquid, the apples will release plenty. Place it over medium heat and let cook for about 20 minutes. Cover the pan, but stay nearby because you’re going to have to stir the mixture every couple minutes, replacing the lid each time. This keeps the steam in and helps cook the apples. You are going to get this glorious caramel-y sauce going. Something magical happens when you gently cook the apple pie filling over a longer period of time like this. The pectin in the apples is converted to a heat-stable form. (Thanks Cooks Illustrated!) That means when you cook the apples again in your pie in the oven, the apples won’t become mushy. Whatever level of “al dente” they are at when you finish cooking them on the stove, that’s how it will taste in your pie. So you can adjust the cooking time a bit to reach your level of apple perfection. Cook longer if you like softer apples; shorter if you like them more firm. You don’t have to calculate for further cooking in the oven. Crazy, right? Science! Once the apples have cooked for about 20 minutes, remove from heat and add the vanilla. Spread the mixture across a pan or two (two pans makes it cool faster, but it will fit on one pan just fine.) I stuck mine in the freezer to chill for about 20 minutes. You can put it in the fridge, or just leave it in the pan you cooked it in and wait for it to come to room temperature (a couple hours), if you are not in a hurry.
Apple Pie Crust
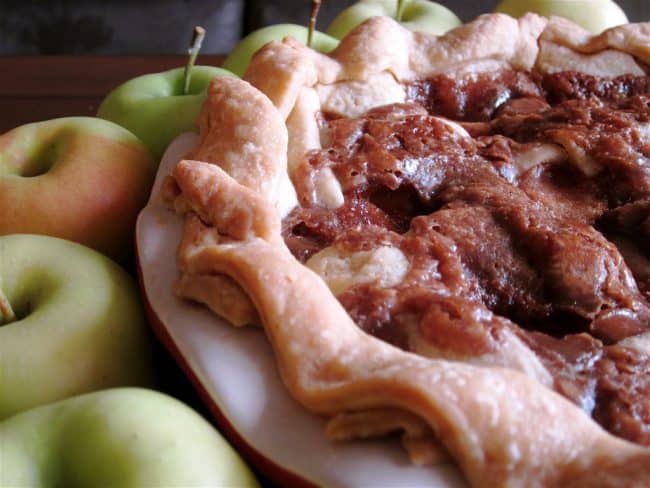
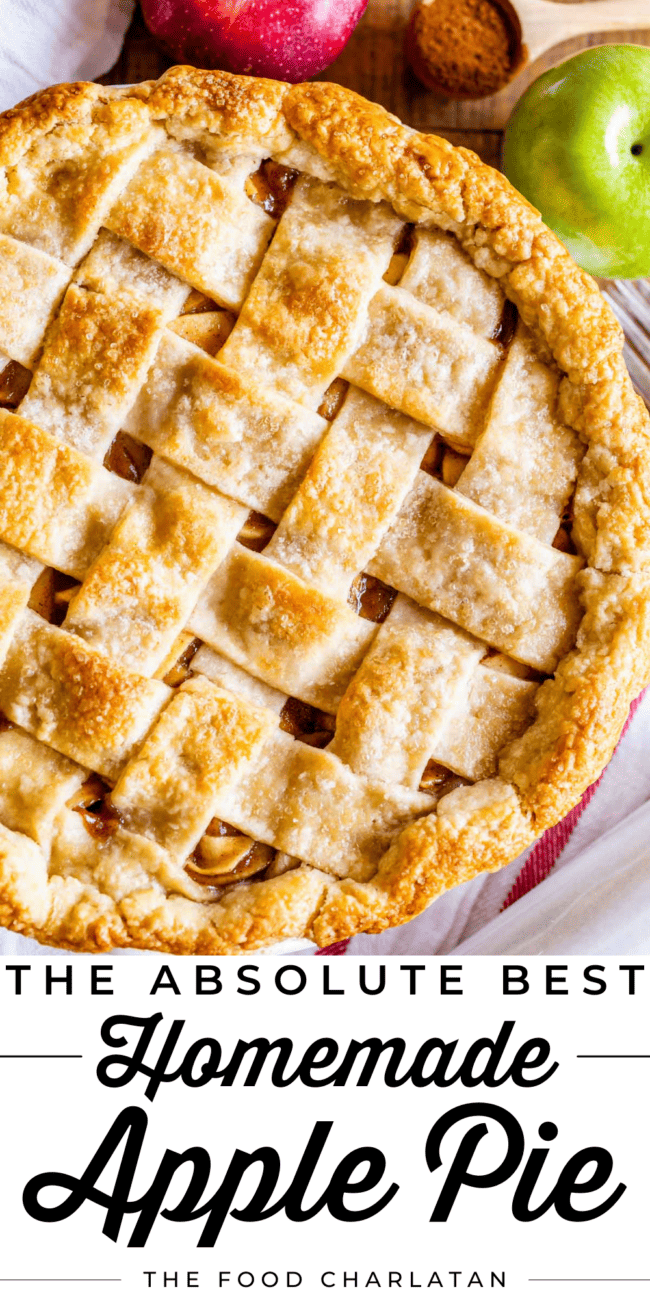
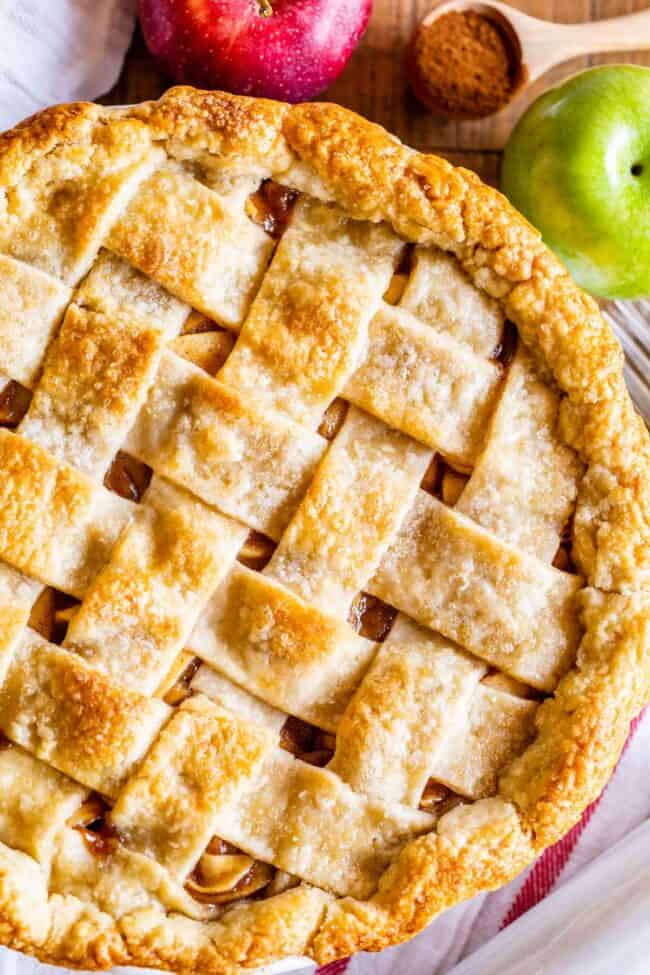
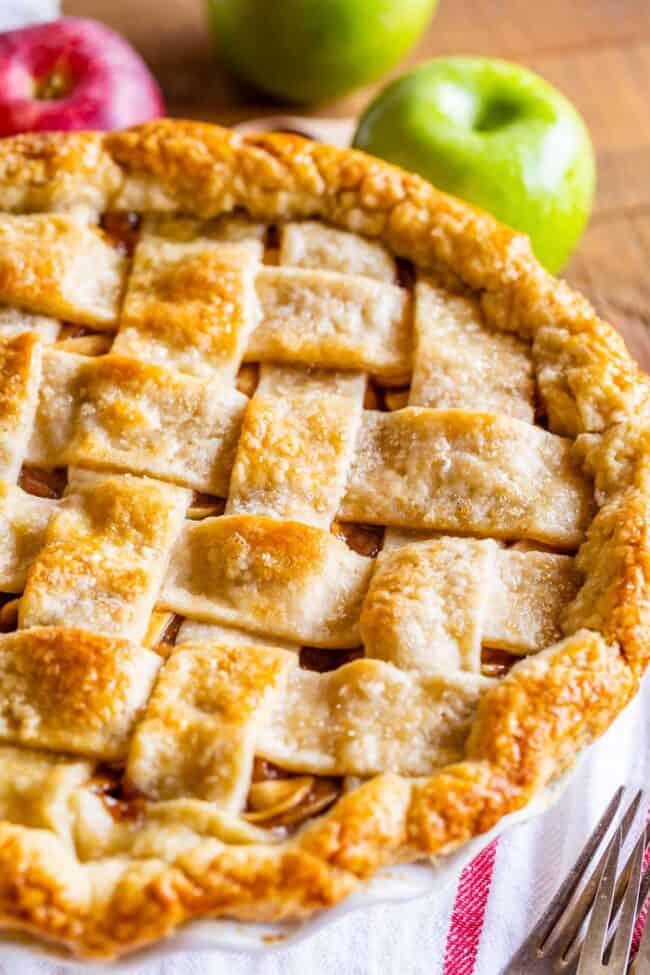
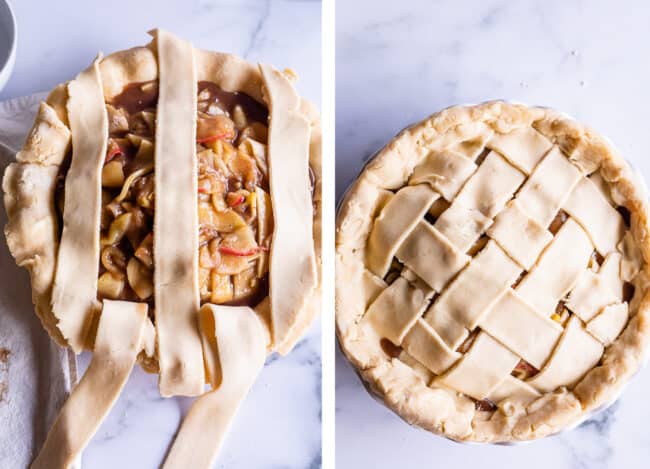
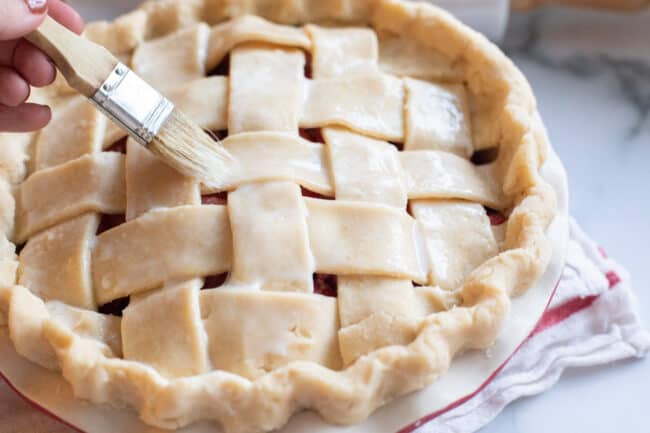
Once the filling is completely cool, pour it into your pie crust. I’ve got all the details for rolling out pie crust on this Homemade Flaky Pie Crust post. I topped my pie with a lattice crust. See my How to Make a Lattice Pie Crust post for all the details! But you can just use a whole crust and put it on top, no problem. Don’t forget to vent the top. Brush with egg/milk and sprinkle with sugar before popping it in the oven.
How long to bake Apple Pie
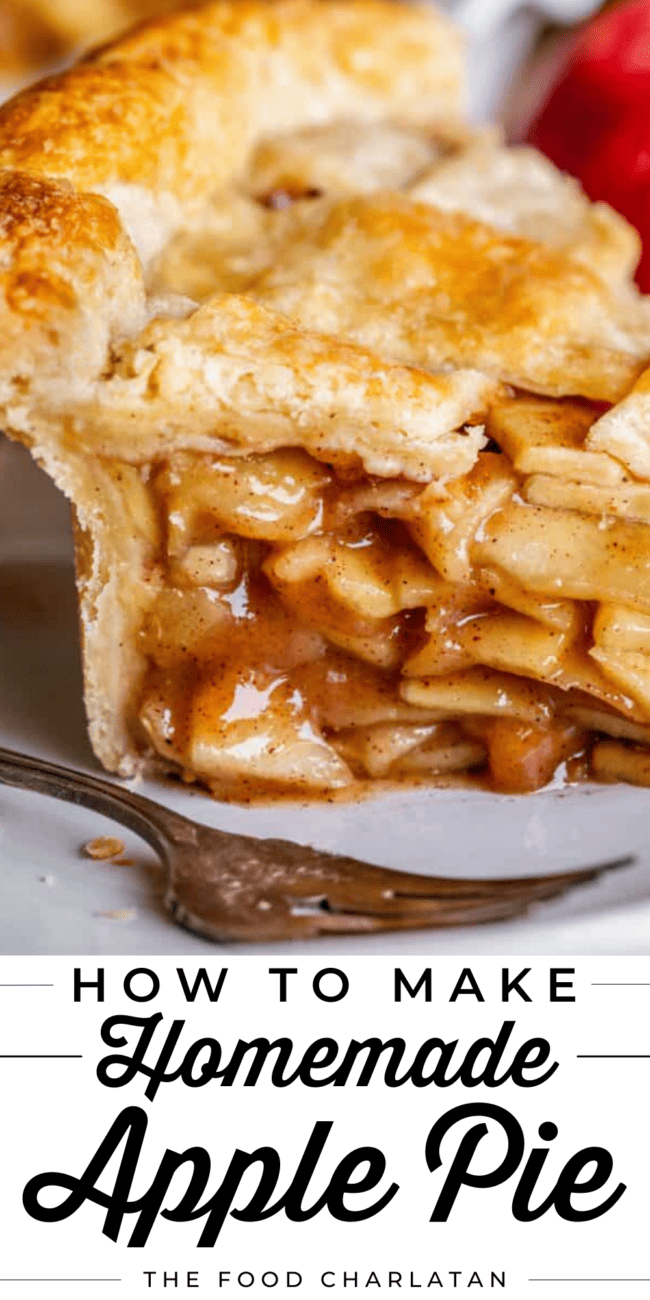
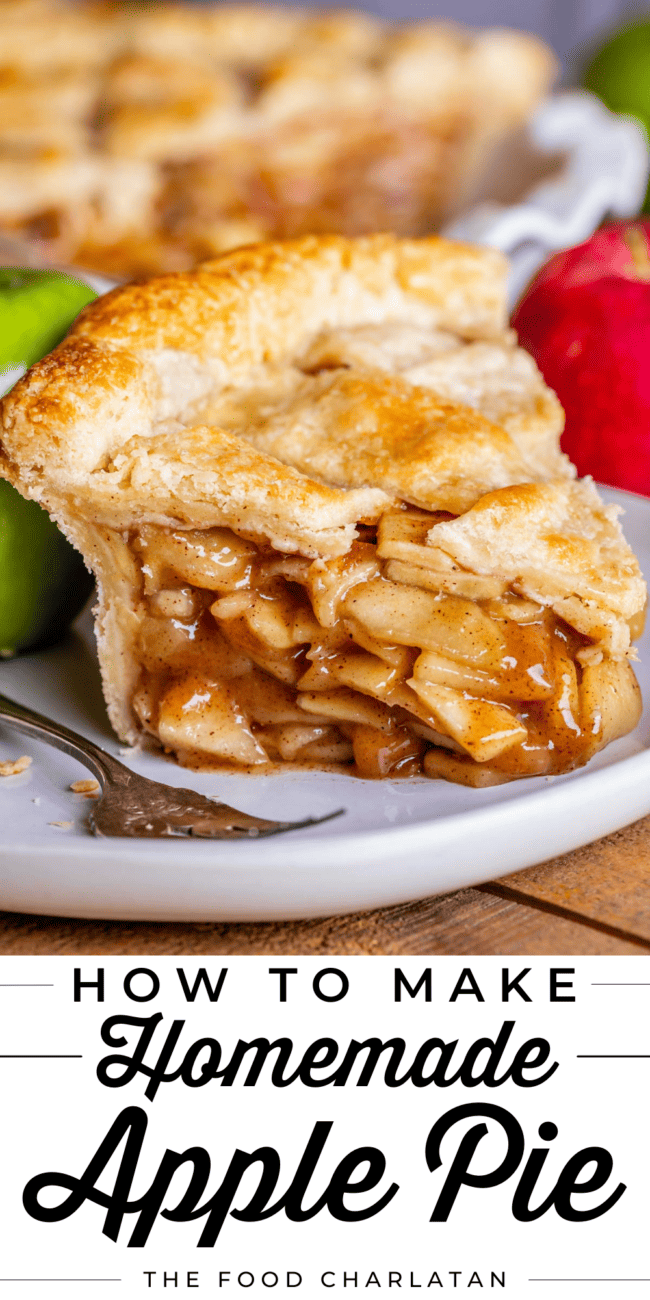
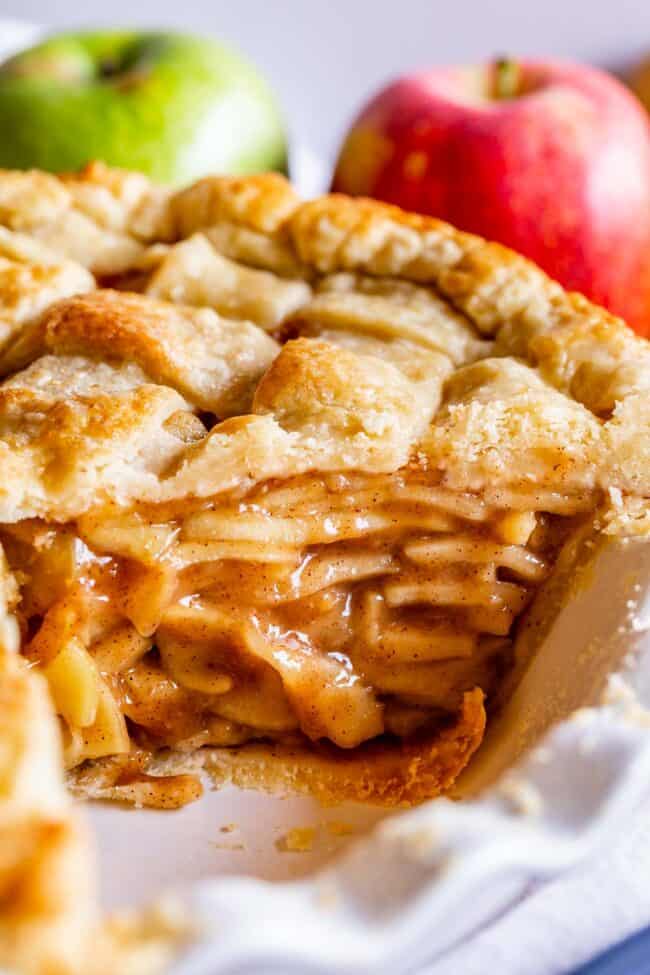
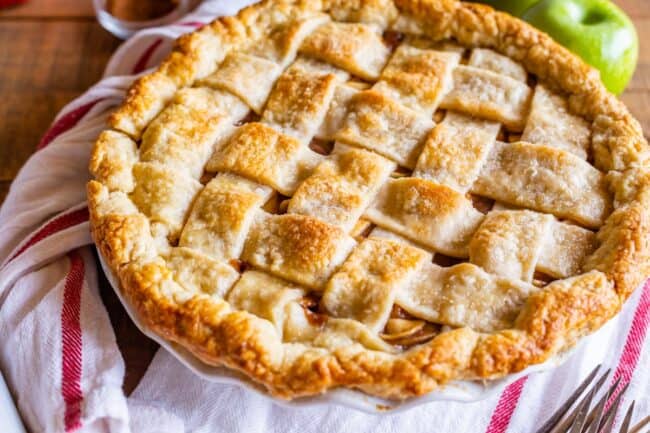
Baking an apple pie usually takes about an hour. First we’re baking it at a higher temperature for a shorter amount of time, just to get the crust to start browning. Then we’re baking it at a lower temperature for a longer amount of time, to fully cook the crust throughout. You may end up baking it for slightly more or slightly less time, but about an hour is standard. Just remember you have to let it cool for SEVERAL hours afterward! I know, it’s such a pain to realize that at any given moment you’re a minimum of six hours away from apple pie (an hour to make, an hour to bake, four hours to cool), but I promise you, the real deal homemade goodness is worth it. The pie is done when the edges of the crust are a deep golden brown, and the top of the pie is just turning golden. Be sure to use a pie shield made of tin foil as discussed above to get even browning. And voila! A beautiful apple pie for fall! Here is the hard part: don’t slice into your pie for 2-4 hours. I know, I know, it’s tough. But the liquid in your pie needs time to come to room temperature so it doesn’t completely fall apart when you cut into it. You can put it in the freezer to speed up the cooling process if you want.
Cook your apple pie filling. Many recipes call for adding RAW apples to a pie crust and popping the whole thing in the oven. I just don’t love it. For one, you risk under baking your apples. Secondly, apples have a lot of water, and all that water ends up in your pie if you don’t cook some of it off first. This means your apple pie is not as flavorful. I know it’s inconvenient (even more inconvenient when I tell you that you’re going to have to cool that filling before adding it to the pie) but hey, you didn’t sign up to make an apple pie because you needed a quick dessert, did you? Take the extra 20 minutes to cook the filling. You won’t regret it.
Use lemon, or even lime for a fun and subtle twist. This keeps your apples from browning while you are slicing, but it also brightens and enhances the flavor of the apples themselves. Make your apple pie with a homemade flaky pie crust. There are two elements to this pie: the filling and the crust. If your crust sucks, it doesn’t matter how great your filling is. There is a time and place for store bought crusts, like when you’re making a chocolate pie that has tons of flavor. But for something more subtle like apples, you need the buttery support of a high quality crust.
Get a square of tin foil that is the same size as your pie. Fold it in half, then in half again. Cut out the center. Open it up again. You should have a square of foil with a circle cut out of the center. See pie crust post for photos. It’s so easy and the perfect way to make sure your crust doesn’t get burned on the edges. And that’s it! Now you know how to make an epic apple pie! Don’t forget to check out the sister recipe, Dutch Apple Pie! I use this same method to get the most epic Dutch version with amazing streusel on top. Here are some other recipes that might be useful: Facebook | Pinterest | Instagram This apple pie post has been on my blog since 2011. Here is the original story I wrote to go along with it, for memory’s sake. Although maybe I shouldn’t be committing such a faux pas to memory, ha! I have a terrible confession. Sometimes when I give people CD’s for birthdays or Christmas I open them up and listen to them before wrapping and tying the bow. I know what you’re thinking. Who in the name of technology buys those archaic CD’s anymore? I can usually play it off. When they open it and see that the plastic wrap is gone, I hastily put in a, “Yeah, part of the present is that I took care of taking off that pesky plastic that is so annoying. I know, wow, above and beyond right?” Lies. I was found out this weekend. For my friend Lauren’s birthday I got her Michael Buble’s new Christmas album. (which is awesome! I would know.) Eric was kind enough to wrap it for me since I was still frosting cupcakes. Halfway to her house I asked, So you put the CD in the case right? The response: What? Toasted. I had taken it out earlier that day to listen to it and never put it back in. Oh the shame! The anticlimax! Poor Lauren. Maybe in recompense I should have sung the whole album to her on the spot. Actually, that would be more like a punishment. Maybe I should just make her this pie instead.

![]()